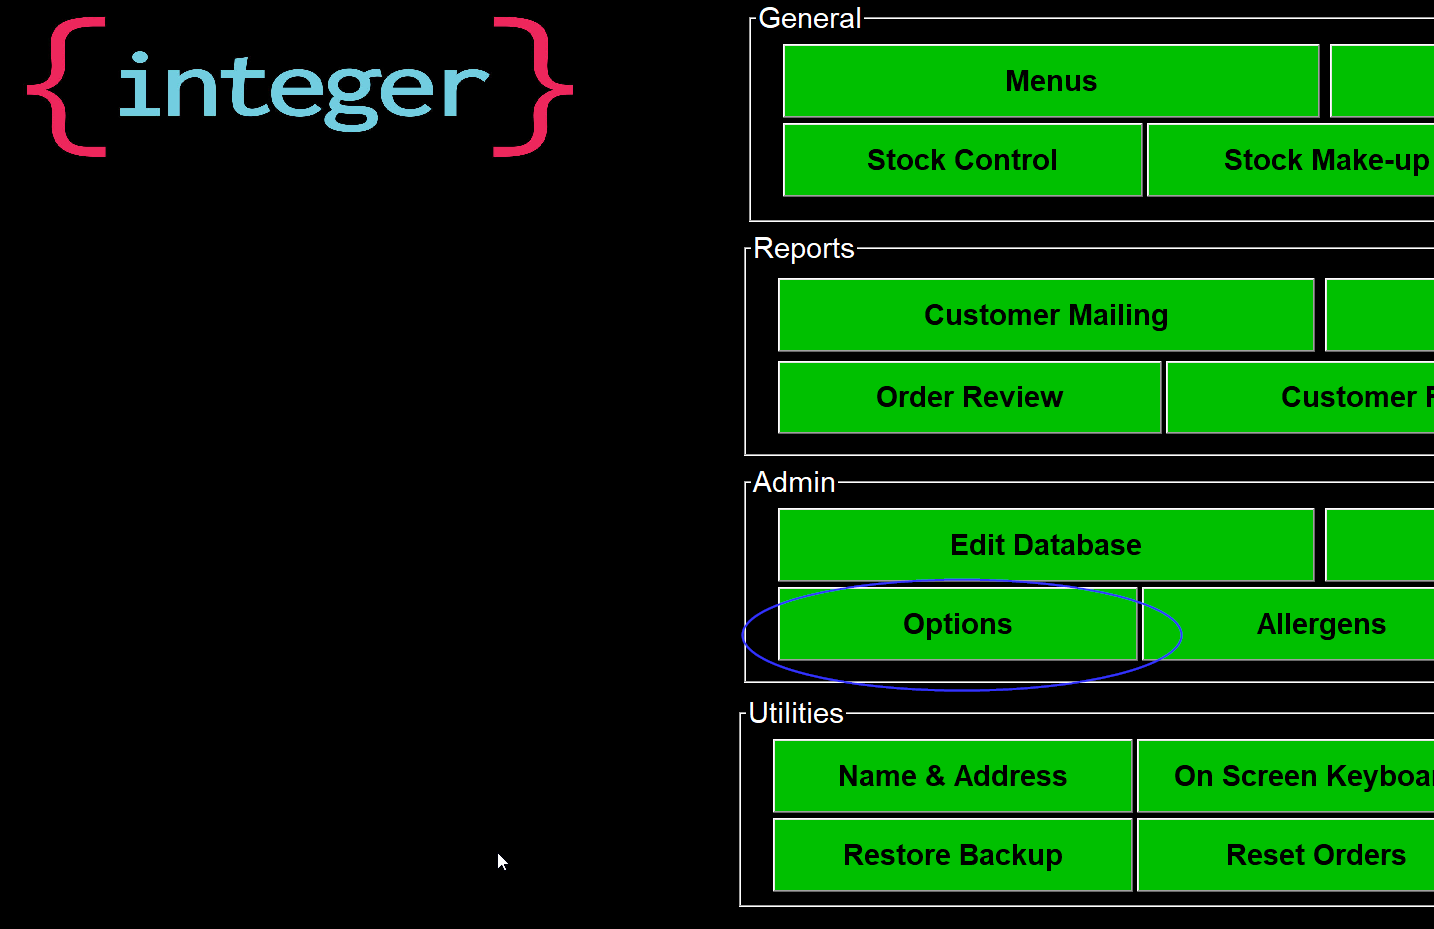
Options
How to set up the program to work in a certain way.
- The Receipt Printer tab in Options
- The Kitchen Printer tab in Options
- The Charges tab in Options
- The Reports tab in Options
- The Order Screen tab in Options
- The Security Tab in Options
- The Setup Tab in Options
- Setting up the wall map Co-ordinates
- Changing the number of days audit trails to keep
- Setting the Order Target Times
- Setting where to start daily order numbers
- Setting up Split Bill
- Setting up Split Payments
- How Set up a Delivery Charge
- How to Exclude Items from Discount
- How to Add Account Payment Methods (Just Eat Card etc)
- Processing Refunds within InTouch
- How to Export Customer Email Addresses
- The "last number dialled" button
- Test Mode
The Receipt Printer tab in Options
If you go into Management


Then Options

The first tab is all about the way the receipt prints out

The printer Type is a dropdown box that lets you choose the type of printer you have and affects the size of font, printing reversed or the cashdrawer if it is connected to the printer. Most printers can be set as "Epson Thermal".
The Top Gap if it is set as 99 won't pre print any information. If it is set for any other number it may be using less paper but is a matter of trail and error and balancing with the bottom gap to get the right setting for your printer.
The cutter option is a drop down the has a choice of None, Partial or Full. None doesn't cut, Partial Cuts but leaves a tiny bit of paper connecting so the paper stays connected if the printer is somewhere not attended the paper doesn't fall on the floor. Full cuts the paper completely.
The Receipt Text options are the text that prints so you know what order type it is. There is also a tick box here to choose whether to print something in red if you have a 2 colour printer or reverse if you have a thermal printer.
The red printing section lets you choose to print something in red if you have a 2 colour printer or reverse if you have a thermal printer.
The VAT section lets you chose how to print the VAT on the receipt.
The double height and Wide printing let you choose things to print either wider or double height. If you choose food items to print Wide as they take up more space on the receipt the description will be smaller.
The Print Receipt section is full of options that change the way the receipt is outputted.
The Omit from receipt section has options that will leave things off the receipt.
To go to the next page of options click the more button at the bottom right of the screen

And the second page of receipt printer options will be displayed

The top and bottom message sections lets you add a message to either the top or bottom of the receipt.
The If Above Section is for a message that goes on the receipt if more than an amount you set is spent.
The Collection section lets you choose when to print a collection receipt and what is says for Paid or to pay.
The Cash Drawer section lets you choose where the cash drawer is connected to ("Receipt" is the receipt printer, serial ports 1,2,3 & 4 are those serial ports, "Till" printer send it to a printer called till, "Kitchen" is the kitchen printer, till.exe is till.exe for that machine in the winci folder, c:\till.exe will look for till.exe in the root folder, Serial ports 5,6,7 & 8 are those serial ports and Posiflex sends the till drawer open command to the CR port of a Posiflex machine without the need for a till.exe). The message box allows you to put an optional message before the cash drawer is opened.
The group items section lets you choose if the receipt is printed as you entered items or reorganised.
The Takeaway Section lets you choose how or when the takeaway orders receipt is printed.
The Delivery Orders section lets you choose how or when the delivery orders receipt is printed.
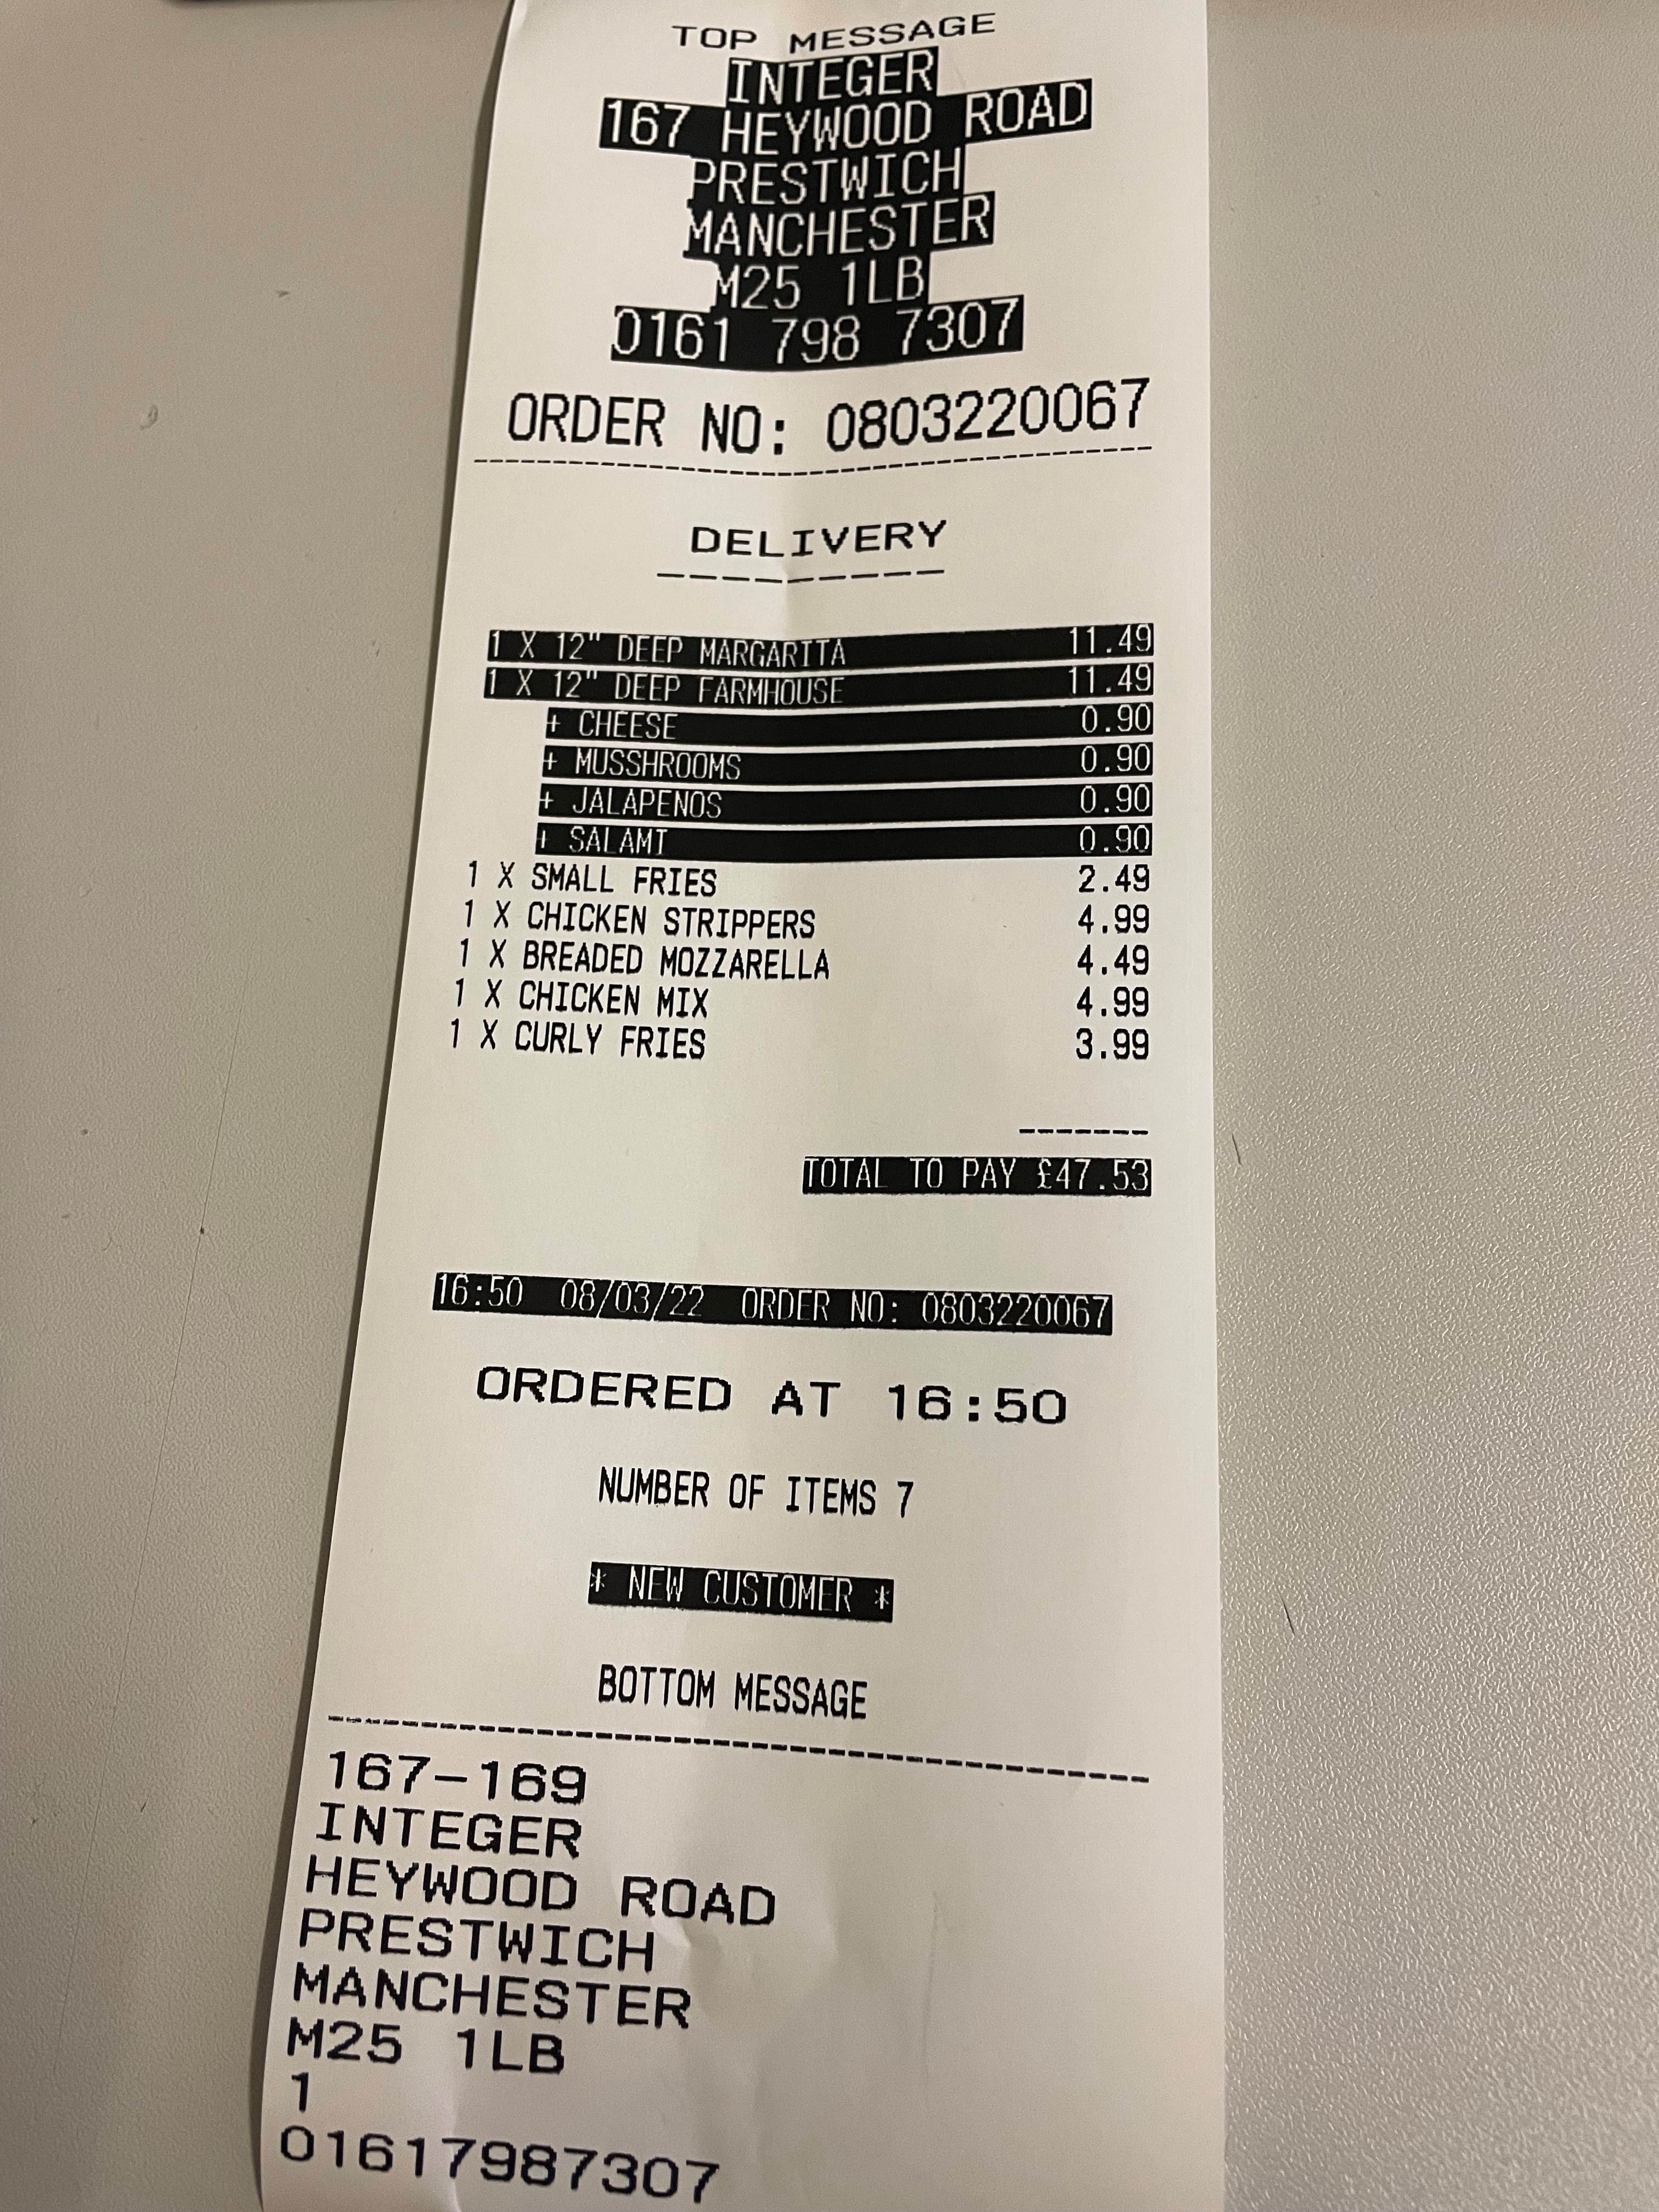
Below is an example of a receipt to show what some of the options do. It has Pizzas and topping in reverse, It has the total in reverse. It has the shop name in reverse. It has the date and time in reverse. It has the delivery time in reverse. It has The option to print everything in Capitals. It has the option to print the order time at the bottom. It has the option to print the number of items on an order, It has the option to print the order number on top. It has the option to make the order number contain the date and time. It has the option to print "New Customer" if they are. It has the option to print the customers details at the botom of the receipt. It also has the top and bottom message on the receipt.
The Kitchen Printer tab in Options
If you go into Management.
Then Options.
Then click the 2nd tab called Kitchen Printer.

The kitchen Printer options page should now be shown

The Top Gap if it is set as 99 won't pre print any information. If it is set for any other number it may be using less paper but is a matter of trail and error and balancing with the bottom gap to get the right setting for your printer.
The cutter option is a drop down the has a choice of None, Partial or Full. None doesn't cut, Partial Cuts but leaves a tiny bit of paper connecting so the paper stays connected if the printer is somewhere not attended the paper doesn't fall on the floor. Full cuts the paper completely.
The Double Height option is a drop down where you can choose what wants to be double height.
The Group items option is a drop down that lets you choose to reorder how things print out differently to how they were entered.
The course gap option allows you to leave a gap between the courses if you have chosen to reorder the receipt with the option above.
The Item print option is a drop down that allows you to change the way items appear on the kitchen receipt.
The Printers Section allows you to name the kitchen printers (usually kitchen or grill or whatever the section the printer is in is known as like Kitchen or Bar) and choose what type of printer it is.
If there is a * at the beginning of this description then only 1 copy of this kitchen receipt will be printed if the number of copies option is set to print multiple copies.
To go to the next page of options click the more button at the bottom right of the screen
And the second page of receipt printer options will be displayed

The Makeline section is to do with the settings if you have additional make line screen.
The Box edge label printer section is to do with the settings if you have a box edge label printer.
Setting up the Boxedge printer
The Alternate printer options are for the setting of a printer that can print different character and is used a lot of the time for a receipt that prints out Alternate Characters (for example Chinese characters).
Setting up the Alternate Printer
The Charges tab in Options
When you touch the Charges tab at the top of the Options screen, the screen will change to that shown below.

The section of this screen, headed “Delivery Charges”, enables you to set up delivery charges that will either apply to all deliveries or just to deliveries for customers in certain areas.
The delivery charge can be either setup by postcode or distance. In the "Charge By" dropdown you can chose Postcode, Distance or the maximum distance you deliver too. The distance is worked out form the customers postcode.
The top line of the screen (which does not have a Post Codes field) is used to set up a delivery charge that applies to all orders or applies to orders below a certain value, but does not depend on where a customer lives.
Delivery charges that apply to only certain parts of your delivery area are created by using the Post Codes fields and are described later.
To make inTouch charge for deliveries, you first need to set up your rules for charging in the program. In order to describe the choice of rules, we will use the example of £6.00 being entered in the Min Order column and £1.00 being entered in the Charge column, both on the top line.
When you touch the drop down arrow on the right hand side of the field at the bottom of the “Delivery Charges” section, the program will give you three choices apart from the default of “None”.
The first choice in this field is “Charge 1.00 for orders under 6.00”. Using this setting, inTouch will automatically add a delivery charge of £1.00 whenever a delivery order with a value less than £6.00 is taken, i.e.
|
|
Order Value |
Delivery Charge |
Total |
|
|
|
|
|
|
|
4.50 |
1.00 |
5.50 |
|
|
5.50 |
1.00 |
6.50 |
|
|
7.50 |
0.00 |
7.50 |
The next choice is “Charge maximum 1.00 for orders under 6.00”. Using this setting, inTouch will automatically add a delivery charge of £1.00 whenever a delivery order with a value less than £6.00 is taken, but will never charge more than £6.00.
|
|
Order Value |
Delivery Charge |
Total |
|
|
|
|
|
|
|
4.50 |
1.00 |
5.50 |
|
|
5.50 |
0.50 |
6.00 |
|
|
7.50 |
0.00 |
7.50 |
The third choice is “Make order value up to 6.00 then add 1.00”. Using this setting, inTouch will automatically round orders with a value of less than £6.00 up to £6.00 and then add on a delivery charge of £1.00.
|
|
Order Value |
Round Up |
Del Charge |
Total |
|
|
|
|
|
|
|
|
4.50 |
1.50 |
1.00 |
7.00 |
|
|
5.50 |
0.50 |
1.00 |
7.00 |
|
|
7.50 |
0.00 |
1.00 |
8.50 |
Using the examples above, select the rule that describes your method of applying delivery charges. Enter the value of an order beneath which your delivery charge will apply in the Min Order field and then enter the amount that you charge for delivery in the Charge field.
The examples above all describe a delivery charge that only takes effect if the order value is less than a specified amount. inTouch can also be set to charge for every delivery, no matter what the value, or to have a minimum order value for delivery but not a delivery charge.
If you charge for every delivery, no matter what the value of the order, enter your delivery charge, e.g. £1.00, in the Charge field but do not enter a figure in the Min Order field. If you set the delivery rule to “Make order value up to 0.00 then add 1.00”, the program will then add a £1.00 delivery charge to every delivery order.
If you have a minimum value for delivery orders but do not charge for delivery, enter the minimum order value, e.g. £6.00 in the Min Order field but do not enter a figure in the Charge field. If you set the delivery rule to “Make order value up to 6.00 then add 0.00”, the program will then make every order with a value of less than £6.00 up to £6.00 but not charge any extra for delivery.
The second page of options on the charge tab is shown below. It has sections for Meal Deals, Toppings and setting up a happy hour.

The Reports tab in Options
If you go into Management.
Then Options.
Then click on the reports Tab.

You will see the first reports options page.

The first option at the top right will let you choose where the end of day report is sent to. There is a drop down with choices of "No Print out", "On Screen", "Receipt Printer", "A4 Printer", "Email" and Print-Out and Email". The on screen option shows you the takings information on screen and you can then choose to print it out. The option to email the end of day report will send it to the email address you type in the box for it at the bottom of the middle column.
The Driver Report Section lets you choose ow the drivers report is displayed if you have chosen it in the "Breakdown of Totals" Section.
The Add Total to summary section allows you to choose different things to appear on you end of day report. There are tick boxes for Disp. (Display) or Print.
The Breakdown of totals are again extra information you can choose to be on the end of day or end of week report by ticking the relevant box.
The Email section lets you enter email addresses for the end of Day or End of Week report. You can put multiple email addresses to receive these emails by separating them with a ";". The End of Week can be set by the option to the right of the email section that is called "Print End of Week" and it has a dropdown box where and end of week day can be chosen. The print simplified report emails the basic takings report without the "Add Totals to Summary" and "Breakdown of Totals" items.
To go to the next page of options click the more button at the bottom right of the screen
And the second page of receipt printer options will be displayed

The Stock Analysis Codes section allows you to put titles next to the stock analysis code numbers. 1 is reserved for pizzas and everything else defaults to 2. To set the stock items stock analysis code go into the details tab on an item and toward the bottom of that tab is the analysis code setting.

The Order Screen tab in Options
When you touch the Order Screen tab at the top of the Options screen, the screen will change to that shown below.

This screen enables you to make some changes to the way that the program operates during the process of taking an order from a customer.
If you touch the drop down arrow on the right hand side of the Default Takeaway Method field, the program will offer three choices. Choose the payment method that applies to the way that you would normally handle take away orders.
The first of these, “Payment Due”, is the default payment method for take away orders. This setting is appropriate if you take payment from a customer when you hand over their food, not when they place their order.
The second choice, “Paid”, is appropriate if you take payment from a customer when they place their order for take away food.
When an order is taken for take away food using one of the above payment methods, the program will assume that there will be an interval during which the food will be prepared and will transfer the order to the Collect button and screen.
The last choice, “Paid & Taken”, is really intended for customers who buy a can of drink, or anything that may be handed over without cooking or preparation. Orders taken using this payment method do not transfer to the Collect button and screen. Some users prefer this setting because, even though it does not accurately describe how they handle a take away order, it means that they don’t have to bother with the Collect screen and yet can still keep a record of take away sales and stock used.
The Prompt for assistant field enables you to set the program to force a server to register that they are taking an order. If this field is left unaltered as “Never”, the program will not ask for the name of the assistant taking an order.
Touch the drop down arrow at the right hand side of the field to reveal the other choices. The other two settings are “Before Order” and “After Order” which, as their descriptions suggest, alter the program to force a server to select their name from the screen, either at the beginning or the end of an order.
The Pizza Fractions field enables you to set the program to accept pizza fractions and choose the size of fractions that are acceptable. If this field is left as “None”, inTouch will not allow a customer to order a fraction of a pizza.
Touch the drop down arrow at the right hand side of the field to reveal the other choices. If the setting is changed to “Half”, the program will allow you to take an order from a customer for half of one pizza and half of another, but no fraction smaller than that.
Select “Halves & Quarters” or “Halves, Thirds & Quarters” if you allow your customers to order fractions that small. Taking orders for pizza fractions is described in full in an earlier section of this guide.
If the Ask if an order is Delivery or Collection drop down is set to "No" it will assume if you press delivery that the order is for delivery and go to the order screen. If the drop down is set to "Yes" before you go into the order screen it will show you the customer details and you will be able to choose whether an order if for delivery or collection. The third choice "Yes & Asks Name" is like the above but will also prompt you to enter a name, The program will then treat the order as a delivery or a collection accordingly.
If the Prompt For Customer Name On Take Away the program will always go first to a Customer Name screen with an on-screen keyboard, when an operator touches the Take Away button on the Main Menu. The operator can then type in the name of the waiting customer, and the customer name will be displayed on the Order screen, on the Collect screen and printed on the receipt.
When the Order screen first appears, the menu buttons from the first, i.e. left hand, course button are on screen. If you want the menu buttons from one of the other course buttons to appear on screen first, enter the appropriate number in the Starting Menu field.
The second page of the Order Screen options is shown below.

The Security Tab in Options
If you go into Management.
Then Options.
Then Select the Security tab at the top towards the right.

The Security options page should now be shown.

The start of day section is at the top right.
Setting this to any numbers always starts the order numbers from that place. Making it 0 means the numbers carry on today from where they finished yesterday.
The Takeaway Start option is if you want the takeaway orders to be in a separate set of numbers and this would be the start point and can be either "As Above", "100" or "1000". I you choose as above the takeaways and deliveries will be together.
The Orders Section is next and has different options to do with how the program responds when you take an order.
The Assign To Driver section has options to do with how the program responds when you assign a delivery to a driver.
Options in the Cancelled Orders section allow you to choose how the program deals` with Cancelled orders. The Send option has a box that allows you to enter an email address for a copy of a deleted order to be sent to.
The Reports section has different options mostly to do with the takings.
The first tick box in the Reports section stops order numbers shown or being printed on the receipt.
The Closing Down section has options to do what is done with when the program is shut down for the day.
The first tick box is for when you press shutdown in the program it asks if you are closing for today and if you answer yes it will show the End of Day takings, just print it or email it, depending on how it is setup. It will then upload your data. If you answer no none of these things will be done.
The second tick box if it is ticked puts consecutive numbers on the end of day report so you can see if it has been printed multiple times.
The third tick box doesn't create a copy audit trail on the terminal.
The fourth tick box if it is ticked uploads the shop data to our servers when you close down.
The fifth tick box if it is ticked automatically opens the cash drawer when yo close down.
The sixth tick box if it is ticked uploads the shop data to our servers at 21:45.
The seventh tick box if it is ticked assumes if the system closes after midnight it is the end of the day. Usually the program thinks it is still the same day until 5am the following day and if the program is left running will automatically close it then.
The Blind Declaration drop down is usually set to none. It is for asking the staff to say how much is in the till before seeing todays takings. It has different choices
"Yes" Just asks for a figure
"By Denomination" comes up with a table so you can input how much of each coin or note there is.
"By Den & Prints EOD" Does the same as the above but then prints the end of day takings.
The Audit trails to keep box lets you set how many days to keep the takings for. If it is set to 0 it keeps the information for ever. If it is set to 1 it keeps the information for a day and uses the same file that is overwritten.
The Backup is if the number of days to Backup the audit trails is different form the number to keep. You may have the audit trails to keep set to 0 so it keeps it forever but you may only want to backup the last 30 days.
The Drive drop down is to set the external backup drive letter if you want to create the backup to an external drive.
To go to the next page of options click the more button at the bottom right of the screen
And the second page of receipt printer options will be displayed

The Order Types drop down has a choice of "Delivery & Takeaway", "No Delivery", "Paid & Taken only", "P&T Eat In/Take Away", "P&T Eat In/TA & Collect" & "Take Away & Pickup". This option change the buttons that appear on the main screen and so the order types that can be taken.
- "Delivery & Takeaway" is the normal way the program is set.
- "No Delivery" This option doesn't have the Delivery, Assign or Payment buttons. These are all to do with deliveries.
- "Paid & Taken only" This option just has the takeaway button and all orders default to paid & taken.
- "P&T Eat In/Take Away" This option just has 2 buttons on the main screen and both take you to the order screen.
- "P&T Eat In/TA & Collect" This option is the same as above but for Eat In allows you to say it is not paid for so has a finalise button for these orders
- "Take Away & Pickup" This option has a takeaway button that takes you straight into an order, pickup takes you to a screen to enter the phone number of the customer who is collecting the order.
The terminate programs drop down chooses which programs the program automatically closes every 30 seconds. If it is set to Full it automatically closes all we browsers and email programs. If it set to None it doesn't close any programs. if it is set to Full but allow email it just automatically closes web browsers.
The passwords section are options to do with passwords.
The Loyalty Schemes section is to do with setting up the loyalty scheme.
The Edit Order section are options to do with editing orders.
The option Edit Customer Options if ticked if you go into the edit database section in occasional menu an extra bow called action will be there to allow you to do different things to the customer database.


The Setup Tab in Options
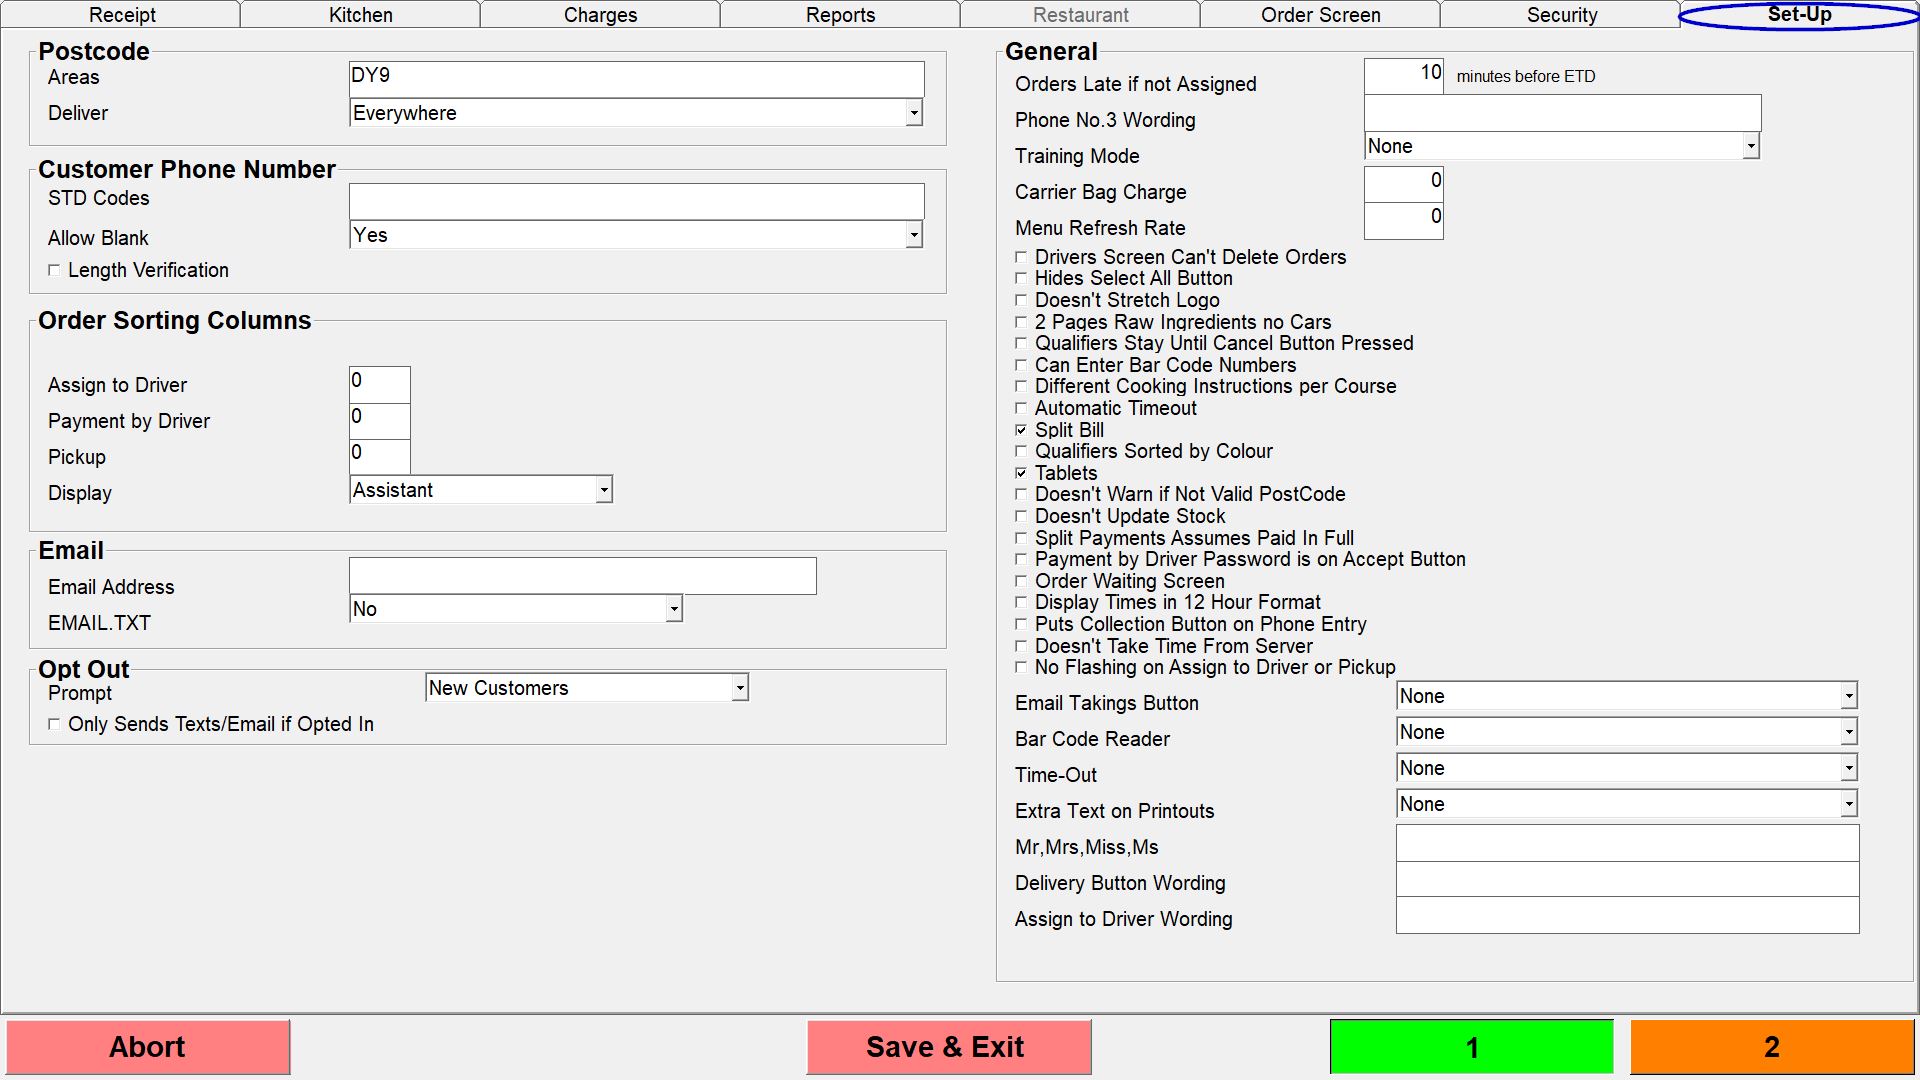
When you touch the Set Up tab at the top of the Options screen, the screen will change to that shown below.

inTouch uses the internet to get details of any postcode you input while adding a new customer.
The Postcode Area field and type in the postcode districts that make up your delivery area. The postcode district is the first half, or outward part of the postcode; i.e. if you deliver to M25 1LB, then M25 is the postcode district.
If you type your local STD code into the STD Codes field, the program will strip that code out of the incoming telephone number when it appears on the Order screen. For example, if you type 0161 into this field, when you receive a call from 0161-798 7307, the number will appear on screen as 798 7307.
If you have typed your local STD code into this field, then when you need to search for a customer by their telephone number, perhaps because their incoming number has been withheld, you do not need to type in their STD code.
You can enter more than one STD code into this field if your store is located in an area where you receive calls from two or more STD codes.
Place a tick in the Display Times in 12 Hour Format check box if you would prefer inTouch not to use a 24 hour clock; in other words, to display 17:25 as 5:25.
The second page on the Setup Tab in Options is shown below.

Touch the drop down arrow to the right of the Caller ID Port No field in the “Caller ID” section to tell the program which of the serial (COM) ports on your computer has the Caller ID unit connected to it. Integer usually connect the Caller ID unit to Port No. 2. This field should be set to 0 (zero) if the computer does not have a Caller ID unit connected.
The Caller ID File option is intended for users with a two screen computer system but only one Caller ID unit which is connected to the main computer (server). If this check box is ticked, then when you touch the Delivery button on the Main Menu, this additional button will now appear on the Search screen.

This feature allows you to take a call from a customer on the second computer (terminal), the one without a Caller ID unit connected to it, when the main computer is in use and yet have the benefit of Caller ID.
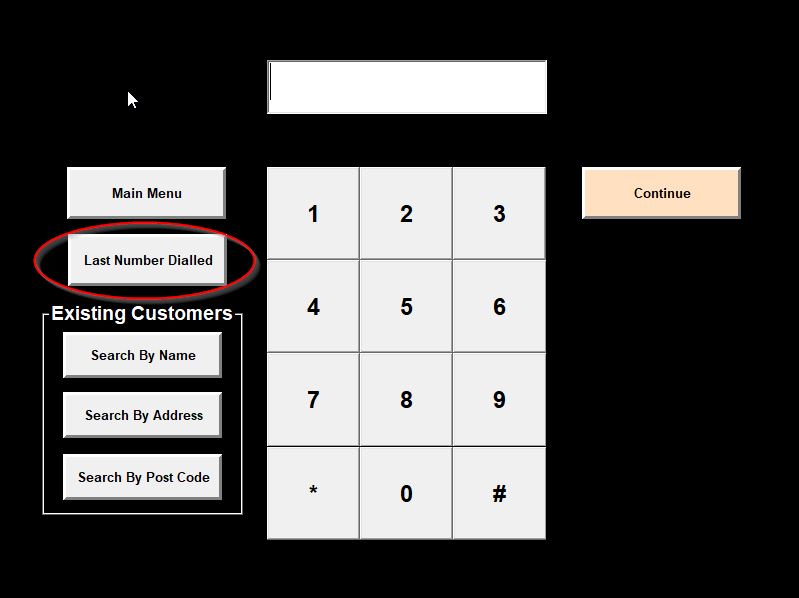
When you take a call in these circumstances, touch Delivery and then touch Last Number Dialled. inTouch will find the last (or current) incoming telephone number and either display the customer’s details or move on to the new Customer Details screen. From this point, continue with the order in the normal way.
Turning to the “Euro” section of the screen, since Sterling is a decimal currency, the program can operate in any other decimal currency. Where applicable, inTouch can convert figures from local currency into Euros.
If you enter a figure in the Exchange rate field, the program will calculate every amount payable in Euros as well as Sterling, or the local currency, and display that amount at the bottom of the payments section of the Order screen. For example, if you type 1.5570 in this field, as the conversion rate from £1 Sterling to Euros, inTouch will calculate and display the amount owing in Euros also, based on that figure.
If you tick the Display on Receipt box, the program will print the amount payable in Euros, as well as in Sterling, on the customer receipt.
When the Currency drop down displays the different currency signs that can be used, inTouch will replace the £ sign where it appears on screen with the symbol chosen.
The “Map Co-ordinates” section of the screen enables you to synchronise the program with a wall map. If the map on your wall has squares with the letters A to H across the top and bottom and squares numbered 1 to 8 down the sides, then you would enter “H8” in the Bottom Right Cell field (always enter the Horizontal co-ordinate first). Maps do not use the letters “I” and “O” and the program takes this into account.
Using the same system, enter the reference for the square in which your shop is located in the Shop Cell field, e.g. “C5”.
The scale of the map that you are using should be shown; from this you can work out the actual distance in meters represented by one square on the map and enter that figure in the Scale (meters) field, e.g. “100”.
Finally, you need to tell the program exactly where your shop is located within the Shop Cell. The X co-ordinate is horizontal and the Y co-ordinate is vertical. Using the scale of the map that you have established above, enter the distance across the square from the left, and the distance up the square, from the bottom, in meters. For example, if you have established that a square on your map represents a distance of 100 meters, and your shop is 60% across the Shop Cell from the left and half way up the square, enter 60 in the X co-ordinate and 50 in the Y.
A little trial and error may be involved but, when inTouch has been synchronised with your map, as each new customer is added, the reference of the square on your map in which they live will automatically be filled in the Zone field on their details and will be printed on receipts.
If you tick the Display Distance on Receipt check box, the program will use the information entered above to calculate the distance between your shop and the delivery address, in meters, and print that distance on the receipt. Note: this distance is “as the crow flies”!
Setting up the wall map Co-ordinates
First go to Management
Then Options
Then click on the Setup section at the to right.

Click the More button at the bottom right.

The Map Co-ordinates section is on the left hand side.

The map co-ordinate options are to sync up the program with a wall map in the store.
The store may have a wall map that looks like the following example.

In this example the bottom right Cell is the highest number and letter so Z22.
The shop cell is the co-ordinates of the square where the shop is located and the X and Y are the number of meters from the top left of the square where the shop is. So if the shop is dead centre of the square and the squares are 250m then X is 125 and Y is 125. If the shop is in the centre but at the top then X is still 125 but Y is 0. The red dot on the example is the shop so X is about 200 and Y is about 80.
The Scale (meters) is how big each square on the grid is. On the example it is 250
The "print distance on receipt" option is a drop down list. "No" doesn't print the distance, "Yes" prints it and "Rounded" prints it rounded to the nearest mile.
If it is setup right in the zone section of each customer it will show which square on the map the address will appear.
Changing the number of days audit trails to keep
First click 'Management'

Then 'Occasional Menu'
Then 'Options'
Then the 'Security' tab at the top right.

The option for the number of audit trails to keep is on the right about 3/4 of the way down. Setting it to 0 will keep the audit trails forever and any other number will keep them for that number of days.

Setting the Order Target Times
First click 'Management'
Then 'Occasional Menu'
Then 'Options'
Then click on the 'Order Screen' Tab

The click 'More' at the bottom right of the screen

The choose the Order Target times. The times are added from when you take the order and is the time the order is expected to be ready. (This is usually about 45 for delivery and 15 for Takeaway/Collection)

Setting where to start daily order numbers
Go into "Management"
Go into "Occasional Menu"
Go into "Options"
Click on the "Security" tab

At the top right there is a section called "Start of Day" and there is a place to set the order numbers.

Setting this to any numbers always starts the order numbers from that place. Making it 0 means the numbers carry on today from where they finished yesterday.
The option below is called "Takeaway Start" and is a drop down menu. The choices are "As Above", "1000" or "100". This is the starting point of the numbers for takeaway. If you leave it set to "As Above" the takeaway and delivery numbers will be from the same set so whatever the next order is it will be given the next number. If you choose"1000" or "100" the takeaway order will start at this number and then be separate from the deliveries.
Setting up Split Bill
Go to Management

Then "Occasional Menu"

Then "Options"

In "Options" go to the "set-up" tab along the top

In the options tab, under general, look for the "Split Bill" tick box

To split a bill, go to a Restaurant order

once on a restaurant table order, in the bottom right hand corner, there will now be a "Split Bill" button


To move the items into boxes, Click the item so that is highlighted in red and then select a box for it to be put into.


When an item has been put into a box, it will allow you to change the method of payment for the box as well.

When all items have been assigned their box, select "Print", in the bottom left hand corner to print each boxes contents as a receipt for the customer.

To finalise the order select the button in the middle at the bottom if the screen which shows the amount due. this will print a normal receipt, rather than how the bill was split.

Setting up Split Payments
First go in to management
Then options
Then the Order Screen tab

The split payments option is at the bottom right

Tick this then click Save and Exit at the bottom of the screen and go back out to the main screen.
When you go to the payment screen now you will have a split payment button.

If you want to split the payment on an order click this and you will get more total boxes.

If you click on the payment type boxes that default to cash it will change to be the payment types you have setup. If you put an amount in a box it will show the remaining balance beneath,

When you have matched the total for the order it will say change due 0.00 and if you press accept the order will be finalised.

How Set up a Delivery Charge
First go into Management
Then Options
Then the Charges tab

The main section is for delivery charges and the charges drop down selects how the charge us calculated. It can either be by postcode, distance or distance with a maximum delivery range.

Whichever way it is set there is a Min Order and Charge column for each area and the top one that is either set if you have a blanket charge for all areas or will be the fall back charge if a customer is accepted for an order but doesn't have a postcode or the postcode isn't one specified.
If you choose to charge by postcode for each area choose the Min Order and Charge amounts and then in the Post Code District box enter the postcodes this charge applies to. There can be multiple postcode areas for each charge separated by a comma.

If you choose to charge by distance it will look similar to the setting for the postcode way of doing it but the Zone section will Change to Upto Miles so you can fill this in to charge a certain amount for orders up to the distance entered. The Max settings are the same but limit orders up to the miles specified. If you want to specify ½ miles in an Upto Miles box use the / key.

The charge type can be set by the Type drop down.

The different type use the Min Order and Charge figures for each charge group to apply different charges in different ways.
- Charge £x.xx for orders under £x.xx - This charges the amount in the charge column to the orders under the amount in the Min Order box
- Charge Maximum £x.xx for orders under £x.xx- This charges the Charge but only up to the Min Order amount. So if the Charge is £1 and the Min Order is £10 if the order value is £8 it will charge the full £1 but if the order value is £9.60 the charge will be the difference to the Min Order value so 40p. In this case the type above will still charge the full £1.
- Make order value up to £x.xx then add £x.xx - This makes the order value up to the Min Order amount, if it doesn't already match or exceed it, and then add the Charge amount. So if the Min Order was £10 and the Charge £1 and the order was £9.60 the delivery charge would be the difference between the order and the Min Order setting, 40p, and the Charge ,£1, so in this case £1.40.
The next choice is to do with how the charge shows on your takings,

- Included - Just includes the delivery changes as a normal part of your takings
- Belongs To Driver- This setting prints the full delivery charge on the individual receipts but they aren't on the takings as they belong to the driver
- Belongs To Driver Less VAT Element - This is similar to the above setting but the VAT element of the delivery charges are included on the takings
- £1 Belongs to Driver - This setting prints the full delivery charge on the individual receipts but they are on the takings less the £1 that belongs to the driver
- £1.50 Belongs to Driver- This setting prints the full delivery charge on the individual receipts but they are on the takings less the £1.50 that belongs to the driver
- £1 Belongs to Shop - This setting prints the full delivery charge on the individual receipts but they are on the takings as £1 for each delivery
The delivery charge Applies to drop down defaults to Not Account but Account Customers or Internet Orders Only can also be chosen.

The Ask Charge if no Zone or Postcode drop down has a few choices.

- No - Is what this default to and doesn't allow orders from a postcode not specified or orders from a distance outside the delivery area
- Phone - Is if it is a phone order it will ask you to enter the charge
- Phone or Internet - Allows you to add a charge to phone or internet orders
- Asks Zone if Blank - Will ask you to enter the zone which will then charge as if the customer is in that zone
- Always Asks - Will always ask you to enter the delivery charge
The Takes into Account Manual Discount tick box will charge you delivery charge on top of any discount you give, with it unticked the discount also comes off the charge.
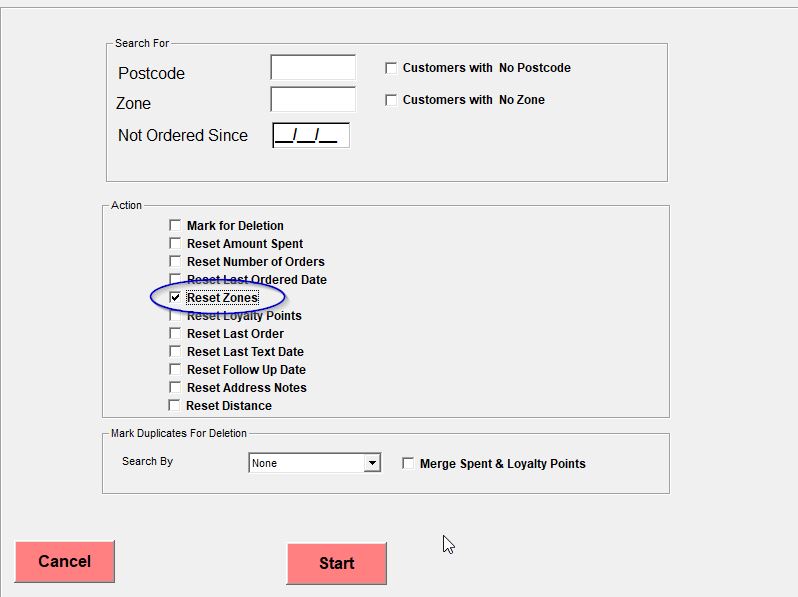
The delivery zone is entered into the customer zone field automatically. If you change the delivery charge you will need to reset the customers zones. It works out what the zone for each customer will be if the field is empty and if you change the zones it will have the old one in. To reset the customer zones in the program go into edit customer database on the occasional menu and tick the "Reset Zones" Choice and then click "Start" and this should reset the customer zones.
How to Exclude Items from Discount
In this example I want to exclude all drinks and desserts from discount
First go to 'Management'

Then click 'Occasional Menu'


Click into the relevant course where the items are located

Click on one of the items you want to exclude. For example 'Cans 330ml'

On the right hand side you will see the Internet box

Where it says 'Allowed' click on the drop down

In the drop down click on 'Not Allowed In *Code Discount*

Then go to 'Details'

At the bottom you will see 'Analysis Code'

By Default stock items are set to Analysis Code 2.
Click in the Analysis Code box and change the number to 6 (or a number that isn't being used)

Do this for all items that you want to exclude from discount

Once all items have been set to Analysis Code 6 click 'Finished'

Go to into 'Options'

Click on the 'Order Screen' tab

And then the 'More' tab bottom right

On the right hand side you will see 'Discount'

In the Discount box you will see 'Ignore Stock'

Add the Analysis Codes you exclude above. For example 6

Then click 'Save & Exit'

***Continue if you have Online Ordering***
In the 'Internet Options'

How to Add Account Payment Methods (Just Eat Card etc)
First go to 'Management'
Then click 'Occasional Menu'
Click on 'Options'

Along the top click on 'Order Screen'

Click on the 'More' tab

On the left in the middle you will see 'Account Payment Methods'

Click in one of the boxes.
![]()
Type in your payment method. For example Just Eat Card, Deliveroo Card

You can add a maximum of 8 account payment methods
Then 'Save & Exit'
![]()
And then 'Exit'

To test this click on Takeaway and then click on the Payment Method

Processing Refunds within InTouch
The option to allow refund first needs to be enabled to do this, you go into management > Occasional Menu > Options.
Once in options, select the "Security" tab and on the right hand side in the "Orders" section look for the "Refunds" drop down box

With refunds enabled, you can now go into "review orders" in the occasional menu,

In review orders, you will need to select which day the order was placed on and then select "Review Orders" from the menu provided.

Onc you select the day and review orders, you can select the order that needs to be refunded
How to Export Customer Email Addresses
First you will need to check that the file type is set to SENDGRID
On inTouch first go to ‘Management’

And 'Options'

In Options click the 'Setup' tab

'Emails' on the left change the dropdown to SENDGRID

Then 'Save & Exit'
To export the customer email addresses go to 'Customer Mailing'

Click on 'Email List'
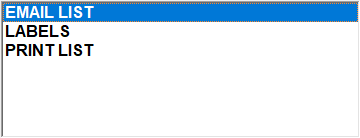
Then 'Full Selection' on the right
Select the 'More' tab
And 'Next'

At the bottom click on CSV Email List'

The file will then be saved to the WINCI folder
![]()
and Report folder
![]()
It will be named email.csv
![]()
The "last number dialled" button
The "last number dialled" button can be made to appear on the delivery section if an option in chosen.
If the option is set to "Local" or "Network" when you press the Delivery Button beneath the Main Menu button will be a button that says "Last Number Dialled". If the option is set to none this button won't be there.
To set the option if you go into Management
Then options
Then the Setup section and 2 at the bottom right and the Caller ID section at the top right there is an option that says Caller ID file.
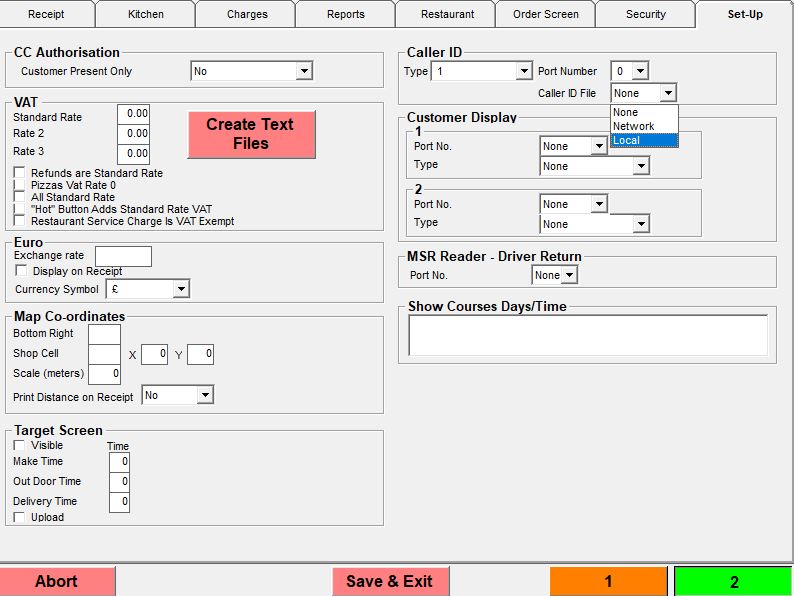
On the drop down there are choices are "None", "Network" and "Local". A file is created in the WINCI DATA folder called CID.TMP that is a small file that contains the last number called.
- None means the file isn't there so the button doesn't appear
- Network Means it looks on the server for the file
- Local means it looks in c:\winci\data for the file
Test Mode
You can use Test Mode to train staff. The order you enter won't be added to the days takings.
To turn on test mode go into management.
The options.
Then the setup tab.
The option for Training Mode is at the top right.
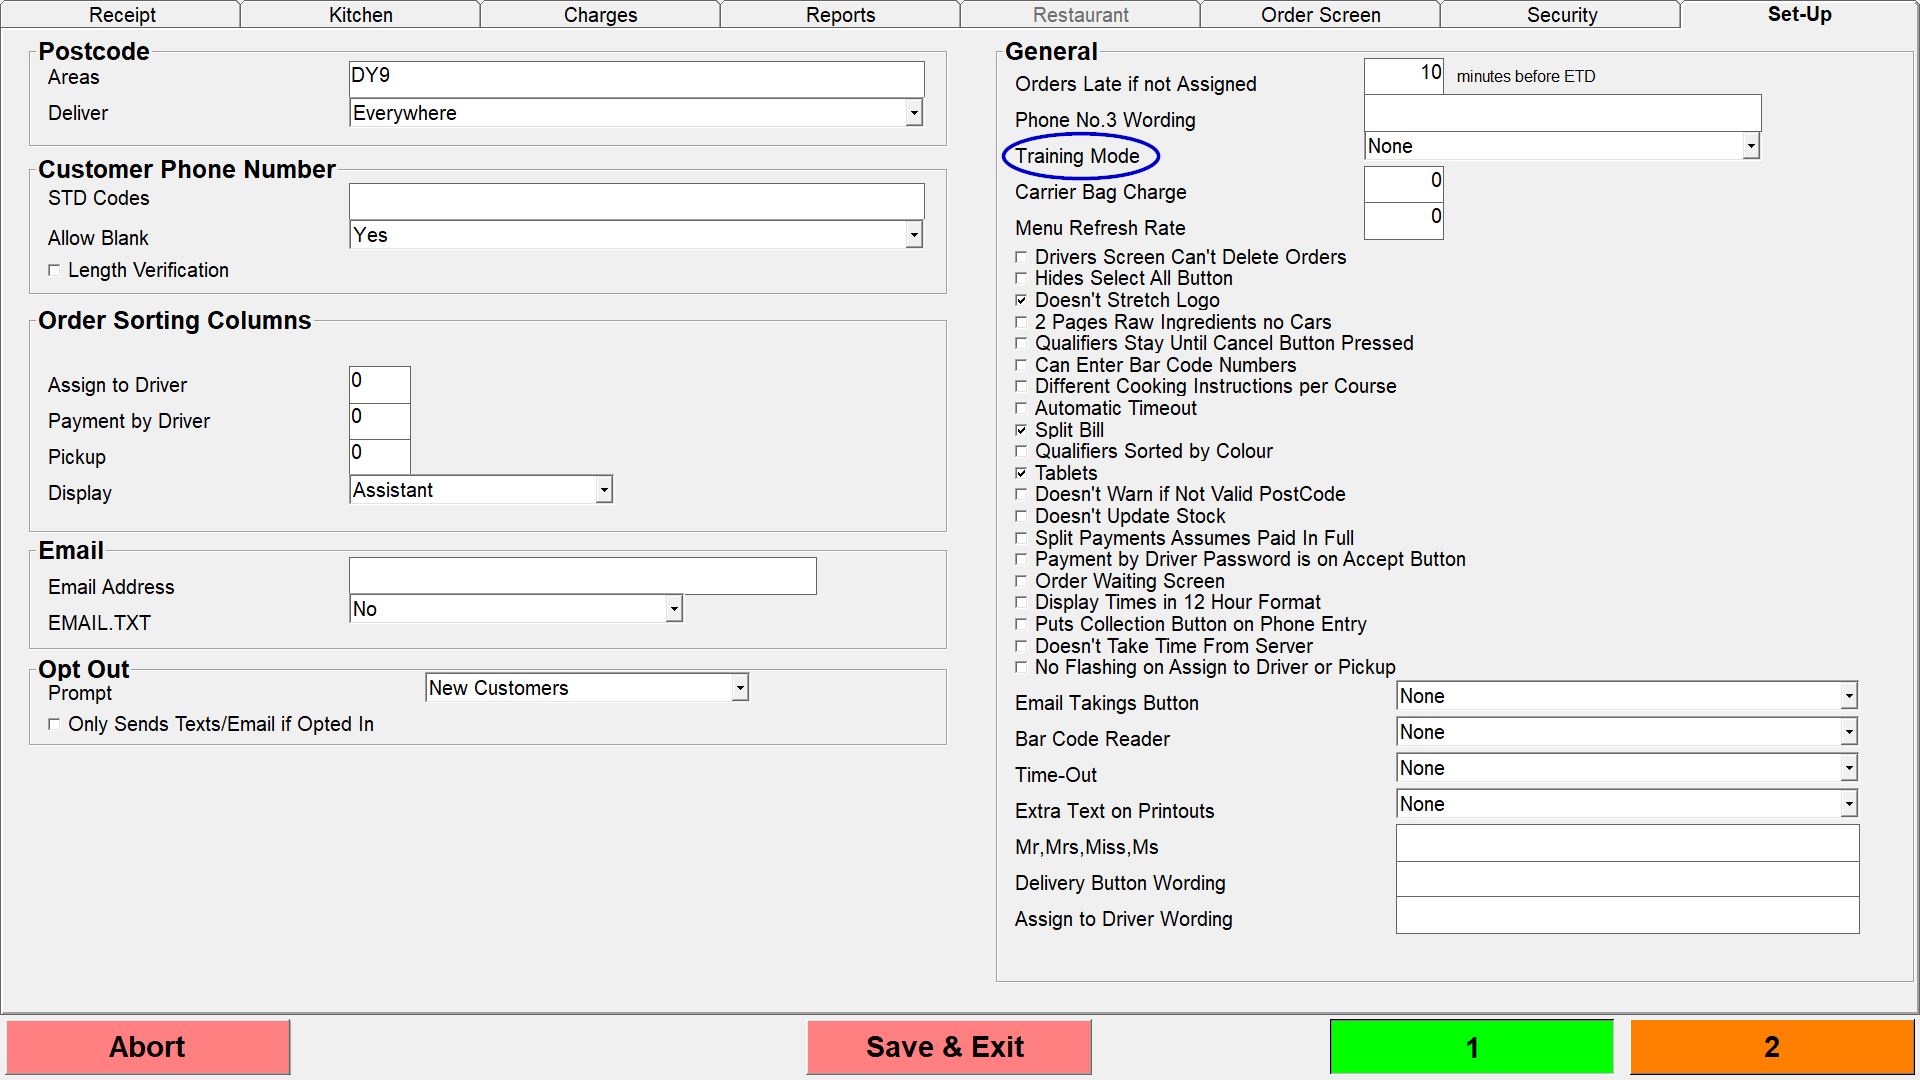
Next to the option is a drop down menu of choices,

Choosing "None" means no training mode, choosing "Allowed" will turn on training mode and "Allowed & Prints" will turn on training mode and print any receipts.
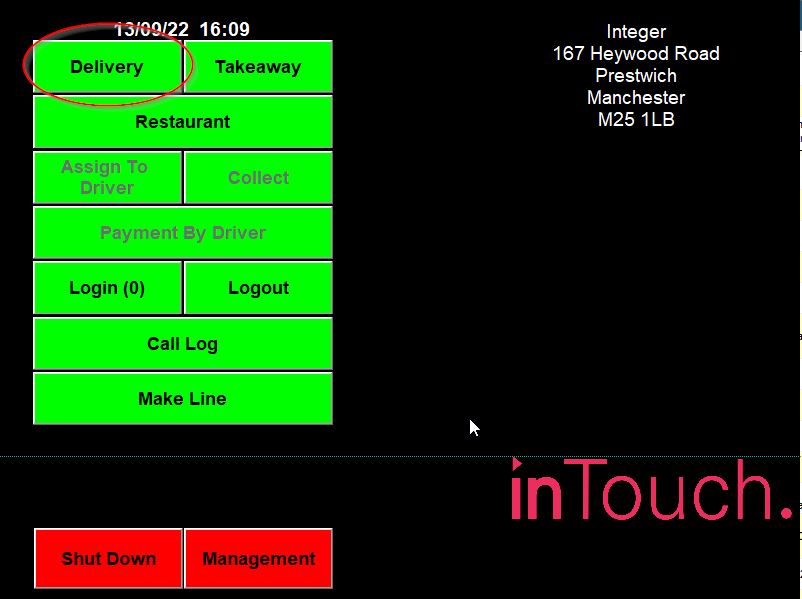
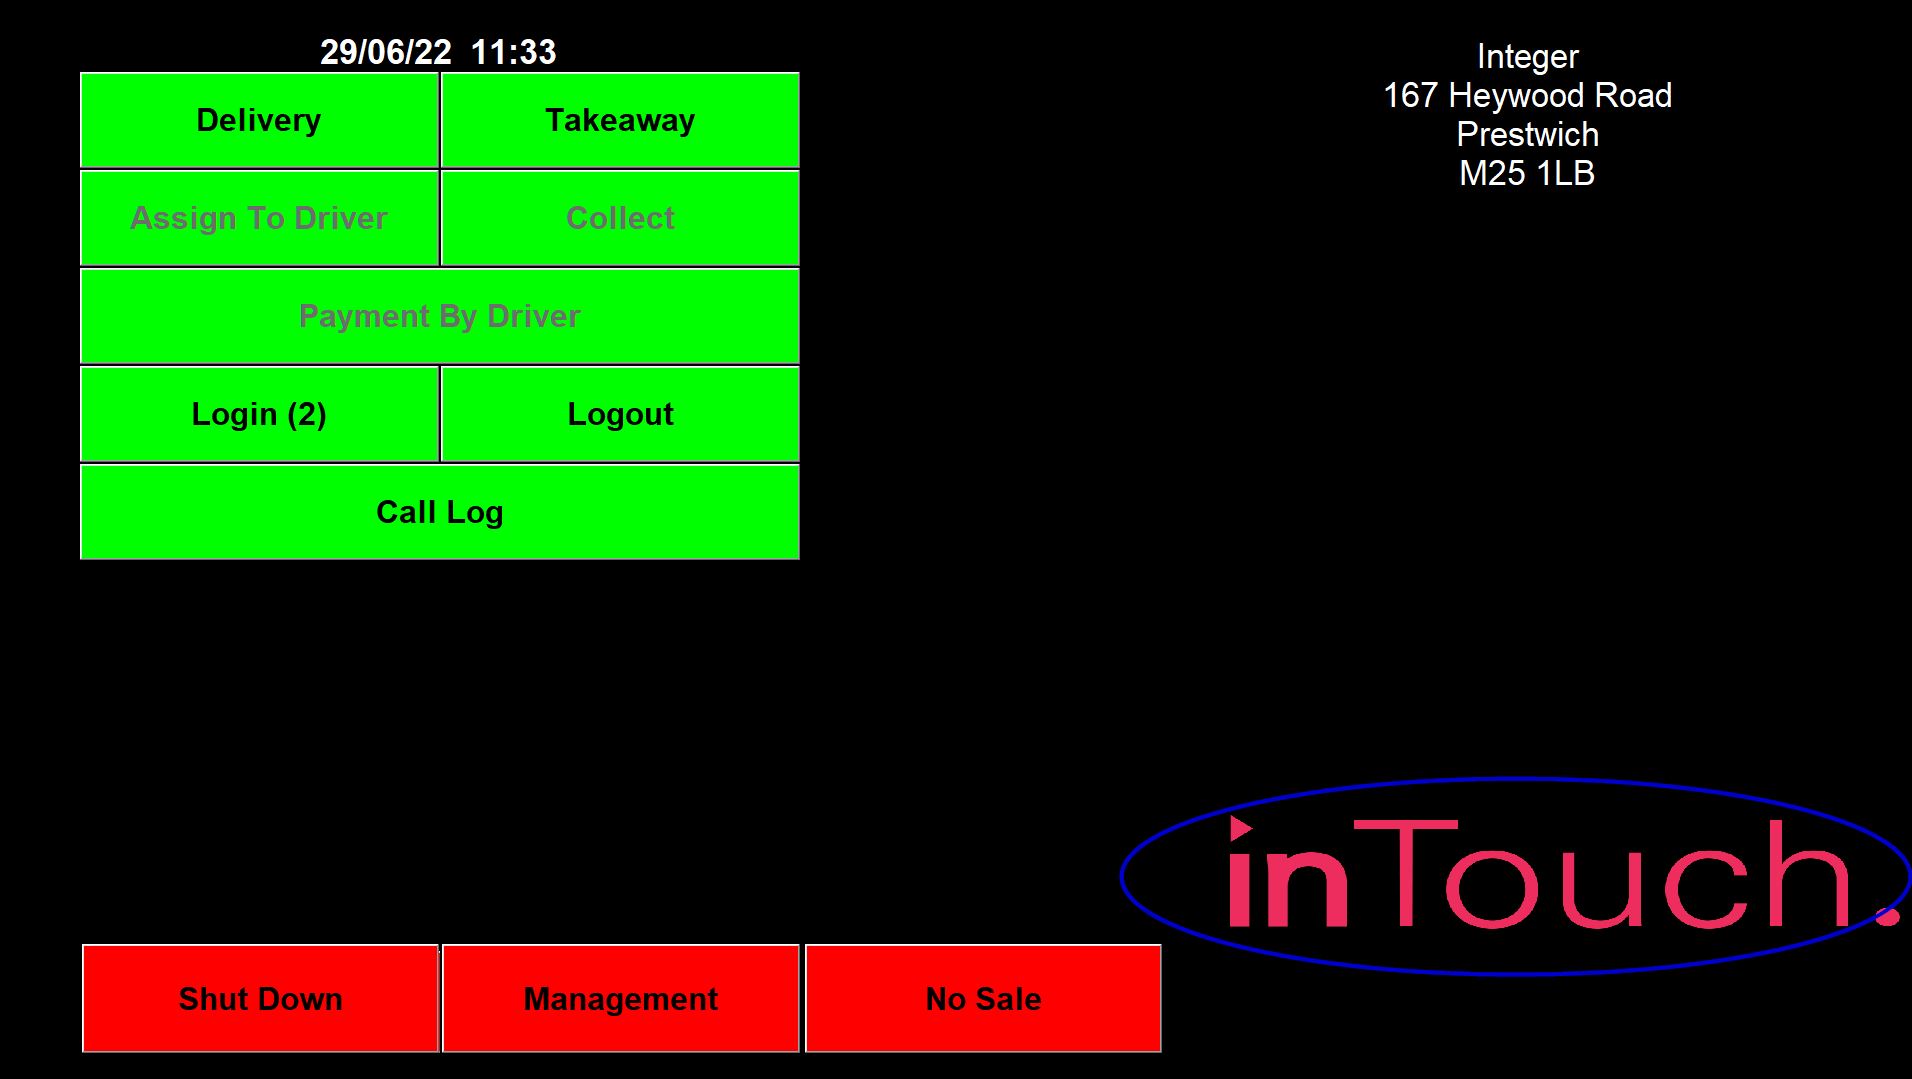
To turn on training mode on the main screen press and hold the InTouch Logo.
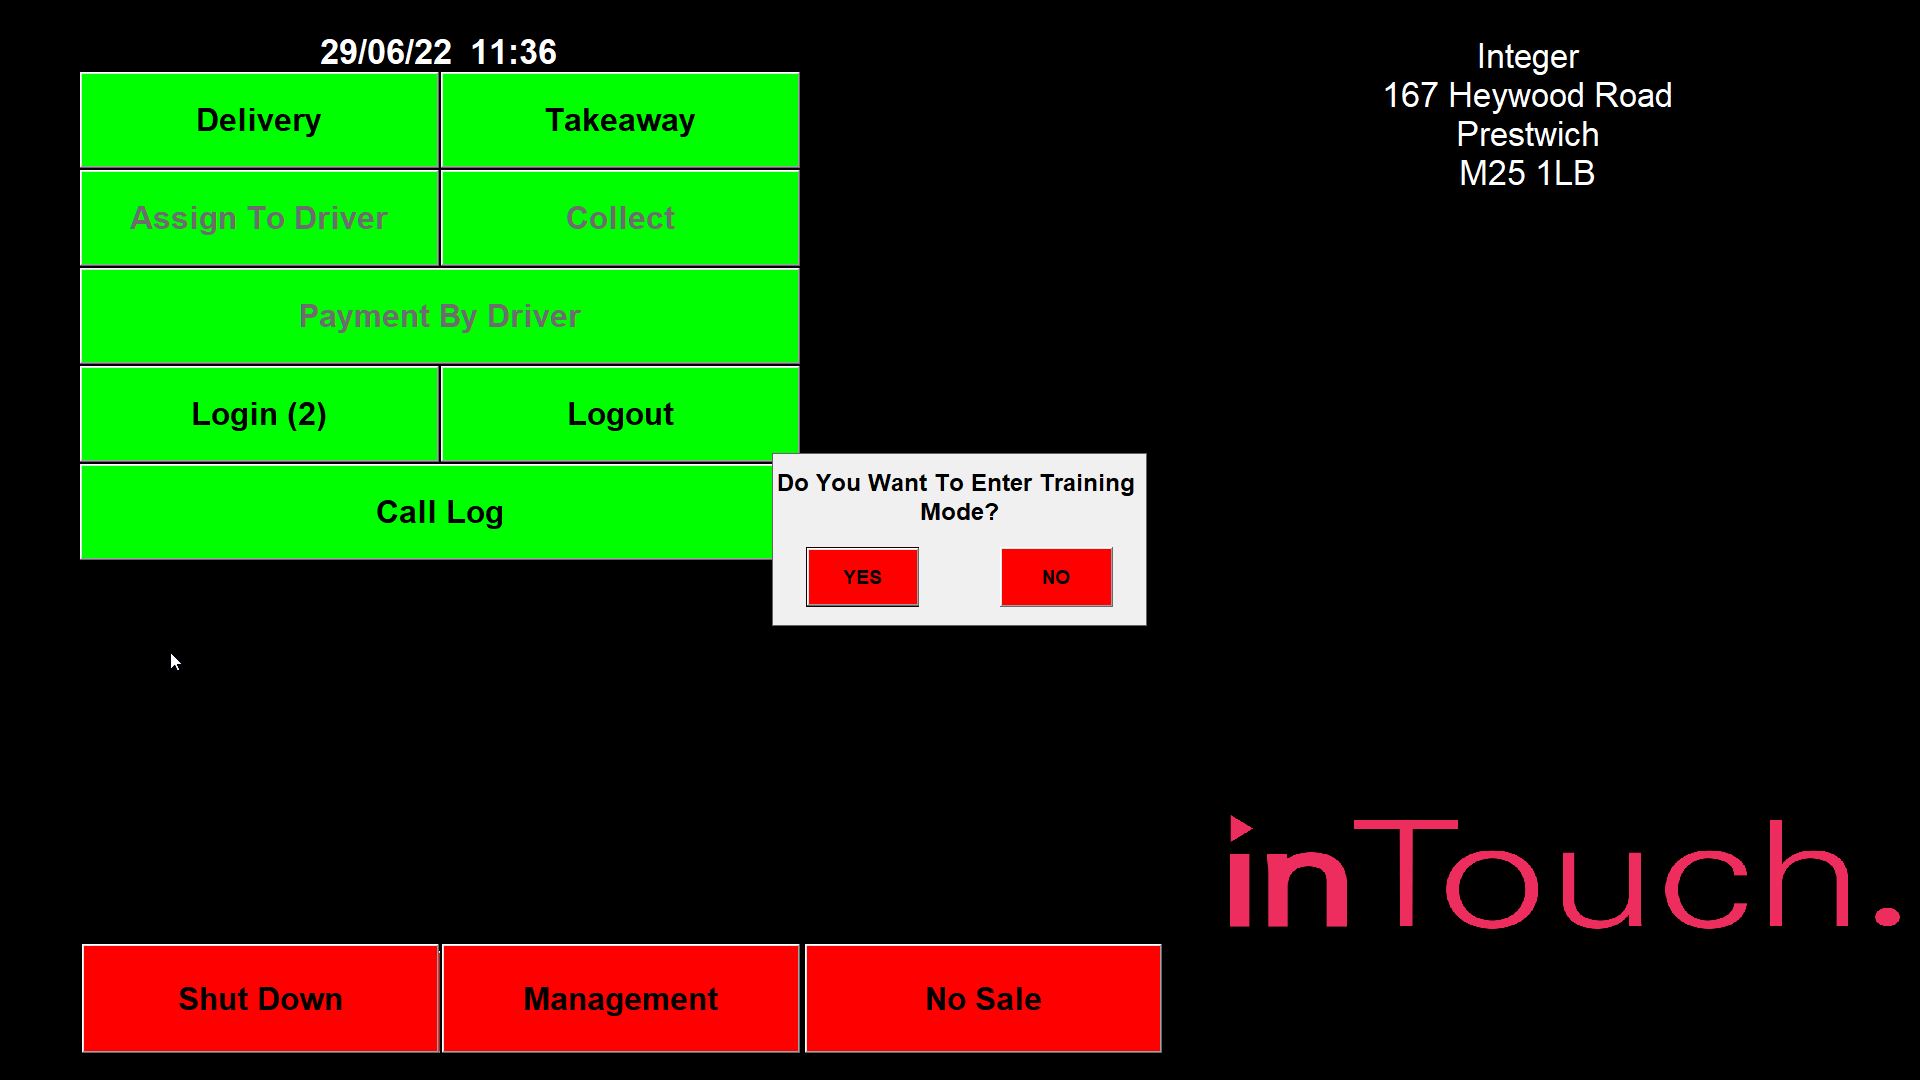
If you have turned Training Mode on it will ask "Do You Want To Enter Training Mode.
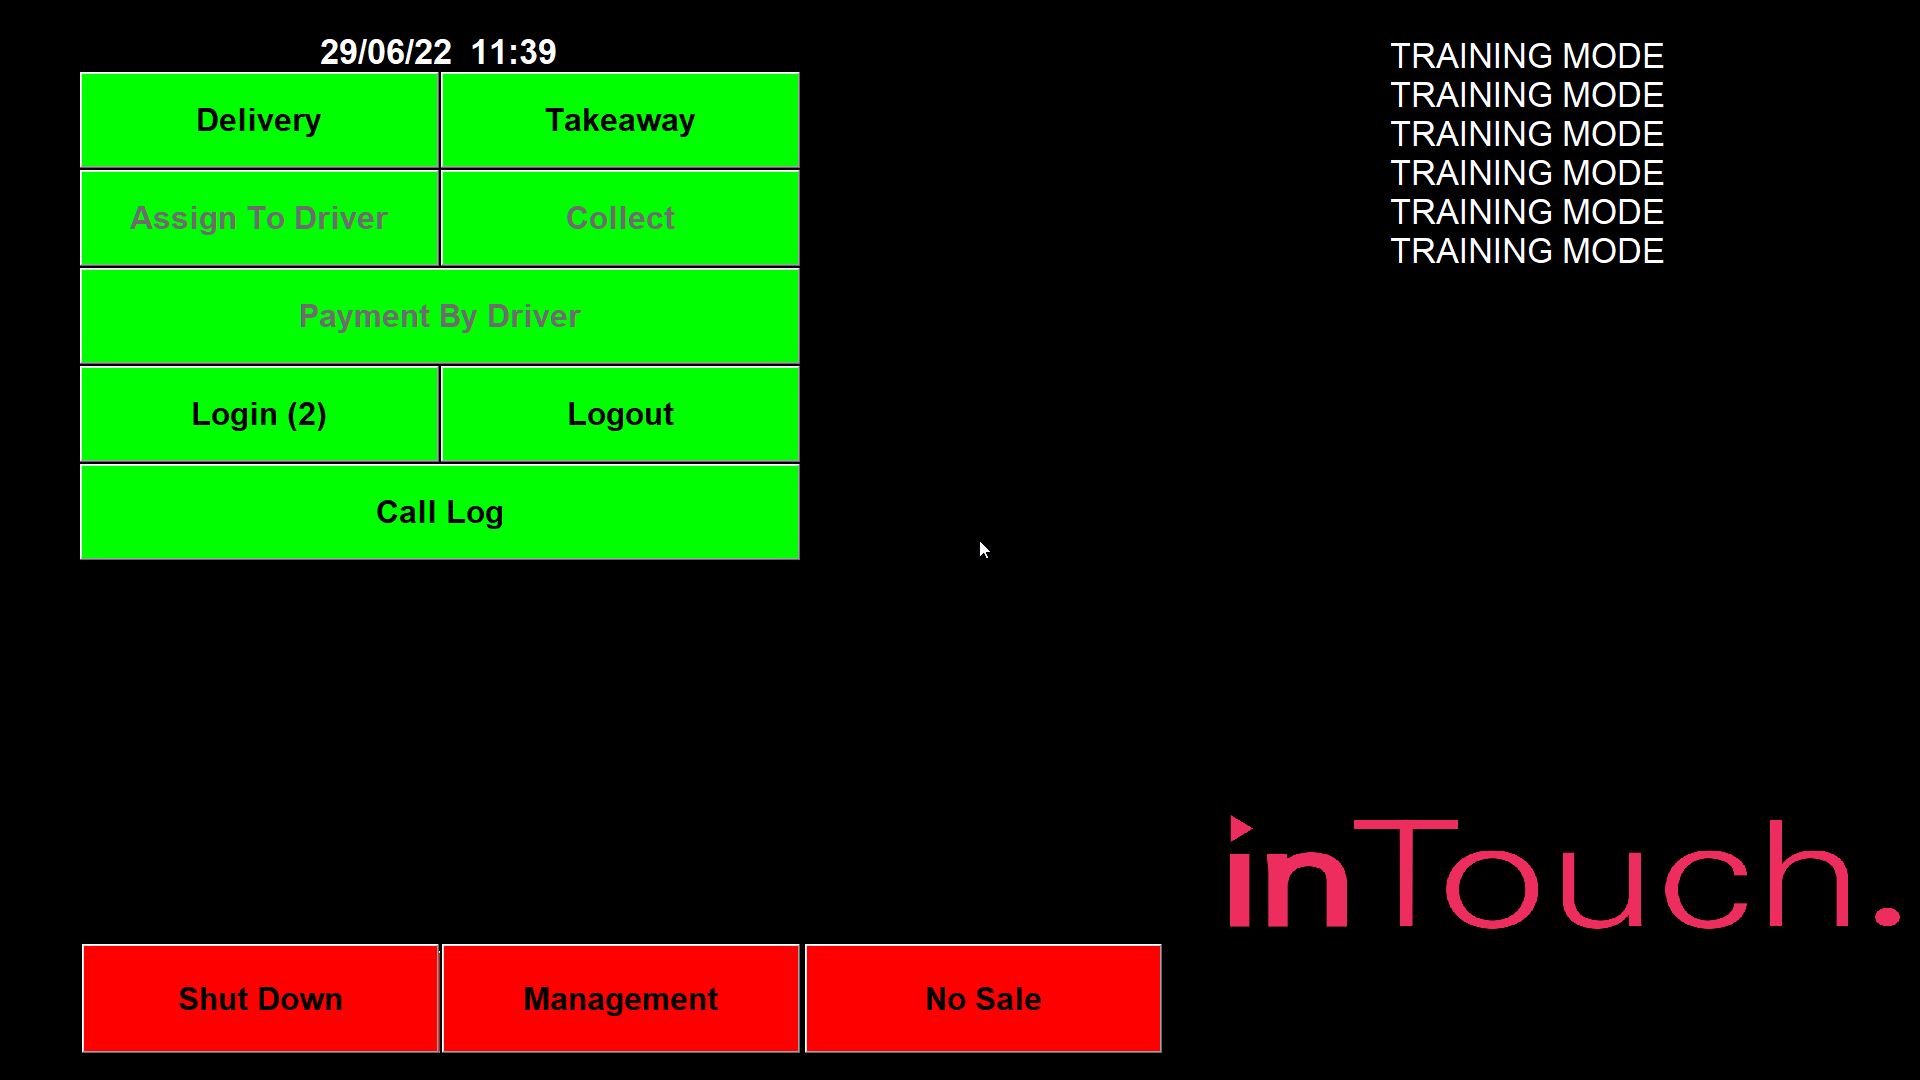
If you choose "Yes" where the name and address of the shop usually is at the top right of the screen it will say Training mode instead.
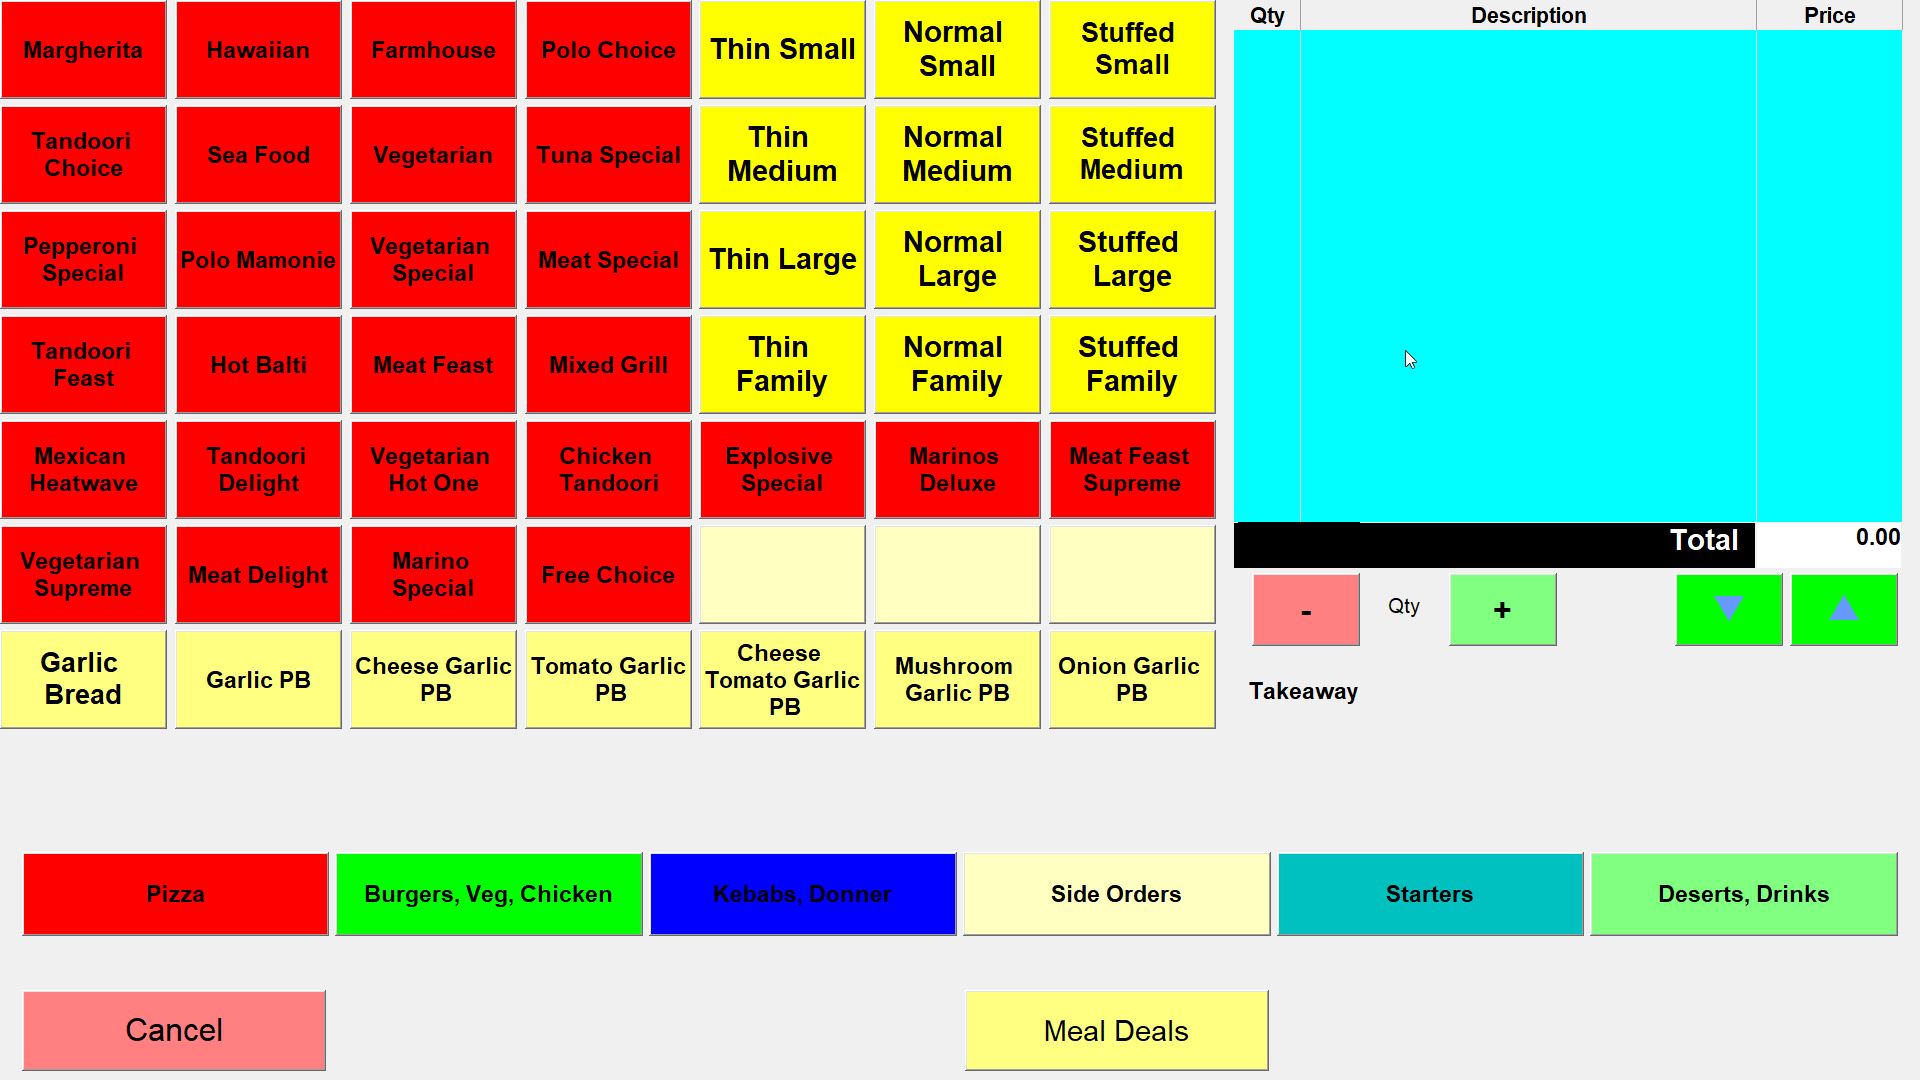
If you then go into take an order the background of where the items for the order are shown which is normally white will be blue.
While in Training mode no changes to the menu or options will be saved.
To Exit Training mode follow the same steps taken to go into it. Press and hold the inTouch Logo and you will be asked "Do You Want To Exit Training Mode?".
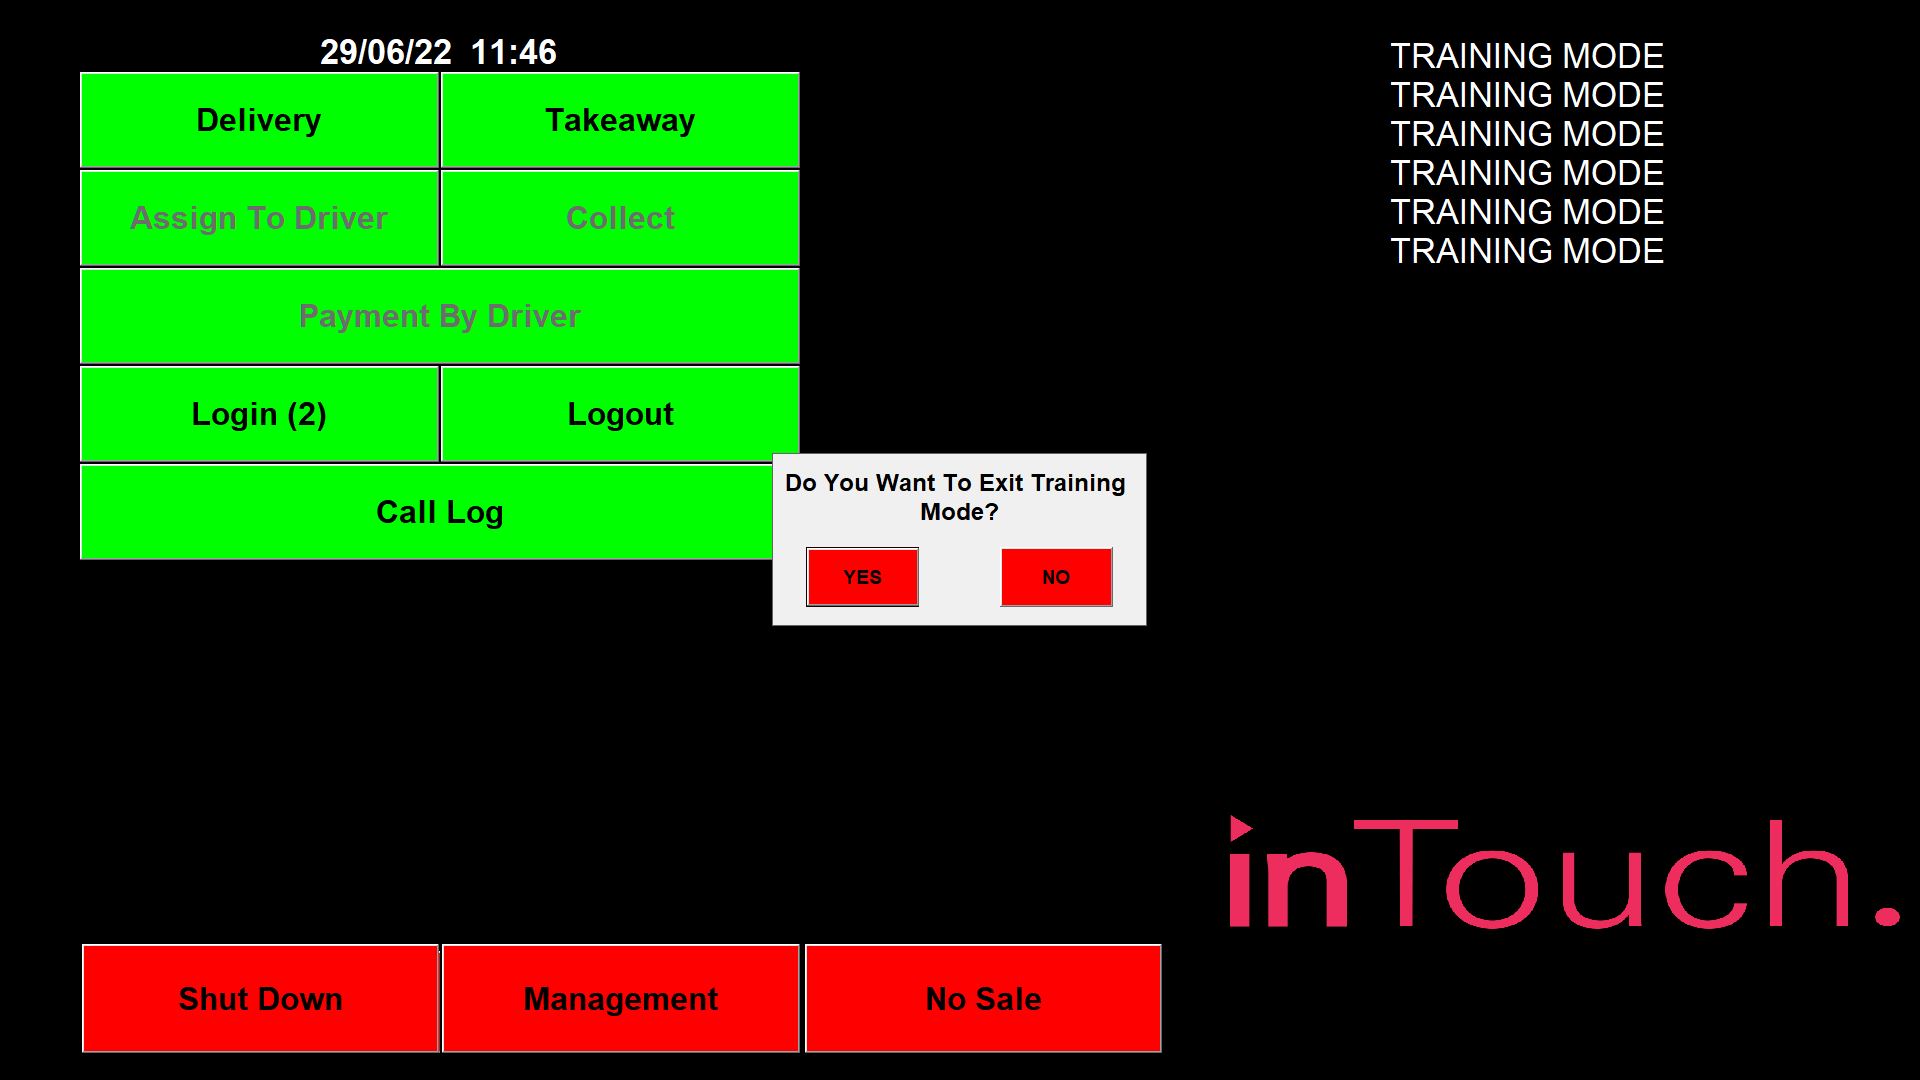
If you press "Yes" the program will go back to normal,