Order Screen
Taking an order in the program and other things that could be done on the order screen
- Taking an order from an Existing Customer
- Adding a New Customer before taking an Order
- Adding a New Customer without using a Postcode
- Existing Customers using a Different Telephone Number
- Amending Customer Details from the Order screen
- Customers not Identified by Telephone Number
- Adding or Removing Pizza Toppings
- Pizza Fractions – Halves, Thirds & Quarters
- Cooking Instructions
- Repeating a Customer’s Last Order
- Changing the Quantity of an item
- Removing Food Items from the Order Screen
- Amending an Order During the Order Process
- Change Pizza
- Pausing an order
- Selecting a Meal Deal
- Payment Section of the Order Screen
- Changing the Payment Method
- Changing the Delivery Method
- Changing the Delivery Time
- Giving a Discount
- Assigning an Assistant to the Order
- Editing an order
- Finishing an Order
- Assigning a Delivery Order to a Driver
- Other Functions on the Assign to Driver Screen
- Taking Payment from a Driver
- Making Alterations to Assigned Orders
- Status Review
- Selling Prompts
- Take Away Orders
- New or Existing Customers ordering Take Aways
- Take Away Order Screen
- Take Away Payment Screen
- Collect screen
Taking an order from an Existing Customer
First of all, we will describe the process of taking a simple order (as many transactions will be) before going on to describe all the variations possible on the Order screen.
When the program is on the Main Menu and the telephone rings, the Caller ID unit will intercept the telephone number of the incoming call. inTouch will check the database of existing customers and if it finds that number has been used before, the program will automatically move to the Order screen and display that customer’s details, as below.

inTouch is now ready for you to begin to take the order.
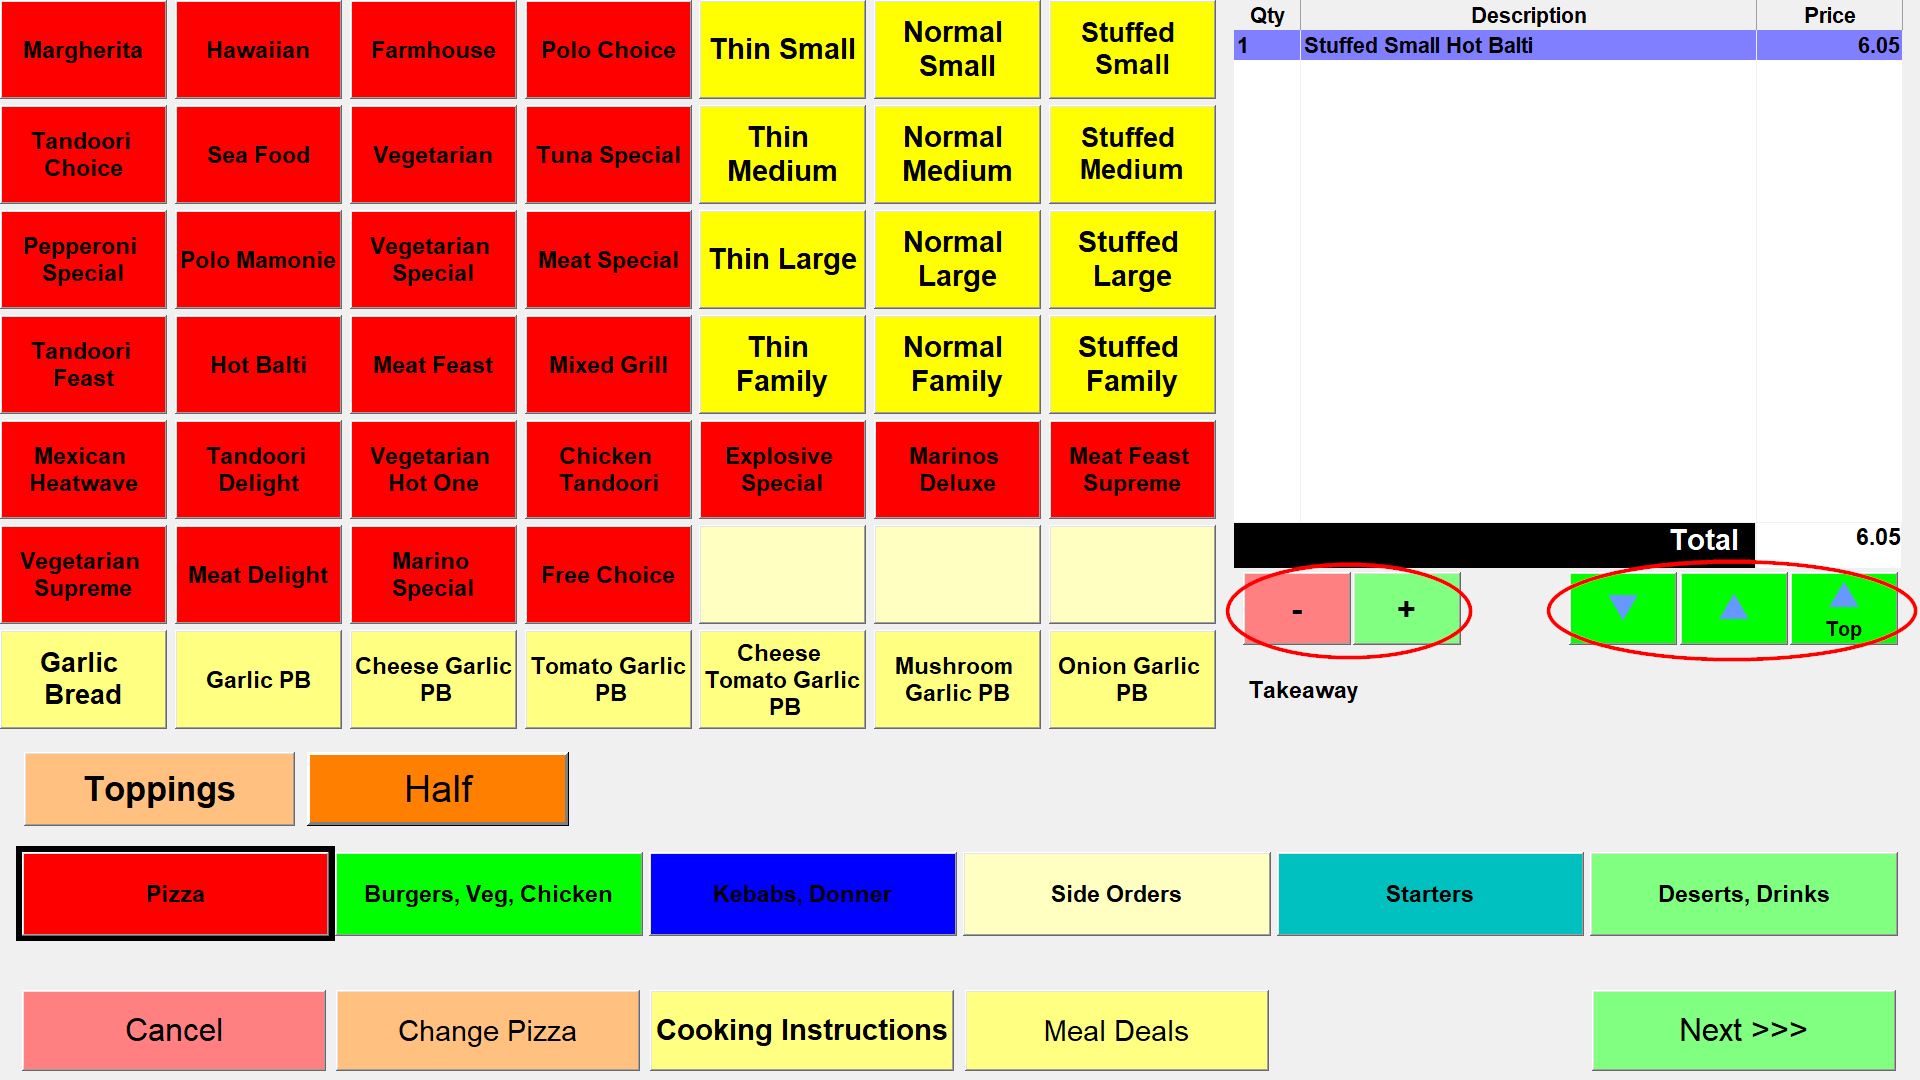
To take an order for a pizza, you must touch 2 buttons; a pizza description and then a pizza size, or a size button followed by a pizza description.
The order does not matter but when you have touched a pizza description button, the program will not react until you touch a pizza size button, and vice versa. To make this more obvious, when you touch a pizza description button, the text on all the other pizza description buttons will change from black to grey and only revert to black after you have touched a pizza size. The same happens when you touch a pizza size button first.
In the example of the screen shown above, to take an order for a “Regular Thin Farmhouse Classic”, touch the Farmhouse Classic button and then the Regular Thin button, or the Regular Thin button followed by the Farmhouse Classic Button. Either way, the pizza description and size, together with the correct price, will transfer to the blank receipt on the right hand side of the screen after you have touched the second button.
Repeat the process for as many pizzas as required.
To take orders for other items, touch the course button at the bottom of the screen, for example “Drinks & Desserts” on the screen shown above. Simply touch the button required and the item will transfer across to the receipt on the right hand side of the screen.
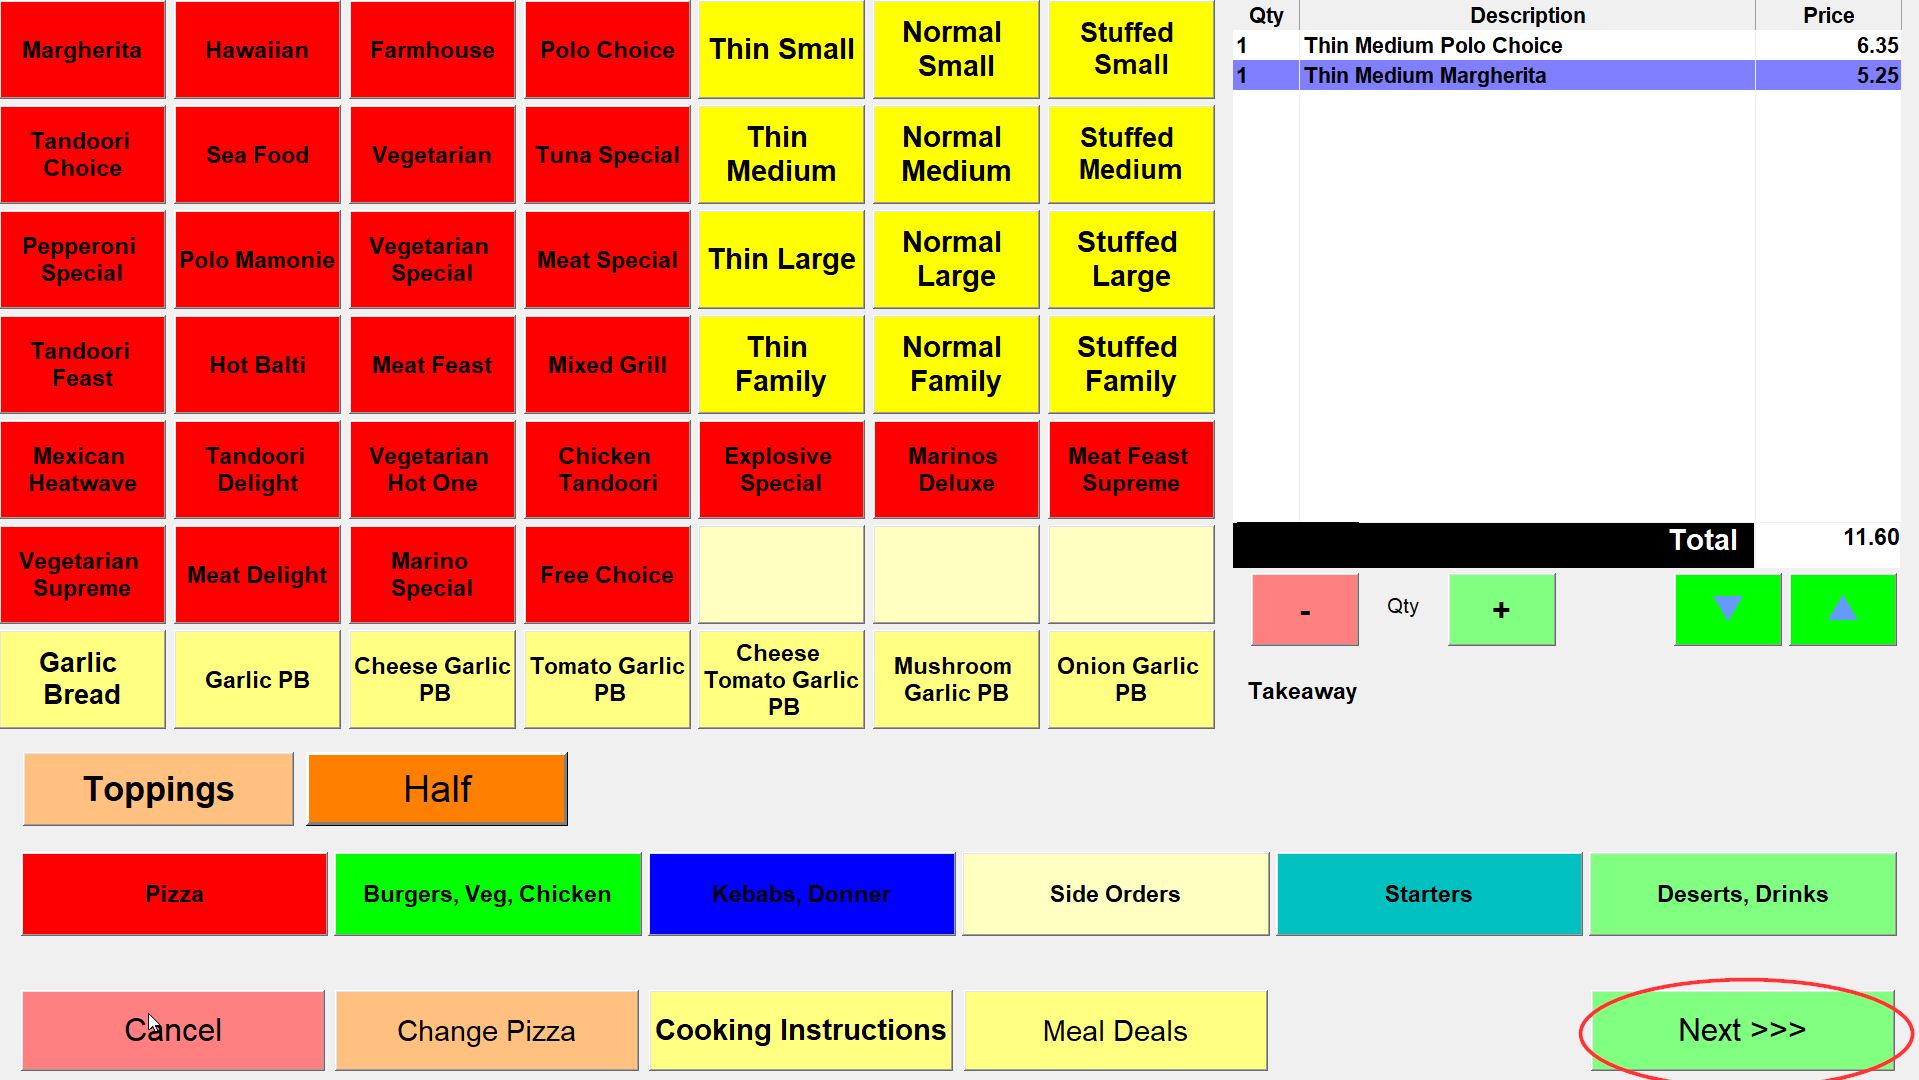
When you have typed in all the food items ordered by the customer (remember this is just a simple order) touch the Next >>> button in the bottom right of the screen. The screen will change to that shown below.

If all the details shown on this screen are correct, i.e. the customer will pay the amount shown, in cash, to the driver when he delivers, touch the Finished button. The program will now print a receipt and the screen will return to the Main Menu where you will see that the number on the Assign To Driver button has increased by 1. Congratulations! You have now successfully taken a straightforward order.
Adding a New Customer before taking an Order
Having described a straightforward order to an existing customer, we will now look at some of the other things that will happen and how inTouch will deal with them. First of all, what if the order is from a new customer?
As before, when the program is on the Main Menu and the telephone rings, the Caller ID unit will intercept the telephone number of the incoming call. inTouch will check the database of existing customers and if it finds that the number has not been used before, the program will move automatically to the Customer Details screen shown below.

You will see that a “keyboard” is displayed on the screen. Touch the buttons to “type” in the normal way. If you make a mistake, touch the Del button to delete the character(s) to the left and then re-type. If you notice a mistake in another field, simply touch that field and once again touch the Del button to delete the text to the left and then re-type.
Tip! To gain full value from inTouch, you should use it not just for taking orders but for customer mailing and marketing as well. For marketing purposes it is worth taking a little trouble to make sure that the details are accurate. There is also a field for e-mail address if you have time to take it.
This screen is designed to allow you to add a new customer with the minimum amount of typing. The customer’s telephone number is already filled in so you will often only need to type a first name, or initial, a surname, a postcode and a house number, and that’s it!
When you have added the customer’s forename, or initial, touch the Surname field and then type in the customer’s surname. You do not need to worry about upper and lower case (capital and small letters) in the name fields; the program will take care of this for you.
When you have completed the customer’s name, touch the Postcode field, type in their full postcode (no need for a space in the middle) and then touch the Search Postcode button. inTouch will automatically fill in the street name and the rest of the postal address in the Address field.
You will notice that the program leaves a space and positions the cursor at the beginning of the street name. This allows you to add the house number (or name) by touching the buttons on screen as before.
If you enter a postcode that does not exist, the program will display the message “No Match Found”. Touch the OK button and the program will return to the Postcode field, allowing you to re-enter the postcode in case you have made a mistake. If the customer is mistaken about their own postcode, the next section tells you how to search for their street name.
The Zone field allows you to enter up to 8 characters that are associated with the location of the customer, e.g. “C5” could relate to a square on a wall map or “108 G7” could be a page number and grid reference in a street finder. The zone entered here will be printed on the customer receipt.
If you have used the Map Co-ordinates section in Management > Occasional Menu > Options > Set-Up >, then the Zone field will fill automatically with the co-ordinates from your wall map.
The Address Notes field gives you the chance to enter brief notes or directions that will be printed on the customer receipt each time that this customer orders and may be useful to the delivery driver, e.g. “Upstairs Flat”, “Next to the Red Lion” or “Beware of the Dog!”.
You would perhaps not usually enter comments about a customer when they are ringing for the first time. Comments are intended for warnings or reminders to staff and will often result from an incident such as a hoax call. If you touch the Customer Comments button, the screen changes to that shown on the next page.

This screen allows you to enter comments about a customer for in store use. Any text entered here will automatically appear on screen, before the Order screen is displayed, whenever this customer telephones you in the future. The comment entered here is not printed on the customer receipt.
Use the on-screen keyboard to add text to the Customer Comments field and touch the Accept button when you have finished. The program will then return to the Customer Details screen.
When you have completed the customer name and address, touch the Accept button and the program will take you to the Order screen where you will see that this customer’s details now appear.
If you touch the Cancel button at any stage during the process of adding a new customer to the system, the message “Delete this customer” will appear on screen. If you touch the Yes button, the program will abandon the process, return to the Main Menu and the details that you have typed so far will not be saved. If you touch No, the message will disappear and the program will return to the Customer Details screen.
Note: You can amend the details that are stored for any customer, at any time, by simply touching their name and address on the Order screen. The program moves to Customer Details, as described above, where any piece of information can be edited by simply touching the field, using the Del button to remove text, re-typing and then touching Accept.
Adding a New Customer without using a Postcode
Sadly, not all customers know their postcodes. If you are speaking to a customer who does not know their postcode, complete their name as described above, and then touch the Address field.
Type in the the details the customer gives you for their address.
When you have completed the customer name and address, touch the Accept button and the program will take you to the Order screen where you will see that this customer’s details now appear.
Existing Customers using a Different Telephone Number
Mobile phones are now so widespread that it will not be long before you take a call from an existing customer who has previously called from one number, e.g. a land line, but is now using a different number, e.g. a mobile (or vice versa).
Obviously, the program will not recognise the second telephone number on the first occasion that a call is received from it. inTouch will treat the call as coming from a new customer and take you to the Customer Details screen as described above.
Since at this stage, you will not be aware that the call is from an existing customer, you will fill in the customer name and address as already described. However, when you touch Accept, then if the house number and postcode that you have entered match the house number and postcode of an existing customer, the program will display the message.

If you touch the No button, the program will abandon the process of creating a new customer, move directly to the Order screen, but will add the new telephone number to the existing customer’s record.
If you want to create a new record for this customer, touch Yes and the program will add this customer to the system in the normal way.
The program allows you to record up to three telephone numbers per customer. By doing so, inTouch helps to prevent customers from having multiple entries in the database which can lead to inaccurate marketing information and unnecessary, annoying duplicate mailings to addresses.
Amending Customer Details from the Order screen
You can amend a customer’s details at anytime by touching the area where the customer’s name and address is displayed on the Order (or Payment) screen (as shown below). The program will take you to that customer’s record in Customer Details where any piece of information can be edited on screen by simply touching the field, using the Del button to remove text, re-typing and then touching Accept to return to the Order screen.

However, when you amend a customer’s record in this way, a new button, Create New Address, appears at the bottom of the Customer Details screen. This button allows you to add, or link, more than one address to the same customer or telephone number, for example a customer calling from an office number as they leave for home, or flats with a shared telephone.
When you touch the Create New Address button, the question box shown below will appear.

If you touch Yes, inTouch will clear (but not delete) this customer’s address, postcode, zone and address notes from the screen but leave their name and telephone number(s) on view. Add the new address for customer, or telephone number, by postcode or by street name in the normal way and then touch Accept. inTouch will then return to the Order screen with the new address on display.
If you touch No, the program returns to the Customer Details screen and does not create a new address for this customer or telephone number.
If you create more than one address for a customer or telephone number in this way, then whenever you receive a call from that number in the future, the program will not go straight to the Order screen. Instead inTouch will list on screen all the addresses which have been linked to this customer or telephone number. You simply touch the address required and the program will then move to the Order screen with that address on display.
Customers not Identified by Telephone Number
As you have seen, when inTouch is connected to a telephone line with Caller ID enabled, it provides automatic caller recognition on screen. However, if the caller withholds their number, or calls from a system that is incompatible or uses a call box, there is no number to be recognised.
Under these circumstances the program will move from the Main Menu to the screen shown below, not the Order screen, with the relevant text, “Withheld”, “Unavailable” or “Call Box”, displayed on screen.
You may also have customers who prefer not to give out their telephone number or don’t even have a telephone! It is always possible to find an existing customer, or add a new customer, under these circumstances. Touch the Delivery button on the Main Menu and the program will move directly to the Search screen shown below.

If you are speaking to an existing customer whose number has not appeared on screen, ask them for and then type their telephone number into the field on the Search screen shown above and touch Continue . The program will then move to the Order screen, if the number is recognised, or to the Customer Details screen if the number is not recognised. If you make a mistake, touch Delete and the program will clear the numbers that you have entered, one at a time.
There may be circumstances where you are unable to locate an existing customer by their telephone number, for example customers who request that you do not store their telephone number. This Search screen also enables you to find customers by either their name or their address.
If the incoming call is from someone you believe to be an existing customer but who was not identified by a telephone number, touch the Search By Name button. The program moves to a Customer Search screen with an on-screen keyboard which you should use to type the first few letters of the customer’s surname and then touch Enter.
The program will list all the customers who match your search. To select a customer, simply touch their name and address on the list and the program will move on to the Order screen with that customer’s details.
If the program finds more customers than will fit on one screen, arrows will appear on the right hand side of the list which allow you to scroll down, and back up, the list until the correct customer is on view. (If this keeps happening, try typing a couple more letters when you search).
Alternatively, touch the Search By Address button and, on the Customer Search screen, use the on-screen keyboard to type the first few letters of the customer’s street name (or any part of the address) and touch Enter.
The program will list all the addresses that match your search. As before, select a customer from the list, or use the arrows to the right hand side of the screen to scroll down, and back up, the list until the correct customer is on view. When a customer has been selected, the program will move to the Order screen with that customer’s details.
When a list of customers is on screen, you can touch Cancel at anytime to return to the Search screen.
If you search for a customer by telephone number, name and/or address and inTouch does not find them, then they are not an existing customer! To add a new customer at this point, simply touch the Continue button on the Search screen and the program will move to Customer Details. Add the new customer in the normal way.
Note: Remember that you are only using this Search screen because this customer’s telephone number did not appear on screen automatically. One of the reasons for the Search screen is that some customers may not want you to store their telephone numbers. Therefore when you add a customer starting from this screen, the Phone No. field is blank and the program allows you to add a new customer without any telephone number. The Search screen will always allow you to find this or any customer by name or by address.
Touch the Main Menu button, or Cancel, when the Search field is blank to return to the Main Menu.
Adding or Removing Pizza Toppings
Whenever you select a pizza by touching the description and size buttons on the Order screen, a Toppings button will appear at the bottom left of the screen, just above the course buttons. When you touch the Toppings button, the screen will change to one like that shown below.
The aim of this section is to describe how to add and remove toppings during an order. The toppings shown on your screen, and their prices, are created and amended in Management > Occasional Menu > Menus > Toppings (1) and that is described in full in a later in the User guide. The program will charge different amounts for toppings depending on the pizza size and it is also possible to have different charges for types of topping, e.g. for veggie, meat or seafood toppings.

To add an extra topping to the pizza that you have just entered on the Order screen, simply touch the relevant button. inTouch will transfer the topping description and price to the receipt on the right of the screen. Repeat the process for as many additional toppings as are required.
You will notice that when you touch the Toppings button on the Order screen, a Hold button then appears in place of the Toppings button. Touch the Hold button, and then touch a topping button, to remove that topping from the pizza that you have just entered on the Order screen.
Note: inTouch will not charge extra for swapped or substitute toppings unless it has been set to do so. If you add a topping to, and remove a topping from a pizza, the program will treat this as a swapped topping and will not make an extra charge. If you add three extra toppings to, and remove one topping from a pizza, the program will treat this as two additional toppings and will charge for two. If you want inTouch to charge for every extra topping, even when some toppings are removed, you must check the Charge for swapped toppings box in Management > Occasional Menu > Options > Charges.
You will also notice that when you touch the Toppings button on the Order screen and the screen changes to one like that shown above, a Half Toppings button appears alongside the Hold button.
If the customer wants extra toppings on one half of the pizza only, select the topping(s) as described above, then touch a course button to remove the toppings menu from the screen and continue with the order.
You will see however, that as soon as you touch the Half Toppings button and then select a topping, the Half Toppings button is replaced by three buttons; Full, One Half and Other Half. These three buttons allow you to add any topping to either or both halves of the pizza in any order.
If the customer has chosen toppings for one half of the pizza, as above, and then wants to select extra toppings for the other half, touch the Other Half button, then a topping button e.g. “Onions”. The program will transfer “Other Half Onions” to the receipt on the right of the screen.
Although it would seem logical to order extra toppings for one half and then the other half, customers are not always so obliging. Therefore, even if you have already selected toppings for the “Other Half”, you can still touch the One Half button (followed by a topping) to add another topping to the first half, or touch the Full button (followed by a topping) to add a topping to the whole of the pizza.
Whenever you have finished adding or removing toppings, touch a course button to return to the main Order screen.
Note: You can choose to print extra and held toppings in red on the receipt in Management > Occasional Menu > Options > Receipt Printer and you can choose to print HOLD for Held toppings on the Kitchen printer in Management > Occasional Menu > Options> Kitchen Printer. You can also add extra toppings to stock items which are not pizzas by putting a topping price on the item in Management > Occasional Menu >Menus.
Pizza Fractions – Halves, Thirds & Quarters
Some stores are happy to allow customers to order fractions of pizzas and some stores actively discourage it. inTouch has four settings for pizza fractions and you can choose the one that fits in with your policy. If you go to Management > Occasional Menu > Options > Order Screen, you will see a Pizza Fractions box. When you touch the arrow to the right of the field, the drop down window offers four choices; they are None, Half, Halves & Quarters and Halves, Thirds & Quarters. Touch, or click on, your preferred option and touch Save & Exit to save the amendment.
If you do not allow customers to order pizza fractions, select None and you can ignore the rest of this section because the buttons that allow pizza fractions will not appear on the Order screen.
If you select an option other than None, the pizza fraction buttons that result from your choice will appear on the Order screen when an order is taken for a pizza. The settings behave as follows and are described in full on the next two pages.
Half – allows customers to order half of one pizza and half of another, but does not allow a fraction smaller than a half
Halves & Quarters – allows customers to order two halves, or one half and two quarters, or four quarters
Halves, Thirds & Quarters –customers may order two halves, or one half and two quarters, or four quarters, or three thirds
Before taking orders for pizza fractions, it is worth understanding some basic principles. First of all, remember that you cannot order more or less fractions than it takes to make one (whole pizza). In other words you cannot order three halves, or one half and three quarters, or five quarters or even three quarters!
Secondly, fractions of pizzas must share the same size and thickness of base. As soon as you have selected a Pizza Size and Pizza Description for the first fraction, the program will treat all the other fractions as being on the same size of base. It would not make sense to order a ½ Large Thin pizza with a ½ Medium Deep Pan pizza.
When it comes to charging, inTouch does not work out a special charge for pizzas made up of fractions. The program simply looks at all the fractions that have been ordered, works out which is the most expensive pizza and then charges the customer as if they had ordered that pizza. For example, if a customer orders a half Cheese & Tomato and a half Hawaiian Dream pizza, and on your menu the Hawaiian Dream is the more expensive of the two, the customer will be charged for a full Hawaiian Dream pizza. The same applies to quarters and thirds.
Finally, you will see that the program will always adjust the fraction of the first pizza ordered as you continue to add fractions; the program will never change the fraction of a pizza that you have selected by touching the Half, Third or Quarter button before the Pizza Description.

Ordering Half Pizzas
When you select a Pizza Size and a Pizza Description on the Order screen, e.g. “Large Thin New York”, a Half button will appear to the right of the Toppings button. If you touch the Half button and then another Pizza Description button e.g. “Farmhouse”, the program will change the first pizza on the receipt to read “½ Large Thin New York” and add “½ Farmhouse” beneath it. The Half button will then disappear until another pizza is selected.
Ordering Halves & Quarters
When you select a Pizza Size and a Pizza Description on the Order screen, e.g. “Large Thin New York”, Half and Quarter buttons will appear to the right of the Toppings button. At this point you can order two halves, as described above, or a half pizza and two quarters, or for four quarters.
If you touch the Half button and then another Pizza Description button e.g. “Farmhouse”, the program will change the first pizza to read “½ Large Thin New York” and add “½ Large Thin Farmhouse” beneath it. The Half button will then disappear.
However, the Quarter button will remain on screen. This allows you touch Quarter followed by another Pizza Description, e.g. “Oriental Express”. The program will now change the first (half) pizza on the receipt to read “¼ Large Thin New York”, leave the second unchanged as “½ Large Thin Farmhouse” and add “¼ Large Thin Oriental Express” (as shown to the left). The Quarter button will now disappear until another pizza is selected.

If you select a Pizza Size and Pizza Description on the Order screen and then touch the Quarter button followed by a Pizza Description, the program will adjust the first pizza on the screen to ¾ and add the new ¼ beneath. If you touch Quarter again, followed by a Pizza Description, the program will reduce the first pizza on the screen to ½ and add the new quarter to the receipt. (At this point the Half button will disappear.) Finally, if you touch Quarter for a third time, followed by a Pizza description, the program will adjust the first pizza on the screen to ¼ and add the last quarter to the receipt. At this point the Quarter button will disappear until another pizza is ordered.

You could stop after the first quarter and therefore take an order for a ¾ pizza and a ¼ pizza if you really wanted to but not many stores allow even their most awkward best customers to do that!
Ordering Halves, Thirds & Quarters
When you select a Pizza Size and a Pizza Description on the Order screen, e.g. “Large Thin New York”, Half, Quarter and Third buttons will appear to the right of the Toppings button.
No combination of thirds and halves or quarters can possibly add up to one (whole pizza), so if you touch either Half or Quarter, followed by a Pizza Description, the Third button will disappear or if you touch Third followed by a Pizza description, then Half and Quarter will disappear.
In other words, once you have selected a Pizza Size and Description, then touched Third followed by a Pizza Description, you must then touch Third again and select another Pizza Description to give you a total of three thirds.
Toppings on Fractions
You can add extra toppings to any fraction of a pizza by simply touching the Toppings button immediately after a pizza fraction has been chosen. You add or remove toppings in the normal way and then continue by selecting the next pizza fraction. If you go to Management > Occasional Menu > Menus > Pizza Size (buttons), the program allows you to set up special charges for half toppings.
Cooking Instructions
If customers make special requests about the preparation of food that they are ordering from you, inTouch make it easy for you to record them.
As soon as you have selected the first item being ordered by the customer a Cooking Instructions button will appear at the bottom of the Order screen. When you touch this button, the screen changes to one like the example below.

This screen allows you to add special instructions for the kitchen that will be printed on the receipt or kitchen printer. The instructions are printed underneath the last item of food that you added to the Order screen.
The text that appears on these buttons can be created and amended in Management > Occasional Menu > Menus > Cooking Instructions. You can make the program print these instructions in red in Management > Occasional Menu > Options > Receipt Printer.
These buttons should be set up to show all the common requests that you accept from customers. However, if a customer makes a special request that does not appear on this screen, touch the Other… button at the top left of the screen.
The screen will change to display a Cooking Instruction field. Use the on-screen keyboard to type in the special instruction made by this customer. Touch Enter when you have finished and the program will transfer the instruction that you have typed to the food order on the receipt and return to the screen shown above.
If you touch a cooking instruction button by mistake, or the customer changes their mind, touch the Remove button followed by the cooking instruction button that you want to remove from the order.
When you have finished adding cooking instructions to a food item, touch any one of the course buttons at the bottom of the screen to continue with the order.
Repeating a Customer’s Last Order
Whenever inTouch recognises the incoming telephone number of an existing customer, or you search for them and find them by name or address, the button shown below will appear at the bottom of the Order screen.

If you touch this button, the program will automatically fill the on-screen receipt with the food items that made up this customer’s last order. At this point, you can accept the order, add to it or amend the order.
If your customer wants to repeat exactly the same order that they made last time, then touch Next >>> and the program will accept the order on screen and move to the Payments screen.
You will notice that when you touch the Repeat Last Order button, the program stays on the Order screen. This allows you to add more food to the repeated order. So, if a customer asks for the same food as last time but with an extra garlic bread, all you need do is touch Repeat Last Order and then touch the button for Garlic Bread.
You can also amend a repeated order at this point. If the customer wants to repeat their last order but, for example, replace spare ribs with chicken wings, touch Repeat Last Order and then remove Spare Ribs and touch the button for Chicken Wings. Removing items from an order is described in full in the next section. It is not worth editing a repeated order if that will take you longer than simply taking a new order.
The Repeat Last Order button is only available as the first touch on the Order screen and will disappear from the screen as soon as you touch a the button of a food item.
Changing the Quantity of an item
If you are in an order you can change the quantity of an item.
While in an order on the right is a list of the items already on the order. If you use the arrows beneath to choose the item you want to change the quantity of and then use the + and - buttons to change the quantity of the item.
Removing Food Items from the Order Screen
As before, when you are taking an order from a customer the last food item that you selected is always highlighted on the receipt on the right of the screen.
To remove the last item ordered (i.e. the food item currently highlighted, touch the button shown below. The program will remove that food item from the Order screen and move the highlight bar up to the previous food item.

If the food item that you wish to remove from the order is not the last item that you selected, and therefore not the one highlighted, touch this button.

The program will highlight the previous food item on the receipt and will move up the order, an item at a time, each time that you touch ▲. When the item to be removed from the order is highlighted, touch the – button.
To move back down the Order screen, an item at a time, touch

When you have removed an item from the Order, continue with the order in the normal way, or touch Next >>> to move to the Payments screen, if the order is complete.
Amending an Order During the Order Process
Whilst you are still taking an order from a customer, you can make some changes to the food items ordered so far, for example if the customer remembers an extra topping for a pizza or a cooking instruction after you have moved on to another part of the order.
To amend a food item, touch the button shown below to move back through the order. The program will highlight the previous food item on the receipt and will move up the order, an item at a time, each time that you touch this button. Continue until the food item that you wish to amend is highlighted.

If you want to add a cooking instruction to a food item, then when the required food item is highlighted, touch Cooking Instructions and touch the appropriate button, or Other…, as described in a previous section.
As you move up the order and highlight different food items, you will notice that the Order screen either displays Toppings or the message “No Toppings Available With This Product”.
When a pizza, or other food item that has been set up to offer a choice of (extra) toppings, is highlighted simply touch the topping (or Hold) buttons to add or remove toppings in the normal way.
Once you have amended a food item, touch the button shown below to move back down the Order screen, an item at a time, and then touch a course button to continue ordering food, or touch Next >>> to move to the Payments screen.

Change Pizza
As you move up the order and highlight different food items, you will notice that when a pizza is highlighted, and the Order screen displays Toppings, then the button shown below appears at the bottom of the screen.

If you have ordered a pizza by mistake, or the customer changes their mind, highlight the pizza to be changed and touch Change Pizza. The program will now expect you to select the replacement pizza in the normal way, i.e. by touching Pizza Size and then Pizza Description, or by touching Pizza description and then Pizza Size.
If the pizza that you are replacing had extra toppings, the program will leave those toppings unchanged unless you use the Toppings button to remove or add to them. Again, changing a pizza in this way is only worth doing if it takes less time than deleting a pizza and ordering a new one.
Pausing an order
In the middle of an order you can pause it and then resume the order where you were up to.
This can be useful if more than one member of staff is taking orders on the same screen and one of them needs to leave the system mid-order to sort something out or a customer wants to take longer making a decision and you can server the next customer.
In the middle of an order, when you have entered some items, if you press and hold the next button the order will be paused.
On the main screen there will be a button that says "Paused" and if you press this it will take you back to the order.
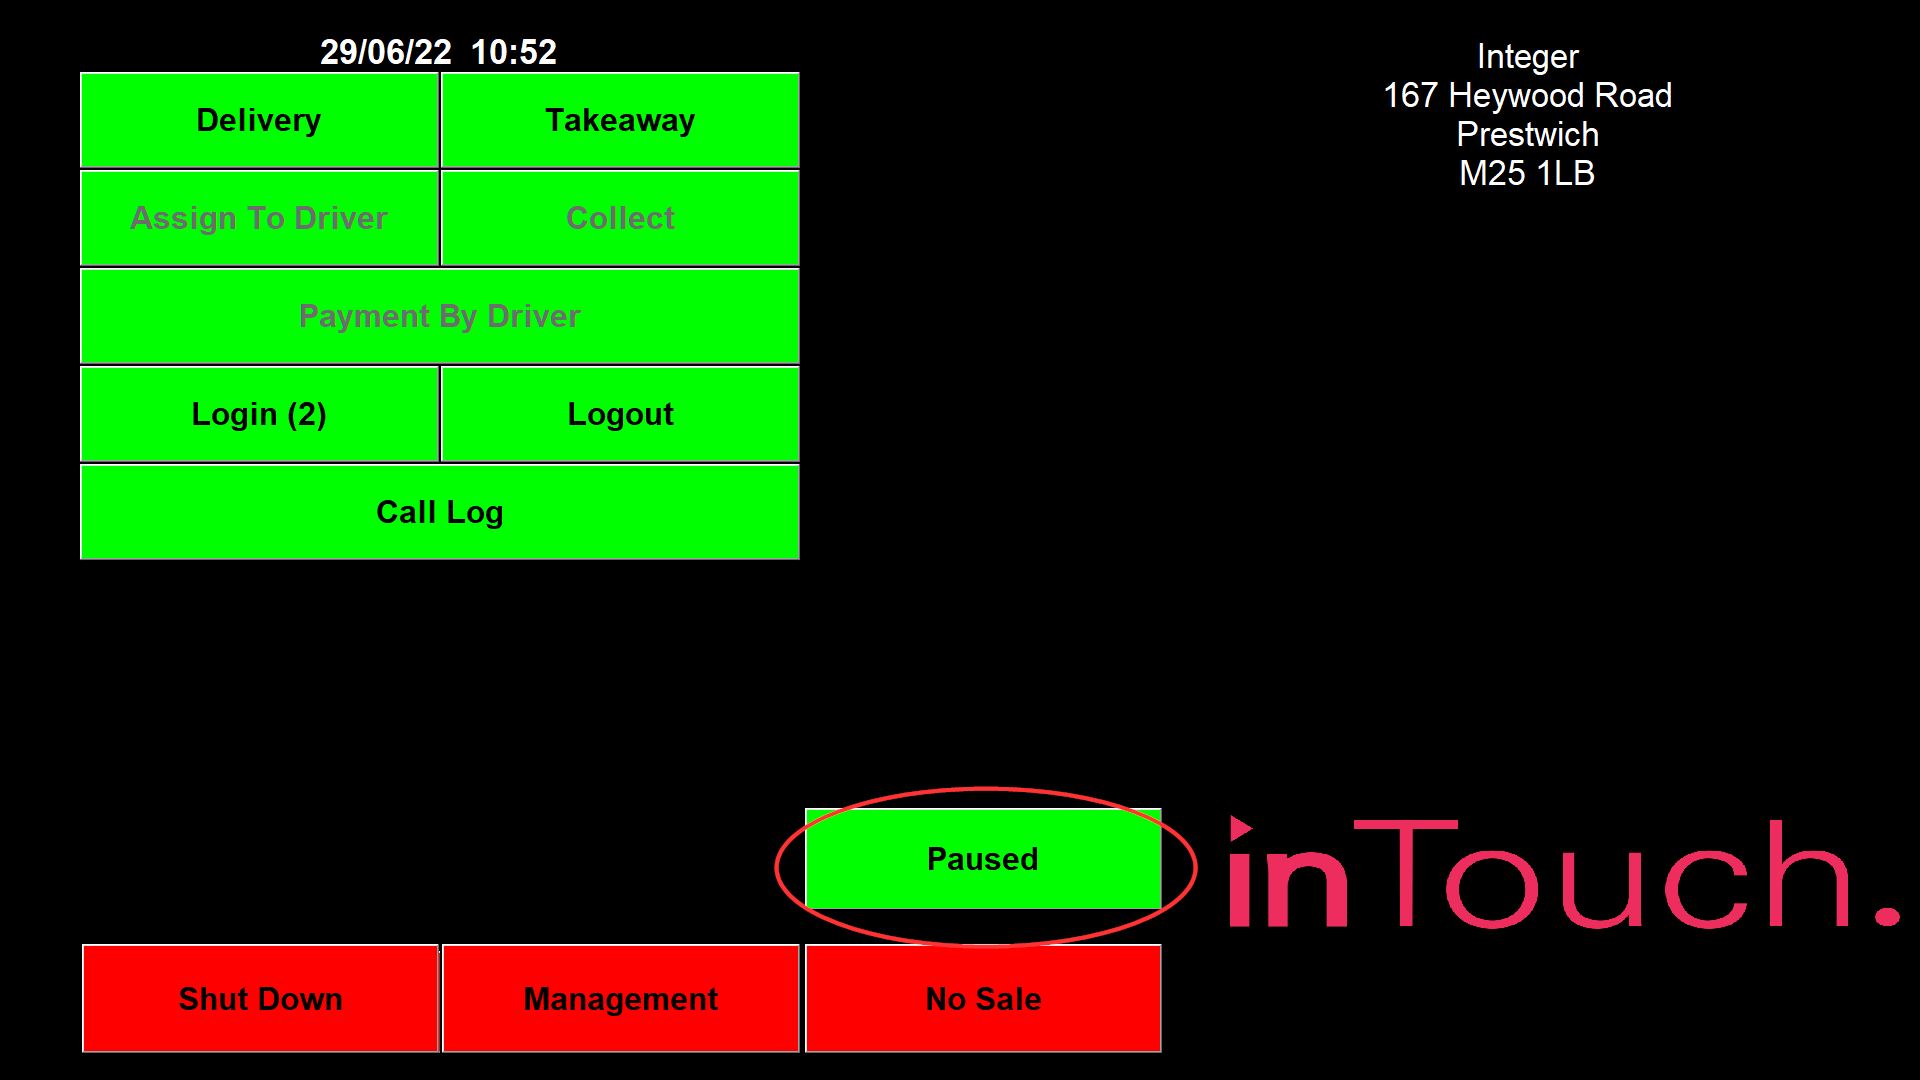
If you have already chosen a staff name, maybe you have the option to choose a member of staff before the order, it will have that name on the button instead of the word paused.
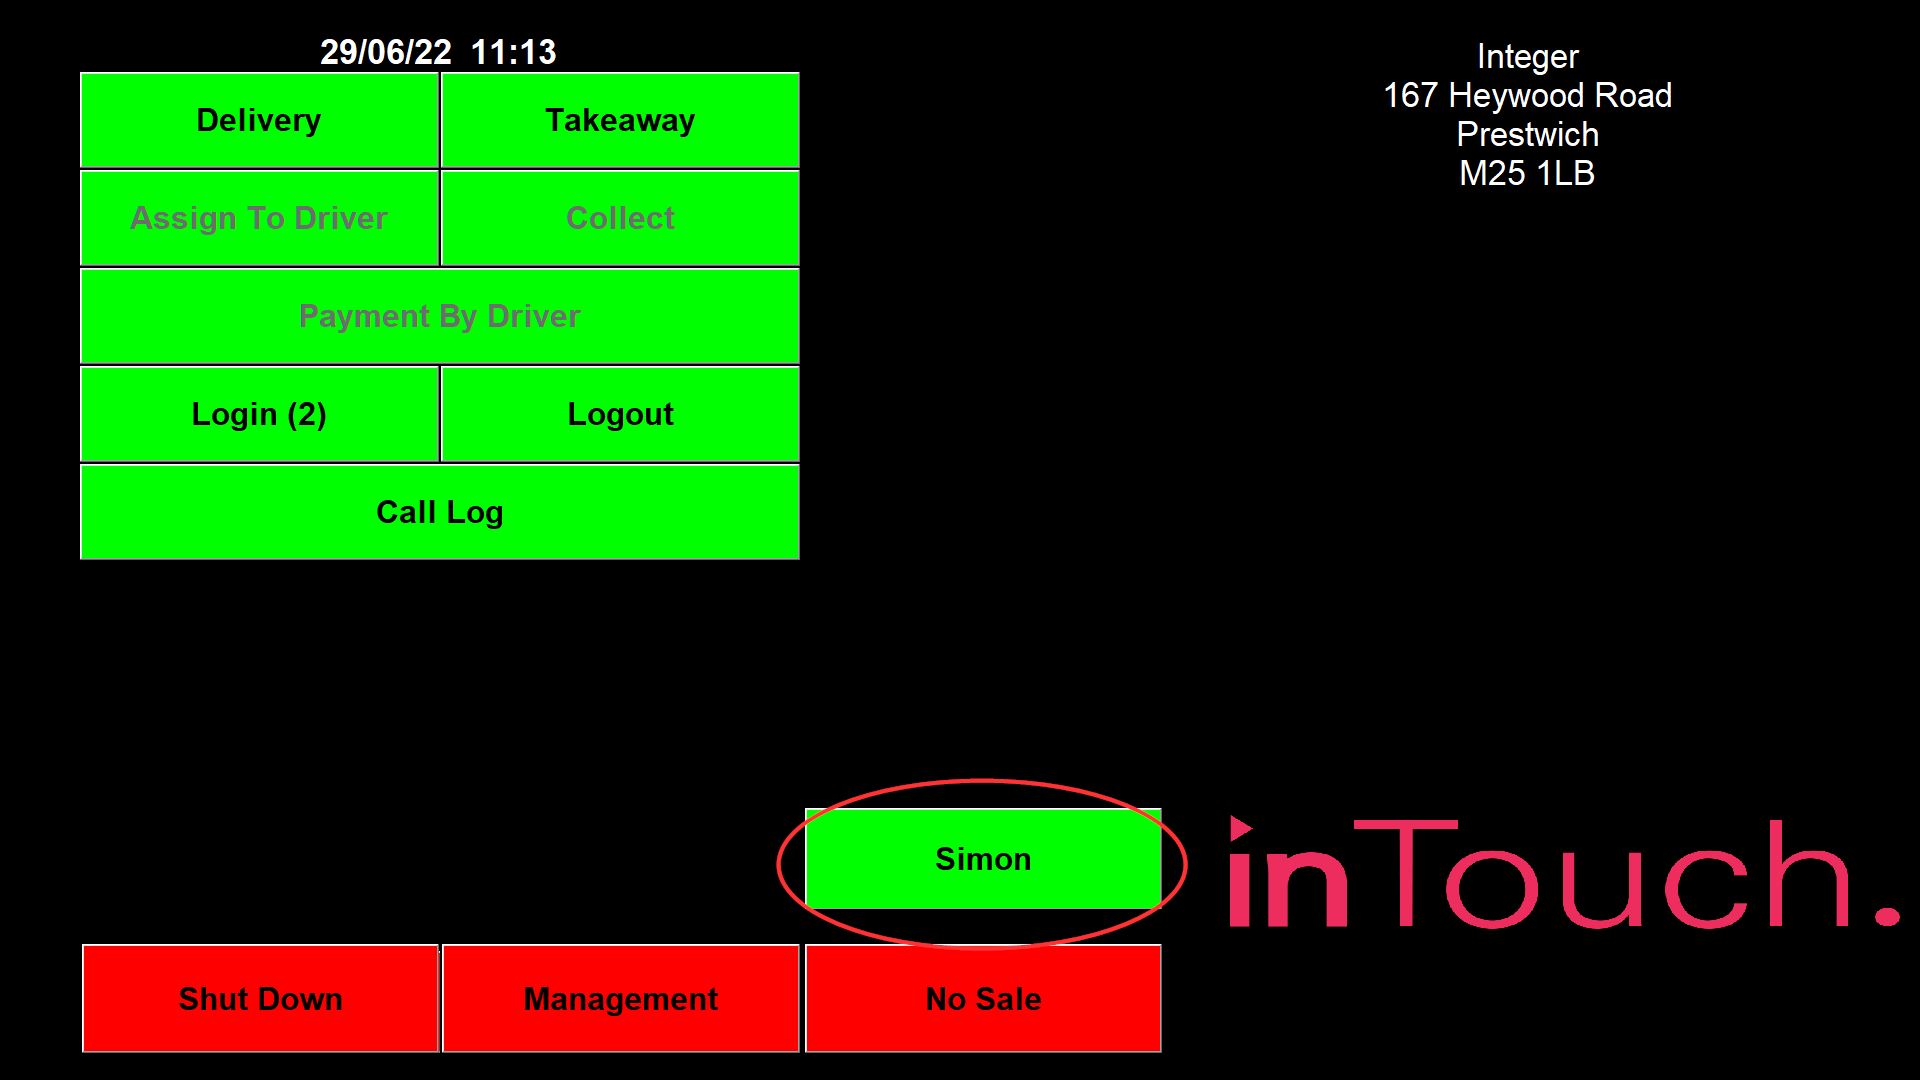
You can have up to 5 order paused at a time.
Selecting a Meal Deal
If you have created any Meal Deals in the program, as described in Management > Occasional Menu > Meal Deals, inTouch will check the food that has been ordered by the customer when you touch Next >>> at the end of the order. If the program finds that a Meal Deal, or more than one Meal Deal, applies to the food ordered, a list will appear on screen. The first item on the list is “No Meal Deal”, followed by the description of, and discount offered by, any other meal deals that the program has found to apply.
At this point you can either select a Meal Deal for the customer, or select “No Meal Deal”. You must touch one of the buttons on the list before the program will reveal the payments section of the Order screen.
If you touch No Meal Deal, the program will clear this list from the screen and move on to the payments section without giving any discount to the customer.
If you touch a Meal Deal button on the list, the program will clear the list from the screen and move on to the payments section where you will see that the Meal Deal discount and it’s description have been added to the bottom of the receipt and the total reduced accordingly.
The settings that you make in Occasional Menu > Options > Charges change the way that Meal Deals are handled at the end of an order. If Meal Deals are set to “List All”, the program will operate as described above. This is appropriate if only one meal deal is allowed per order.
If Meal Deals are set to “List all including Maximum”, in Occasional Menu > Options > Charges, an additional button, Maximum Meal Deal Discount, will appear at the bottom of the list of Meal Deals.
When set this way, inTouch will check if more than one meal deal can be applied at the same time and if so will automatically calculate the maximum discount available to the customer. The “Maximum Meal Deal Discount” button will show the amount of discount that will be given taking all the discounts that apply into account. You can now either select an individual Meal Deal or give the customer the maximum discount. As above, when you touch a button, the program will clear the list from the screen and move on to the payments section with the discount added to the receipt and the total reduced accordingly.
If Meal Deals are set to “Automatically Calculate Maximum” in Occasional Menu > Options > Charges, the program will not list all the applicable meal deals at the end of the order. Instead inTouch will calculate the maximum discount available to the customer and move to the payments section with that discount automatically transferred to the receipt on the customer’s order.
Payment Section of the Order Screen
When you have typed in all the food items ordered by the customer, touch the Next >>> button in the bottom right of the screen. The screen will change to that shown below.

This screen is designed to provide all the information that you need to complete an order. For example, if your procedure is to read back the order to the customer, confirm the price, the payment method and the delivery time, all of those details are shown on the screen.
For many orders, all the details shown on this screen will be correct, i.e. the customer will pay the amount shown, in cash, to the driver when he delivers, and you just need to touch the Finished button. The program will then print a receipt and the screen returns to the Main Menu where the number on the Assign To Driver button will have increased by 1.
However, this screen also allows you to change the payment method, the delivery method, the delivery time, give a discount or go back and amend the order or the customer details. Each will be described in turn.
Changing the Payment Method
When you take an order for delivery, inTouch will assume that the customer is paying in cash unless you change the Payment Method.

If you touch the above button, it will change to

When you touch it again, it will change to

And if you touch it again, it changes back to

If you take an order and leave the payment method as Cash, or change it to Cheque, the program will expect the driver to collect payment from the customer. If you change the payment method to C/Card, the program will understand that the customer has paid for the order in advance and will not expect the driver to collect payment.
If you change the payment method to C/Card, then when you touch Finished to complete the order, the screen will change to

Use the keypad on screen to enter the customer’s credit card details. Don’t worry about spaces, inTouch will add them automatically. The Enter button will move the pointer to the next field or you can simply touch the next field. Use the Delete button, which will remove the figure to the left of the pointer, if you make a mistake and then re-type.
Touch Accept when you have finished typing in the customer’s credit card details and the program will print a receipt and return to the Main Menu. If you touch Cancel, the program will return to the payments section of the Order screen.
The payment method is always displayed on the Assign to Driver screen and printed on the receipt. There is an option to print the customer’s credit card number on the receipt and also highlight “Credit Card Payment” in red (see Management > Occasional Menu > Options > Receipt Printer).
Note: inTouch does not store a customer’s credit card details.
Changing the Delivery Method
When you take an order for delivery, inTouch will assume that the customer is paying the driver when he delivers the order unless you change the Delivery Method.
The Delivery Method allows you to change a delivery order into a pickup and a takeaway into a delivery. It also makes clear to the driver or the server whether a customer has paid and allows inTouch to keep a track of the payments due from a driver.
If you touch the Delivery Method button, which always reads Delivery - Payment Due at first, the buttons shown below appear on screen.
The current payment method is always highlighted.

If you are taking a delivery order and the payment method is Cash or Cheque, the current delivery method will be Payment Due.
If you have changed the payment method to Credit Card, the delivery method will be Paid.
You will notice that the Delivery Method buttons are grouped. Delivery has Payment Due and Paid. Take Away has Payment Due, Paid and Paid & Taken. To alter the Delivery Method, simply touch one of the other buttons.
It might help to give a couple of examples of why you might want to change the Delivery Method at the end of an order.
First of all, an existing customer could telephone you, place an order and at some stage in the process, announce that they want to collect the order. Since the order will have begun with a telephone call, probably with caller identification, the program will have assumed that the order is to be delivered and when you reach the payments section, the Delivery Method button will display the text Delivery - Payment Due.
To change this order to a pickup, touch the Delivery Method button and when the screen shown on the previous page appears, touch Takeaway – Payment Due. inTouch will take you back to the payments section of the Order screen with the Delivery Method now changed. When you touch Finished at the end of the order, the program will print a receipt and the screen will return to the Main Menu where you will see that the number on the Collect button (not Assign To Driver) has increased by 1.
Secondly, an existing customer may walk in to the store, ask for food to be delivered to their home but pay for it now. The program enables you to identify them by their telephone number, name or address and you would then take an order as if the customer had telephoned. Since you have identified the customer, the program will have assumed that the order is to be delivered and when you reach the payments section, the Delivery Method button will display the text Delivery - Payment Due.
To show that this delivery order has been paid for, touch the Delivery Method button and when the screen shown on the previous page appears, touch Delivery - Paid. inTouch will take you back to the payments section of the Order screen with the Delivery Method now changed and will now expect no further payment from the driver.
In the above example, it may be that the customer does not identify themselves as an existing customer at the start of the order, in which case you would have begun the order as a Takeaway. As in the other examples, touch the Delivery Method button to reveal the screen shown on the previous page and then touch Delivery – Paid.
Note: If you want to establish whether an order is to be delivered to or collected by a customer at the beginning of every order, you can check the Ask if an Order is Delivery or Collection checkbox in Management > Occasional Menu > Options > Order Screen. The question, “Delivery?”, will then appear on screen at the beginning of each order; you must touch either Yes or No before inTouch will allow you to continue.
Changing the Delivery Time
inTouch allows you to set up a standard delivery time in Management > Occasional Menu > Options > Set Up. However, there may be times when you wish to adjust the standard delivery time or perhaps take an order for much later in the day.
When you have take a customer’s order and touched Next >>> on the Order screen, the payments section of the Order screen will show the Delivery Time for this order displayed on a button.
To alter the standard delivery time shown, touch the Delivery Time button and the screen shown below will appear.

There are two ways of altering the delivery time. If you touch the 30 Minutes button, the program will set the delivery time to 30 minutes from now. Touch 40 Minutes and the delivery time will be 40 minutes from now, and so on.
If you touch the + or – buttons above and below the hour display, inTouch will adjust the hour shown by one hour at a time. If you touch the + or - buttons above or below the minutes display, inTouch will adjust the minutes shown by five minutes at a time.
If you are using the system with a keyboard connected, you can also touch the hours and minutes fields and then type in the required time.
When you have changed the delivery time shown to that required, touch Finished and the program will return to the payments section of the Order screen with the amended delivery time on display.
Giving a Discount
inTouch can be set up to provide automatic meal deals and discounts in Management > Occasional Menu > Meal Deals. However, there may be occasions when you want to give a customer a special discount. Touch the Discount button on the payments section of the Order screen and the screen shown will appear.

If you want to reduce the total that the customer has to pay by an amount, use the keypad on screen to enter the figure. You do not need to type a decimal point; if you want to give a discount of £2.50, simply enter 250 and touch Accept.
If you want to reduce the total that the customer has to pay by a percentage, use the keypad on screen to enter the percentage. Ignore the decimal point; if you want to reduce the total by 10%, simply enter 10 and touch the % button.
If you make a mistake, touch C and the program will clear the figures you have entered, one at a time.
As soon as you touch Accept or %, the screen will change to one headed Select A Reason.
The text that appears on the buttons on this screen is created in Management > Occasional Menu > Menus > Reasons.
These buttons should be set up to show all the common reasons why you might give discounts to customers. However, if you are giving a discount for a reason that does not appear on this screen, touch the Other… button at the top left of the screen.
The screen will change to display an Enter Reason field. Use the on-screen keyboard to type in the reason for discount for this customer. Touch Enter when you have finished.
When you have selected a reason for the discount, the program will return to the payments section of the Order screen where you will see that the discount and the reason have been transferred to the food order on the receipt, and the total due reduced accordingly.
Assigning an Assistant to the Order
The program can be set up to ask automatically for the name of the server at the beginning (or end) of the order in Management > Occasional Menu > Options > Order Screen. If this option has not been set, you have the chance to enter your assistant name, or change the name of the assistant, on the payment section of the Order screen.
Touch the button below and the screen will change to show every assistant who has been entered in the program.

Touch the button with your name on it and the program will return to the payments section with the assistant name now shown on the Assistant button.

Editing an order
If , before finalising the order, you touch the Edit Order button, inTouch takes you back to the Order screen. Amending or adding to an order has already been described in a previous section of this guide. When you touch Next >>> on the Order screen, the program will return to the payments section.
If you touch the Name or Delivery Address fields, the program takes you to the Customer Details screen for this customer and allows you to amend their details or create a new delivery address. Amending a customer’s details has been described in full in a previous section.
Finishing an Order
Touch the button shown below at anytime on the payments screen to abandon this order. inTouch asks you to touch Yes to confirm and then takes you back to the Main Menu. If you touch No, the program returns to the payments screen.

When you have made any of the above amendments to the order and you are satisfied that all the details on screen are correct, touch the button shown below.

The program will now print a receipt and the screen will return to the Main Menu where you will see that the number on either the Assign To Driver button or the Collect button has increased by 1.
There are many options that cover what should appear on the receipt and when or where is should be printed; they are covered in full in Management > Occasional Menu > Options > Receipt/Kitchen Printing.
Assigning a Delivery Order to a Driver
The Assign To Driver button represents the second stage of the delivery order process. You have taken an order, the food has been prepared and is now ready to be given to a driver for delivery to the customer.
Whenever you take a delivery order from a customer, the number shown on the button below on the Main Menu increases by 1. This number indicates the number of delivery orders that are being prepared and have not yet been given to a driver for delivery.

The Assign to Driver screen is mainly intended for you complete the second stage in the order process and give orders to drivers for delivery, but you can also change the payment method, or go back and edit an order, reprint a receipt or cancel an order.
When an order is ready to leave the store, touch the Assign To Driver button and a screen like the one shown below will appear.

This screen shows all the orders that are currently being prepared. Each line shows the order number, the time that the order is due to be delivered, the customer’s name, first line of their address and post code, and finally the total amount due.
The orders are listed on screen according to the time that they were received. The oldest order is at the top of the list and the last order that you received at the bottom. There is an option to remove the postcode from this display in Management > Occasional Menu > Options > Set Up.
If an order has not yet been assigned to a driver when the time reaches 10 minutes before your standard delivery time, inTouch will add “10 minutes to go for Delivery” to the display and count down to 1 minute.
If an order reaches one minute after your standard delivery time and has still not been assigned to a driver, the program will add “1 minutes late” to the display and keep counting up the minutes until the order is assigned to a driver.
Both of these are intended to attract your ATTENTION!
To select an order to be given, or assigned to a driver, simply touch the centre of a line on the screen. The line will change colour and the button below will appear at the bottom of the screen. If you touch a line by mistake, touch it again and it will go back to the original colour.

If you want to give more than one order to the same driver for the same delivery run, simply select each order to be assigned by touching them. If you ever want to select all the orders listed on screen to be assigned to the same driver, there is a Select All button provided for that purpose.
When all the orders to be assigned have been selected and are highlighted, touch Accept. The screen will change to show all the drivers’ (and servers’) names on buttons. Touch the button that shows the name of the driver who will be delivering the order(s).
If there are now no more orders left to assign, the program will return to the Main Menu. If there are other orders left on the Assign to Driver screen, the program will return to that screen in case you want to assign another order to a different driver.
If you do want to assign another order to a different driver, repeat the process described above. If there no other orders are ready to be assigned at the moment, touch Cancel and the program will return to the Main Menu.
When you return to the Main Menu, you will notice that the number shown on the Assign To Driver button has now decreased by the number of orders that you have just assigned and the number on the Payment By Driver button has now increased by the same number.
You can stop the process of assigning orders to drivers at anytime by touching the Cancel button. The program will return to the Main Menu.
Other Functions on the Assign to Driver Screen
If a customer calls back to say that they want to pay by cheque instead of cash, for example, you can change the payment method for an order on the Assign to Driver screen. When the orders are listed on screen, touch the right hand side of a line and the payment method shown will change from Cash to Cheque. Touch it again and it changes from Cheque to C/Card; touch it once more and it changes back from C/Card to Cash.
You can also use the Assign to Driver screen to go back and edit an order. When the orders are listed on screen, touch the left hand side of a line, in the area of the order number, and the program will take you back to the payments section. From here you can edit the order, as previously described, then touch Finished to return the Assign to Driver screen.
When you edit an order starting from the Assign to Driver screen, you will notice that a new button appears on the payments section of the Order screen. Touch the button below to reprint the receipt for this order.

Tip! You can define the text that appears at the top of a reprinted receipt, e.g. “Reprinted Order”, and choose to print it in red, in Management > Occasional Menu > Options > Receipt Printer. This will help make it clear to all staff that the receipt is for a reprinted order and not a new order.
When you choose to go back and edit an order, inTouch will also allow you to cancel the order, as has been described in a previous section. However, there is one important difference.
When you cancel an order during the order process, you are cancelling an order that has not been completed and inTouch simply asks you to touch Yes to confirm. If you go back to edit an order from the Assign to Driver screen and then cancel it, you are cancelling a completed order and inTouch will ask for a reason for cancellation.
When you edit the order and return to the payments section of the Order screen, touch Cancel and then touch Yes to confirm that you wish to cancel the order. The screen will change to one headed Select A Reason.
The text that appears on the buttons on this screen is created in Management > Occasional Menu > Menus > Reasons. These buttons should be set up to show all the common reasons why you might cancel orders. However, if you are cancelling an order for a reason that does not appear on this screen, touch Other… at the top left of the screen.
The screen will change to display an Enter Reason field. Use the on-screen keyboard to type in the reason for cancelling this order and touch Enter. The program will return to the Main Menu where you will notice that the number on the Assign To Driver button has decreased by 1.
Taking Payment from a Driver
The Payment By Driver button represents the third and final stage of the delivery order process. You have taken an order, the order has been delivered by a driver and you now require payment from that driver.
Whenever you assign a delivery order to a driver, the number shown on the button below on the Main Menu increases by 1. This number indicates the number of delivery orders that have been given to drivers for delivery and for which you have not yet been paid.

The program will allow drivers to pay after just one delivery, after several deliveries or at the end of the shift after all of their deliveries.
When a driver is ready to hand over payment, touch the Payment By Driver button and a screen appears showing all the staff buttons (as set up in Management > Occasional Menu > Options > Menus). Only the buttons that apply to drivers who currently owe money are active and available and each button also shows the amount that the driver currently owes. (There is an option available to remove this amount from the buttons in Management > Occasional Menu > Options > Set Up).
To select the driver who is handing over payment, simply touch the button with their name on it. The driver button will change colour and the button shown on the right will appear at the bottom of the screen. If you touch a button by mistake, touch it again and it will go back to the original colour.

If you want to take payment from more than one driver at the same time, select each driver by touching all the buttons with their names on.
When all the drivers have been selected and are highlighted, touch Accept. The screen will now display a numeric keypad and will show the Total Due on the right hand side. Use the keypad to enter the amount being paid by the driver; this amount will appear in the Tendered field.
If the driver tenders the exact amount due, type in the total and touch Accept. If the driver tenders more than is owed, type in the amount and the program will calculate and display the Change Due. Touch Accept when you no longer need the change to be displayed on screen. £5, £10 and £20 buttons are provided for quick entry of a figure. (There is an option available to prevent the Change screen from appearing in Management > Occasional Menu > Options > Set Up).
When you touch Accept, the program will return to the Main Menu where you will notice that the number on the Payment By Driver button has decreased by the number of orders that have just been paid for.
If, for some reason, a driver is going to hand over less than the total that they owe, touch the button with their name on it but this time leave your finger on the driver button for at least one second.
The program will now list on screen all the orders that make up the total that this driver currently owes. Select the order for which the driver is paying less than the amount due by touching the centre of the line and leaving your finger on the line for at least one second.
The program will now display this numeric keypad. Use the keypad to enter the amount actually being paid by the driver and touch Accept.

You do not need to type a decimal point; if you want to record a payment of £10.00, simply enter 1000 and touch Accept.
If you make a mistake, touch C and the program will clear the figures you have entered, one at a time.
As soon as you touch Accept, the screen will change to one headed Select A Reason.
The text that appears on the buttons on this screen is created in Management > Occasional Menu > Menus > Reasons.
These buttons should be set up to show all the common reasons why you might accept short payment from a driver. However, if you are accepting short payment for a reason that does not appear on this screen, touch the Other… button at the top left of the screen.
The screen will change to display an Enter Reason field. Use the on-screen keyboard to type in the reason for short payment from this driver. Touch Enter when you have finished.
When you have selected a reason for the discount, the program will return to the Amount Tendered screen. Touch Accept and inTouch will return to the Main Menu. The program will amend the record of this order to show the short payment and the reason for it.
You can abandon the process of taking payment from drivers at anytime by touching the Cancel button. The program will return to the Main Menu.
The Payment by Driver screen is mainly intended for you to take payment from drivers, but you can also re-assign an order, change the payment method, go back and reprint a receipt, or edit or cancel an order.
When you list the orders to be paid for by a particular driver and then touch an order on the list, two further buttons appear at the bottom of the screen, Accept and Un-Assign Driver.
If you touch Accept, the program will continue with the process of a driver handing over payment as already described.
Making Alterations to Assigned Orders
As we have just described, when you touch the Payment By Driver button on the Main Menu, a screen appears showing the buttons of all drivers who currently owe money with the amount that each driver currently owes.
At this point, you would normally touch the button that applies to the driver handing over payment and then touch Accept to complete the payment process.
However, if you have any queries about an order, or you want to go back and make alterations to an order, touch the button of the driver who has been assigned that order and leave your finger on the driver button for at least one second.
The program will now list on screen all the orders that make up the total that the driver currently owes. You can select an order for viewing or editing by touching the line.
If a driver returns from a delivery with a cheque instead of cash, for example, you can change the payment method for an order from here. When the orders are listed on screen, touch the right hand side of a line and the payment method shown will change from Cash to Cheque. Touch it again and it changes from Cheque to C/Card; touch it once more and it changes back from C/Card to Cash.
You can also go back and edit an order from here. When a driver’s orders are listed on screen, touch the left hand side of a line, in the area of the order number, and the program will take you back to the payments section. You can edit the order, as previously described, then touch Finished to return to the Payment by Driver screen.
When you edit an order starting from the Payment by Driver screen, you will notice that a new button appears on the payments section of the Order screen. Touch this button to reprint the receipt for this order.

When you choose to go back and edit an order, inTouch will also allow you to cancel the order, as has been described in a previous section. However, there is one important difference.
When you cancel an order during the order process, you are cancelling an order that has not been completed and inTouch simply asks you to touch Yes to confirm. If you go back to edit an order from the Payment by Driver screen and then cancel it, you are cancelling a completed order and inTouch will ask for a reason for cancellation.
When you edit the order and return to the payments section of the Order screen, touch Cancel and then touch Yes to confirm that you wish to cancel the order. The screen will change to one headed Select A Reason.
The text that appears on the buttons on this screen is created in Management > Occasional Menu > Menus > Reasons. These buttons should be set up to show all the common reasons why you might cancel orders. However, if you are cancelling an order for a reason that does not appear on this screen, touch Other… at the top left of the screen.
The screen will change to display an Enter Reason field. Use the on-screen keyboard to type in the reason for cancelling this order. Touch Enter when you have finished. When you have selected a reason for the cancellation, the program will return to the Main Menu where you will see that the number on the Payment by Driver button has decreased by 1.
If you touch Cancel, inTouch will go back to the driver button screen.
Status Review
If you receive a telephone call from a customer who currently has an order in progress, inTouch will display a Status screen like the one shown below. An order in progress is one that has not yet been assigned to a driver or one that has been assigned to a driver but not yet paid for.
This screen will appear automatically if the incoming telephone number is recognised. If the incoming number is from a withheld number, then the Status screen will appear when you have identified the customer by typing in their telephone number, their name or part of their address.
inTouch assumes that a caller who telephones for a second time when they have an order in progress, is probably telephoning for one of three reasons; to amend their order, to cancel their order or to find out how long they will have to wait. The Status screen enables you to handle all of these quickly.

This screen shows the customer’s telephone number, their name and address, the time of their order and the order number. The program shows whether or not the order has yet been assigned to a driver and if so, how long ago. This provides the answer to customers’ questions like “How much longer will it be?” and “Is my food on it’s way yet?”.
If the customer wants to add to, or make changes to their order, touch Edit Order. inTouch will take you back to the Order screen with this customer’s order displayed on the receipt on the right hand side. Amending an order has been described in full in an earlier section of this guide. When you have amended the order, touch Next and the program will move to the payments section of the Order screen.
It may be that a customer is calling back, for example, to say that they will pay by credit card instead of cash. If so, amend the payment method on the payment screen and touch Finished. The program will return to the Main Menu.
If the customer wants to cancel their order, touch the Cancel Order button on the Status screen. The program will display the message “Cancel Order?” on screen. If you touch No, the message will disappear and the order will remain on the system. If you touch Yes, the screen will change to one headed “Select A Reason” where you must touch the button that applies to this cancelled order. The process of cancelling orders has been described in full in an earlier section of this guide.
There may be occasions when a customer calls wanting not to amend an order but to place a completely new order in addition to the first order. If this happens, touch New Order and the program will take you back to the Order screen where you can begin the order process again.
When the Status screen is displayed, you can touch the Main Menu button at anytime to return to the Main Menu.
Selling Prompts
You may find that inTouch gives you an on-screen prompt at the beginning of each order, for example “Thank you for calling, Pizza Patrol. My name is …….”, or prompts you to ask the customer questions at the end of an order, for example, “Would you like any Garlic Bread?” or “Would you like a drink with your order?”.
This means that either Pre-order or Post-order prompts have been set up in Management > Occasional Menu > Selling Prompts. Creating and amending these prompts is described in full in a later section.
If inTouch displays a prompt at the beginning of the order, touch OK and the program will move on to the Order screen. If the program prompts you to ask the customer a question at the end of the order, it will also ask you if you want to “Edit Order?”. Touch No and the program will go straight on to the payments screen; touch Yes and inTouch will take you back to the Order screen to add to or amend the order.

Take Away Orders
When you touch the Take Away button on the Main Menu, the program moves directly to the Order screen with your menu, as below.
The operation of the Order screen and the payments screen and many of the functions available on them, have already been covered in full in this User Guide. This section will concentrate on functions that are unique to the Take Away screen and refer you to other sections where appropriate.

You will notice that the box underneath the receipt that would usually display a delivery customer’s name and address simply contains the words “Take Away”. If you are only interested in taking an order as quickly as possible and you do not want to identify the customer in any way, then select the food from the menu screens in the normal way.
It is possible however, to attach a name to a customer on this screen, or to add a customer to the database, or to search for an existing customer.
First of all, if you check the Prompt For Customer Name On Take Away box in the Management > Occasional Menu > Options > Order Screen section, the program will always go first to a Customer Name screen with an on-screen keyboard when you touch Take Away on the Main Menu.
If you type in the name of a waiting customer, the program will display their name on screen (so that you can address them) and also print it on the receipt. Touch Enter when you have typed in their name (or left the Customer Name field blank) to move on to the Take Away screen.
New or Existing Customers ordering Take Aways
If you have the time, you can ask a customer in the store if they would like to be added to the customer database. This will enable you to send them menus and special offers in the future. To add a new customer to the database, touch the Name & Address field on the Take Away screen which currently contains the words “Take Away”.
The program takes you to the Search screen where you type in the customer’s telephone number and touch Continue ►. inTouch will now take you to the Customer Details screen where you add the name, address and other details of the new customer and touch Accept. The program will then take you back to the Take Away Order screen with this customer’s name and address now filled in the Name & Address field.
Adding a new customer from the Search screen is described in full in the sections headed Adding a New Customer before Taking an Order and Adding a New Customer without using a Postcode.
If you type in the telephone number of an existing customer and touch Continue ► on the Search screen, the program will take you straight to the Take Away Order screen with that customer’s name and address displayed in the Name and Address field.
You can also use the Search screen to search for and find existing customers by typing in their name or part of their address. Once you have found them, inTouch will return to the Take Away Order screen with the customer’s name and address displayed in the Name and Address field. This has been described in full in the section headed Customers who cannot be Identified by Telephone Number.
If you touch ◄ Cancel when the Search field is blank, inTouch returns to the Take Away Order screen with the Name & Address field unchanged.
Take Away Order Screen
There is no difference between the way that food is selected on screen for a take away order and for a delivery order. Variations during the order process such as, pizza toppings, pizza fractions, cooking instructions, adding and removing items, are described in full elsewhere in this User Guide. When you have selected the food ordered by the customer, touch Next >>> and inTouch will move to the payments section of the Order screen.
Take Away Payment Screen
As with a delivery order, the payment screen allows you to make changes to the payment method, the collection time, the customer name and address (if applicable), give a discount, go back and edit an order and record which server took the order. These functions have been described in full in the sections beginning Payment Section of the Order Screen.
Unless you have changed the standard setting on the program, the Delivery Method will read “Take Away – Payment Due”. There is an option to change the Default Take Away Method in Management > Occasional Menu > Options > Order Screen. Touch the Delivery Method button to display, and select one of, the other delivery methods available.
The default delivery method should be set to follow your normal practice. If you take payment from the customer when they place their order, the default delivery method should be set to “Take Away – Paid”; if you take payment from the customer when you hand them their food, it should be set to “Take Away – Payment Due”.
The program assumes that orders which are taken with the delivery method of either “Take Away – Payment Due” or “Take Away – Paid”, have to be prepared and then handed to the customer and so they are transferred to the Collect button and screen (see next section).
The third delivery method applying to takeaways, “Take Away – Paid & Taken” is really intended for customers who buy a can of drink, or anything that may be handed over without cooking or preparation. Orders taken with this delivery method are not transferred to the Collect button or screen.
When you touch Delivery Method on the payments screen, the program also gives you the chance to select “Delivery – Payment Due” or “Delivery – Paid”. This enables you to take an order from a customer who, for example, calls in the store but wants the food delivered to their home. Select “Delivery – Paid” if the customer pays now and “Delivery – Payment Due” if the customer will pay the driver when he delivers the order.
When you touch Finished at the end of a takeaway order with the delivery method set to either “Take Away – Paid” or “Take Away – Paid & Taken”, the program displays a numeric keypad with the Total Due on the right hand side. Use the keypad to enter the amount being paid by the customer; the figures that you type appear in the Tendered field.
If the customer tenders the exact amount due, type in the total and touch Accept. If the customer tenders more than is due, type in the amount and the program will calculate and display the Change Due. Touch Accept and the program will return to the Main Menu. £5, £10 and £20 buttons are provided for quick entry of a figure.
Collect screen
The Collect button on the Main Menu allows you to complete a takeaway or pickup order that was placed some time ago. You should touch this button when you are ready to hand over the order to the customer.
Whenever you take an order from a customer where the delivery method is set to “Take Away – Payment Due” or “Take Away –Paid”, or you take a telephone order where the customer arranges to pick up the food, the number shown on the button below increases by 1.

Touch Collect and a screen like the one shown below will appear.

The operation of this screen and the functions available are very similar to the Assign to Driver screen.
This screen shows all the takeaway orders that are currently being prepared. Each line shows the order number, the time that the order should be ready, the customer’s name (if used) and the amount due.
The orders are listed on screen according to the time that they were taken. The oldest order is at the top of the list and the last order that you took at the bottom.
If an order has not yet been handed to a customer when the time reaches 10 minutes before your standard collection time, inTouch will add “10 minutes to go for Delivery” to the display and count down to 1 minute.
If an order reaches one minute after your standard collection time and has still not been handed to a customer, the program will add “1 minutes late” to the display and keep counting up the minutes until the order is collected.
Both of these are intended to attract your ATTENTION!
To select an order to be handed to a customer, simply touch the centre of a line on the screen. The line will change colour and the button below will appear at the bottom of the screen. If you touch a line by mistake, touch it again and it will go back to the original colour.

If you want to hand over more than one order at the same time to customers, simply select each order to be collected by touching them. If you ever want to select all the orders listed on screen to be handed over to customers, there is a Select All button provided for that purpose.
When all the orders to be handed over have been selected and are highlighted, touch Accept.
If you are handing over an order that was “Take Away – Paid” inTouch will return to the Main Menu. If the order was “Take Away – Payment Due” the program will display a numeric keypad with the Total Due on the right hand side. Use the keypad to enter the amount being paid by the customer; the figures that you type appear in the Tendered field.
If the customer tenders the exact amount due, type in the total and touch Accept. If the customer tenders more than is owed, type in the amount and the program will calculate and display the Change Due. Touch Accept when you no longer need the change to be displayed on screen. £5, £10 and £20 buttons are provided for quick entry of a figure.
When you touch Accept, the program will return to the Main Menu.
When you return to the Main Menu, you will notice that the number shown on the Collect button has now decreased by the number of orders that you have just handed over to customers.
You can stop the process of handing over orders to customers at anytime by touching Cancel. The program will return to the Main Menu.
From the Collect screen, you can also alter the payment method (by touching the right hand side of the order), edit or cancel an order or reprint a receipt (after touching the left hand side of the order). These functions operate in exactly the same way as they are described in the section headed Other Functions on the Assign to Driver Screen.