Printers
- How to install the Star TSP143II (USB)
- How to install the Integer U80II (USB)
- How to share your printer and add it to another computer
- Adding a logo to a Star TSP100 printer
- Installing the Bixolon Boxedge printer.
- How to install the Integer U80II (Ethernet)
How to install the Star TSP143II (USB)
Unbox your Star TSP143II (USB)

Plug the power cable into the back of the printer and plug socket

Then plug the USB cable into the back of the printer and USB port into your computer

Once the green light is on go to 'Control Panel'

Click on 'Devices and Printers'

Double click on 'Star TSP100 Cutter (TSP143)'

Click the 'Printer' tab

Then click on 'Properties'

Click in the box that says 'Star TSP100 Cutter (TSP143)'

Rename it to 'Receipt'

Then click 'OK'

To check that the printer works go to 'Properties'
In the 'General' tab

At the bottom click on 'Print Test Page'

This will then do test page

Then on the Server in inTouch go to 'Management'

Click on 'Occasional Menu'

Then 'Options'

In the 'Receipt' tab

You will then see 'Printer Type'

Click on the drop down

Select 'Star TSP143'

Then 'Save & Exit'

And 'Exit'


Then just do a test print

How to install the Integer U80II (USB)
***Please call us to get the U80II printer driver***
Unbox your Integer U80II (USB)

Plug the power cable into the back of the printer and plug socket
Then plug the USB cable into the back of the printer and USB port into your computer
Turn the printer on

Once the green light is on go to 'File Explorer'

Click on 'This PC'

Then go to 'C: Drive'

Click on the 'Integer' folder

Open the folder 'Setup_U80 V1.12' folder

Double click on the 'Setup.exe'

Click on the 'Receipt' drop down and select 'U80II'

Click on 'Next'

And 'Next' again

Then click on 'Install'

Once the driver has installed click 'OK'

You will then need to go to the 'Control Panel'
Click on 'Devices and Printers'
Double click on 'U80II(U)'

Click the 'Printer' tab
Then click on 'Properties'
Click in the box that says 'U80II(U)'
Rename it to 'Receipt'
Then click 'OK'
To check that the printer works go to 'Properties'
In the 'General' tab
At the bottom click on 'Print Test Page'
This will then do test page
Then on the Server in inTouch go to 'Management'
Click on 'Occasional Menu'
Then 'Options'
In the 'Receipt' tab
You will then see 'Printer Type'
Click on the drop down
Select 'Epson Thermal'

Then 'Save & Exit'
And 'Exit'
Then just do a test print
How to share your printer and add it to another computer
In control panel, go to Device and Printers, and printer properties

Go to 'Sharing' tab and tick 'Share this printer'

Then go to the 'Security' tab allow all permissions for 'Everyone'.

If 'Everyone' isn't there, click 'Add' and then type "Everyone" and click 'OK'.

Go back to 'Control Panel' and click 'Network and Sharing Centre'

Click 'Change advanced sharing settings'

In 'Private' settings:
-Select 'Turn on network discovery' and tick 'Turn on automatic setup of network connected devices.
-Select 'Turn on file and printer sharing'

In 'Guest or Public' settings:
-Select 'Turn on network discovery'.
-Select 'Turn on file and printer sharing'

In 'All Networks' settings:
-Select 'Enable file sharing for devices that use 40- or 56- bit encryption'.
-Select 'Turn off password protected sharing'

Open 'File Explorer' and right click your C: Drive and click 'Properties'.

Go to the 'Sharing' tab and click on 'Advanced Sharing'


Add 'Everyone' and allow all permissions. 'Apply' and click 'OK'


Once again, go to the 'Sharing' tab, click 'Advanced Sharing', tick 'Share this folder', click 'Permissions' and add "Everyone".


Click 'The printer that I want isn't listed:

Add a local printer

Keep clicking "Next" until it asks for the "printer name". Put:
"\\server\reciept"

Adding a logo to a Star TSP100 printer
If you go into Control Panel by holding the windows key and pressing R to bring up the run box and typing control panel.
![]()
Then choose Devices and Printers.
![]()
Choose the printer you want the logo on (usually receipt).
![]()
Choose printer and then on the drop down choose properties.
![]()
Choose TSP100 Config.
![]()
Click Launch Configuration Application.
![]()
The choose Star Line Mode and click OK.
![]()
The Star utility will now be displayed.
![]()
First choose Image list.
Select the image you want to be printed.
Then choose Logos & Cropping and select the image to be at the top and centred.
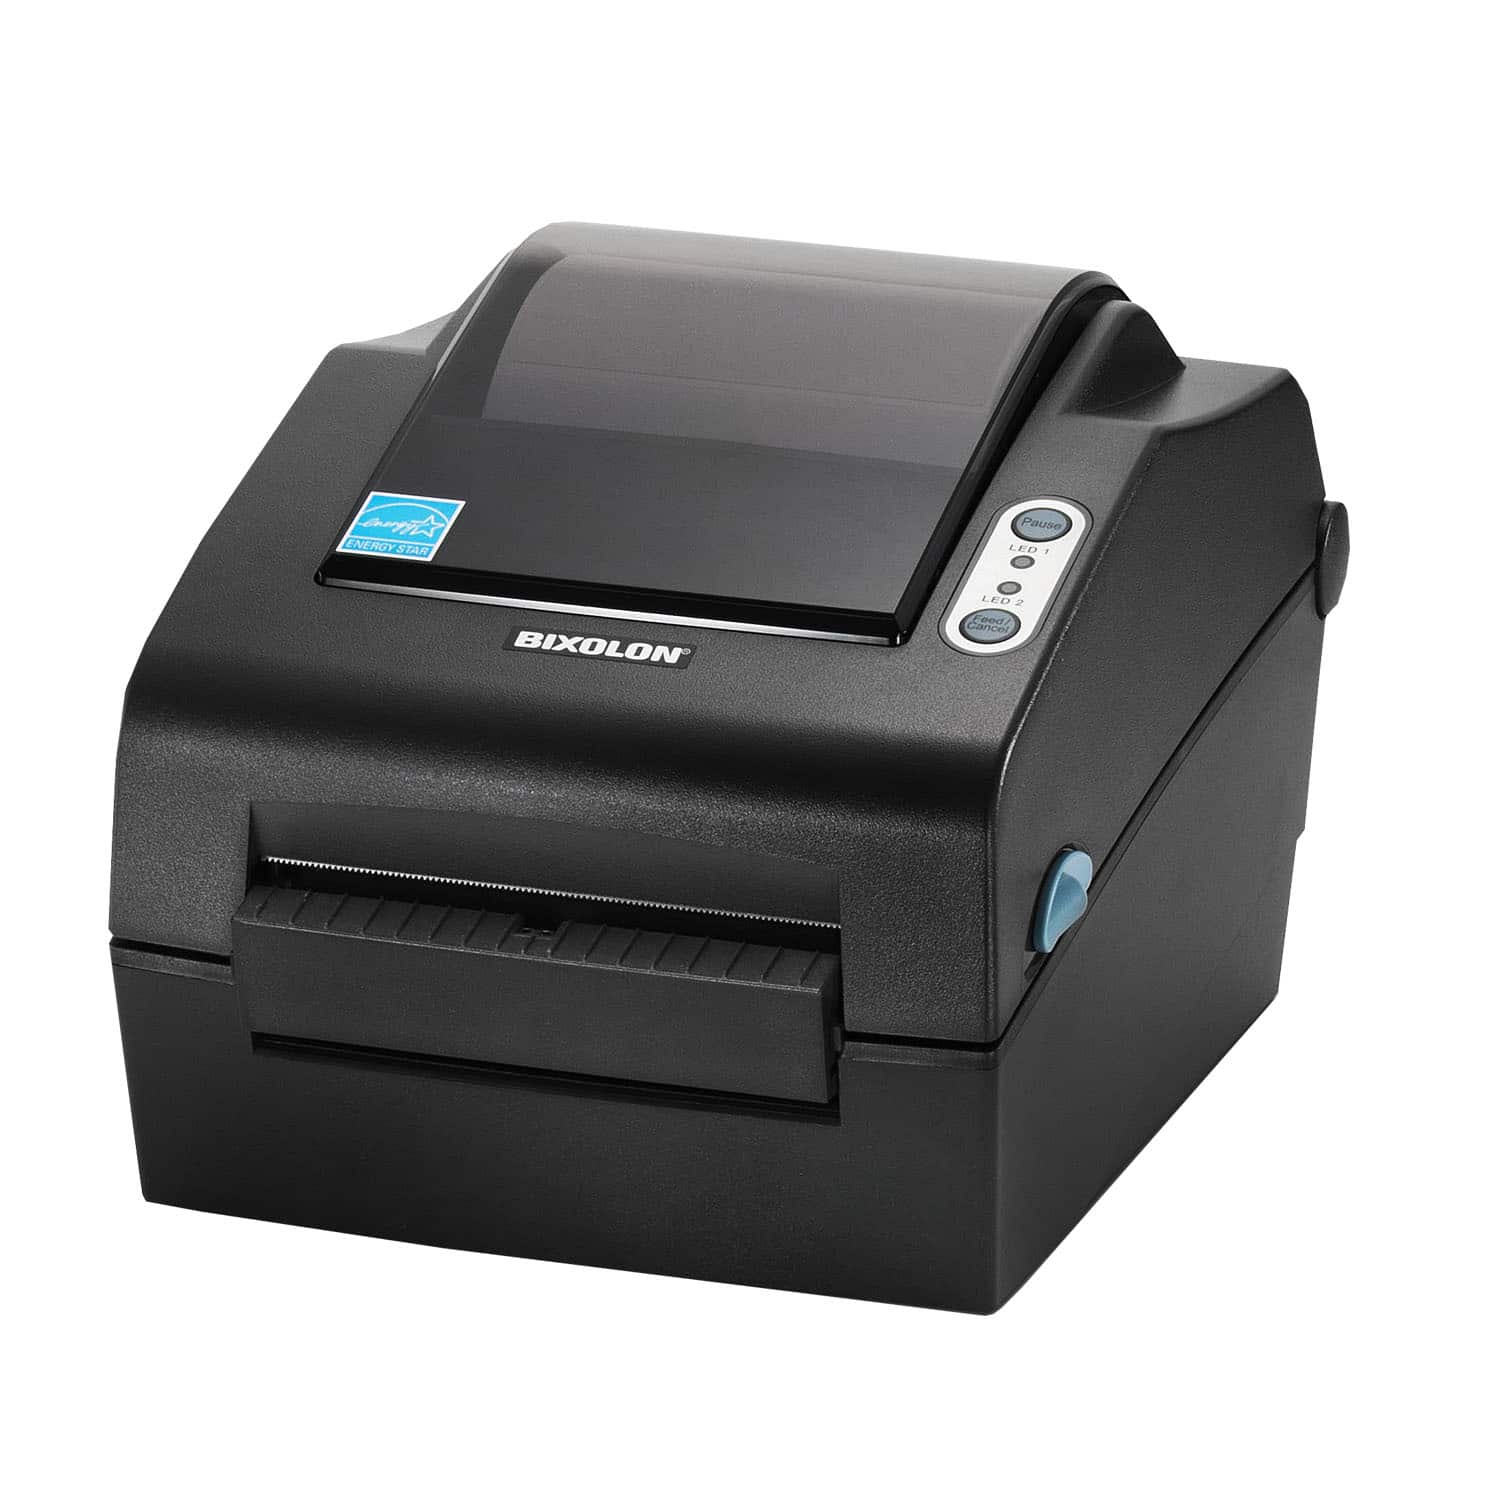
Installing the Bixolon Boxedge printer.
The Boxedge Label printer we usually supply is the Bixolon XD5 40d with a cutter or previously we supplied the Bixolon SLP-DX420CG with a cutter. The cutter is important when the printer is purchased as it can't be fitted afterwards on the SLP-DX420CG but can on the newer XD5 40d . The labels are Zebra labels, Part no. 800263-105 and the size is (mm) 76.2 x 25.4 (3 inch by 1 inch).
The printer has USB, LAN and serial connections. If it is closer to a machine the USB connection can be used, If it is further away it can be setup as LAN or serial. The serial connection on the back of the printer is a 9 pin and the pin out for the serial to RJ45 adapters are in the notes folder on the fileserver. If the printer is connected to the serial port the speed of the port may need to be changed. To do this on the printer properties go to the ports tab. Click on the "Configure Port..." button and change the Bits Per Second setting from the default 9600 to 115200.
The driver is on the Bixolon site.
https://bixolon.com/download_view.php?idx=34 SLP-DX420CG
https://bixolon.com/download_view.php?idx=132 XD5 40d
Further down the page in the Application section and Utility there is the net configuration tool (which can find the printer on the network if that is how it is connected) and the Unified Label Utility (which can reset the printer to factory default and recalibrate the labels amongst other things).
Once the printer is installed if you rename it Boxedge you are then ready top set it up in the program.
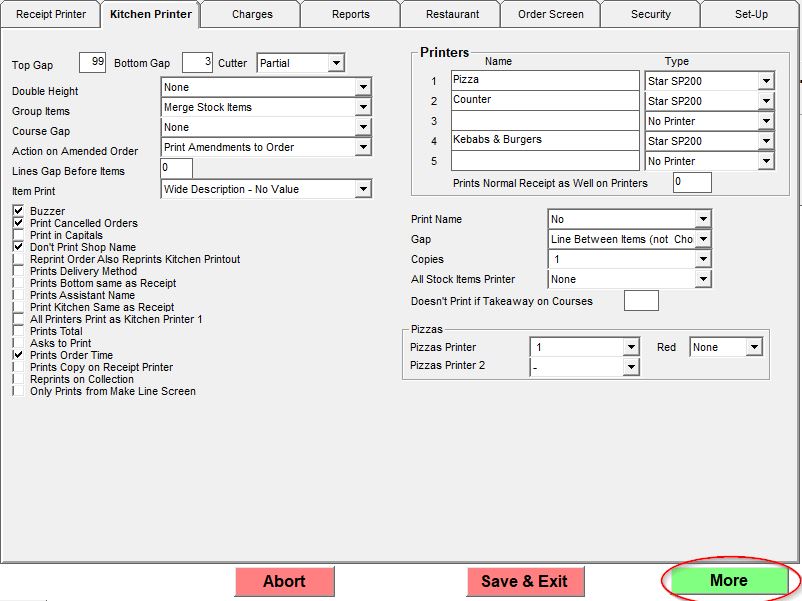
If you go into Management.


Then Options.

Then click on the Kitchen printer tab and more the Boxedge options are on the right,
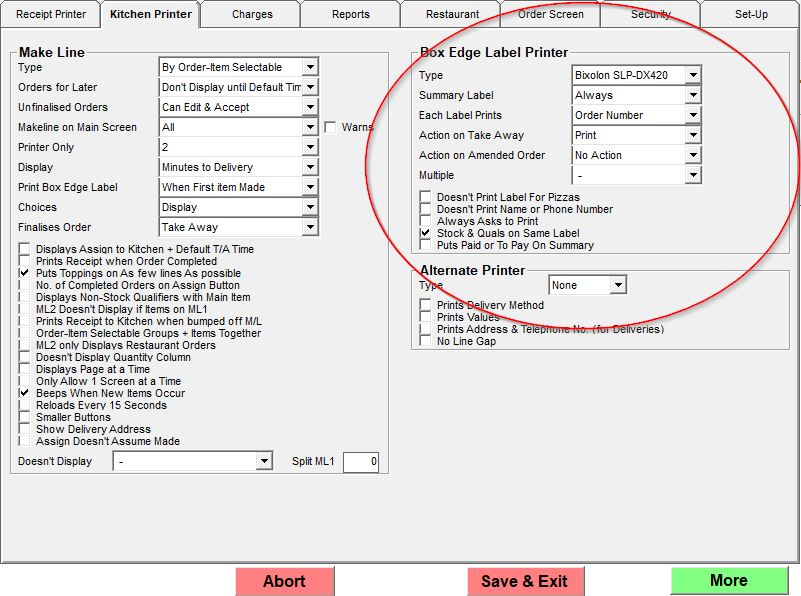
In the options the first drop down is for the type of printer. There is a list of printer we have used with the system in the past. The Bixolon printer is near the bottom. At the bottom is an option for Bixolon No Cutter as sometimes if a printer has been purchased with no cutter this option needs to be used. If the normal Bixolon option is used the code to cut is sent and as the printer has no cutter it shows a red light and goes into an error state. The labels do have perforations so can be separated but it is better if the printer has a cutter.
The next option is if a summary label is to produced for each order. For each order it produces a label for each item that is set to print its own label. It can print a summary label for the order with the order number and total price.
It can Also print a sundry label that puts together all the items that you have chosen to go on a sundry label.
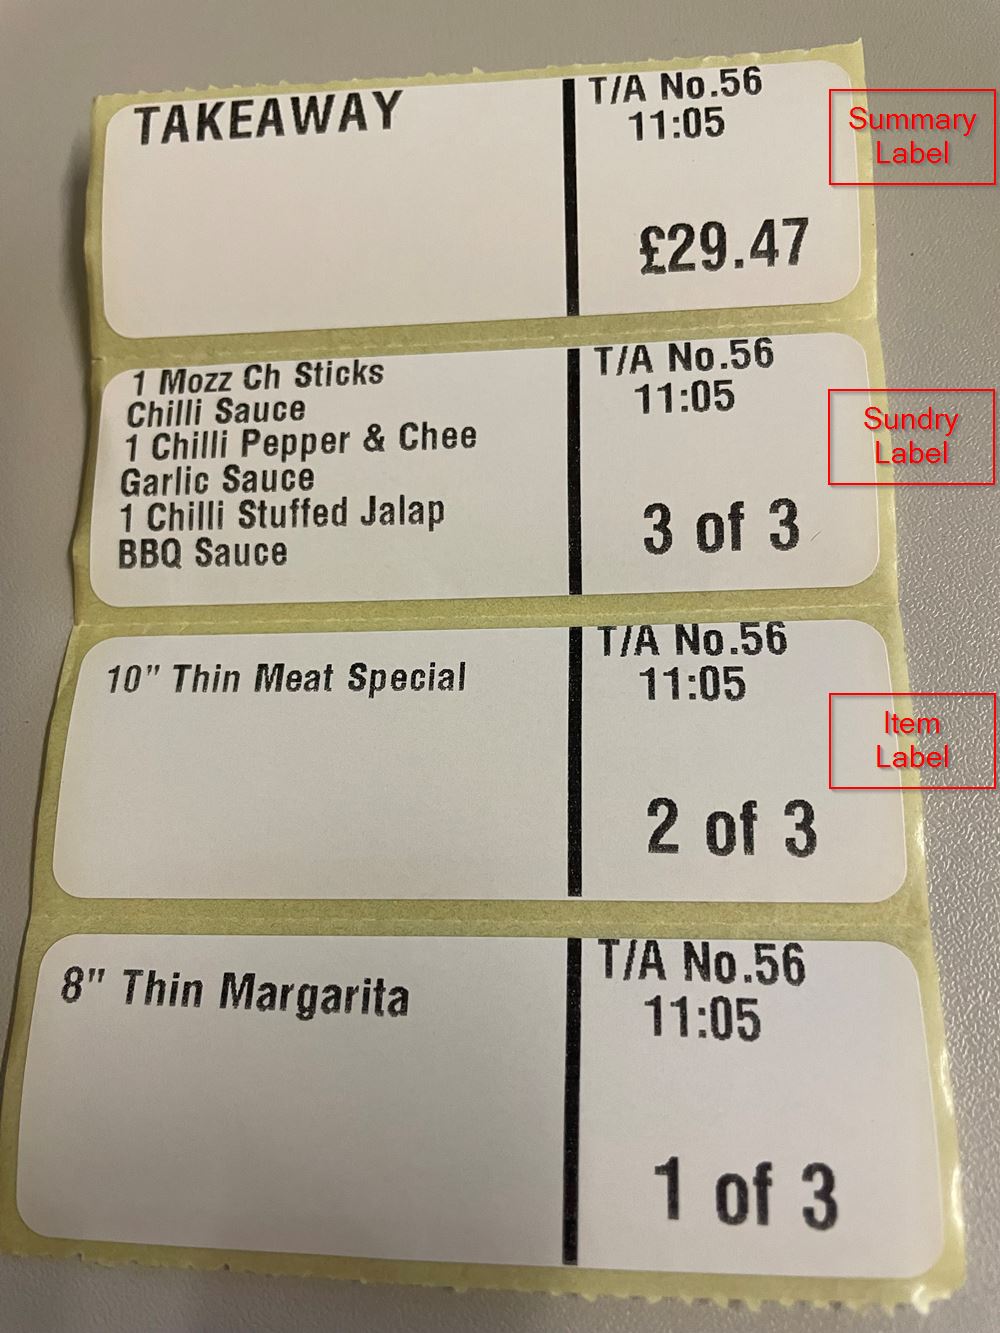
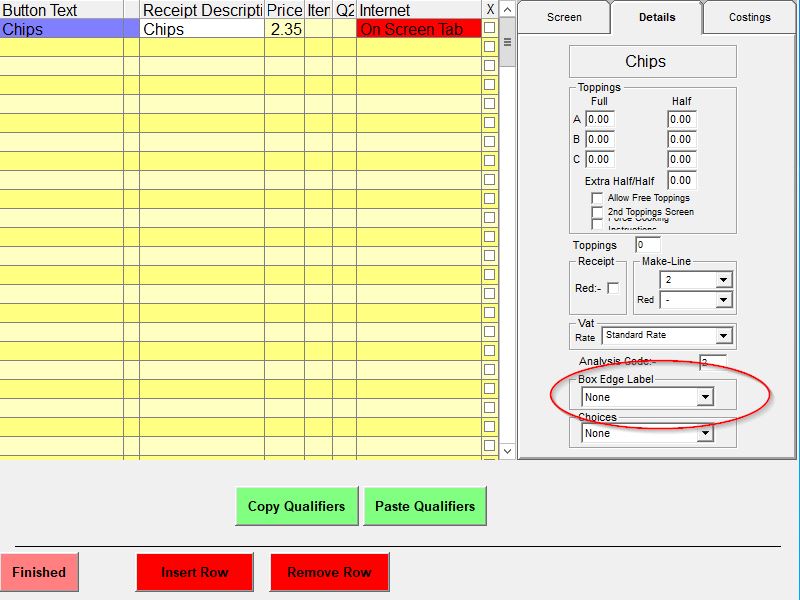
To specify if an item is printed on a label at all, prints on its own label or prints on the sundry label if you click on an item in the menu section and go into the details tab of an item and there is Boxedge Label drop down. From this you can choose if an item has a label printed and if so what type.
How to install the Integer U80II (Ethernet)
***Please call us to get the U80II printer driver***
Unbox your Integer U80II
Plug the power cable into the back of the printer and plug socket
Then plug the Ethernet cable into the back of the printer and a port into your router
Turn the printer on
Once the green light is on go to 'File Explorer'
Click on 'This PC'
Then go to 'C: Drive'
Click on the 'Integer' folder
Open the folder 'Setup_U80 V1.12' folder
Double click on the 'Setup.exe'
Click on the 'Receipt' drop down and select 'U80II'
Click on 'Next'
Click on 'Next'
On the next screen choose "Net" from the drop down and enter the printers IP address in the box and then click install at the bottom.
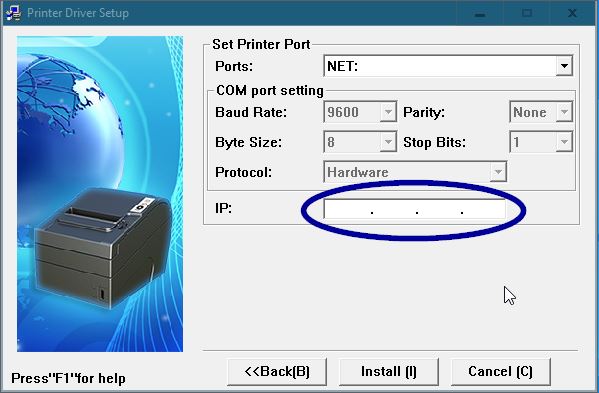
The IP address of the printer is given out by you router so can be different on every network. To find out what it is on the printer power it off, hold the feed button and power it back on. You should now receive a test print from the printer and at the bottom it will give you the IP address of the printer. Press and release feed again to print a bit more of the test print and the printer will now be ready to work.
Once the driver has installed click 'OK'
You will then need to go to the 'Control Panel'
Click on 'Devices and Printers'
Double click on 'U80II(E)'
Click the 'Printer' tab
Then click on 'Properties'
Click in the box that says 'U80II(E)'
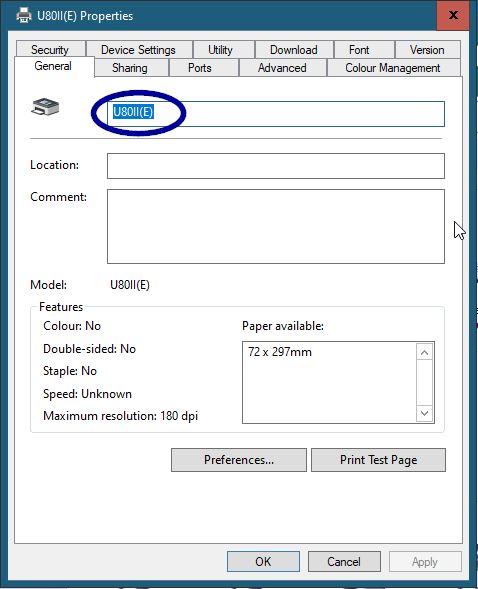
Rename it to 'Receipt'
Then click 'OK'
To check that the printer works go to 'Properties'
In the 'General' tab
At the bottom click on 'Print Test Page'
This will then do test page
Then on the Server in inTouch go to 'Management'
Click on 'Occasional Menu'
Then 'Options'
In the 'Receipt' tab
You will then see 'Printer Type'
Click on the drop down
Select 'Epson Thermal'
Then 'Save & Exit'
And 'Exit'
Then just do a test print