The Restaurant module
Setting up and taking order in the restaurant section.
- Adding the Restaurant module
- The Restaurant Options
- Adding Tables
- Bookings
- Taking an order in the Restaurant section
Adding the Restaurant module
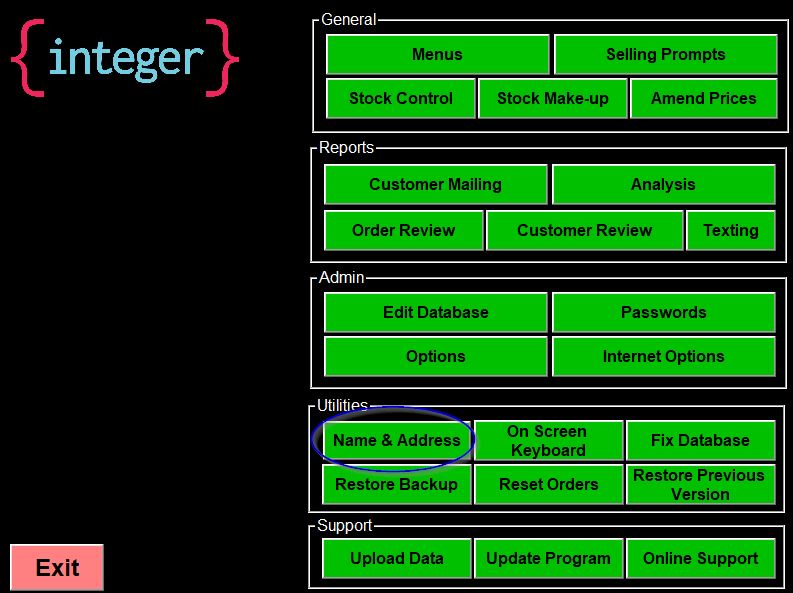
First go into management

Then Name and Address
Here it will ask you for a password that you can get from us.
In the Modules line add R.
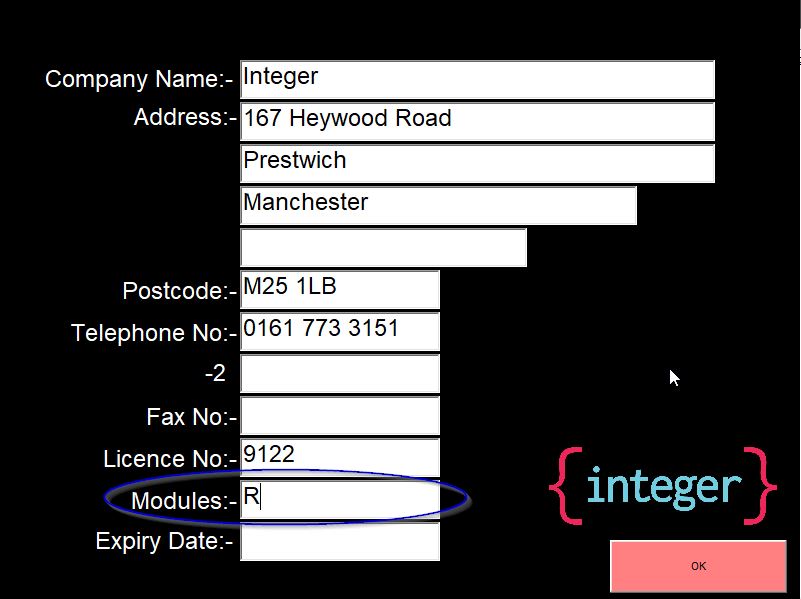
If you now OK this and go back to the main screen then into management and occasional menu again the restaurant tab of options , which is normally greyed out will be available.
The Restaurant Options
First go into Management
Then Options

The Restaurant Module option are in the Restaurant tab of options.
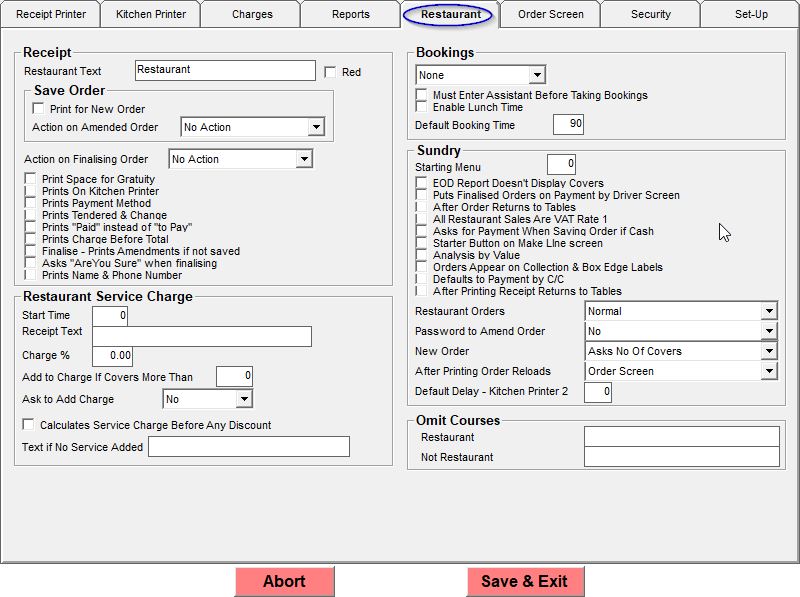
The receipt section is how the receipt is produced for restaurant orders.
- The Restaurant Text option allows you to specify what is printed on the top of the receipt (This is usually just Restaurant but can be whatever you like eg. Eat in) There is also a tick box so it can be printed in red or reverse if it is a thermal printer
- The save order section allows you to print a full receipt for new orders if that option is ticked and what to do when an order is amended "Reprint Order" prints the full order again, "Ask to reprint" asks and if you say yes prints the full order and "Print Amendments" just prints the changes to the order.
- Action on Finalising defaults to "No Action" but "Print Order", "Print Order and Kitchen", "Print Order & Open Till" and "Print Order & Kitchen & Open Till" can be chosen.
The other options are just tick boxes and fairly self explanatory.
The Restaurant Service Charge options can set how the program deals with the service charge.
- Start time lets you choose a start time for the service charge. If it is left as 0 then the charge is always applied.
- The "Receipt text" is what is printed on the receipt for the service charge.
- The % charge will work out the service charge a a % of the total bill.
- The "Add to Charge If Covers More Than" will only add the charge if the order is for more than a certain number of covers. If you want it for every order leave this as 0.
- The "Ask to add charge" drop down defaults to "No" but can be set to "Yes" or "Can Edit". If it is set to ask it will come up with the prompt every time to ask. If it is set to edit it will come up with a calculator showing the service charge it has calculated but allowing you to change it.
- The "Calculates service Charge Before Any Discount" option calculates the service charge before you add any discount.
- The "Text if No Service Added" box allows you to enter what will be printed on the receipt if no service charge is added.
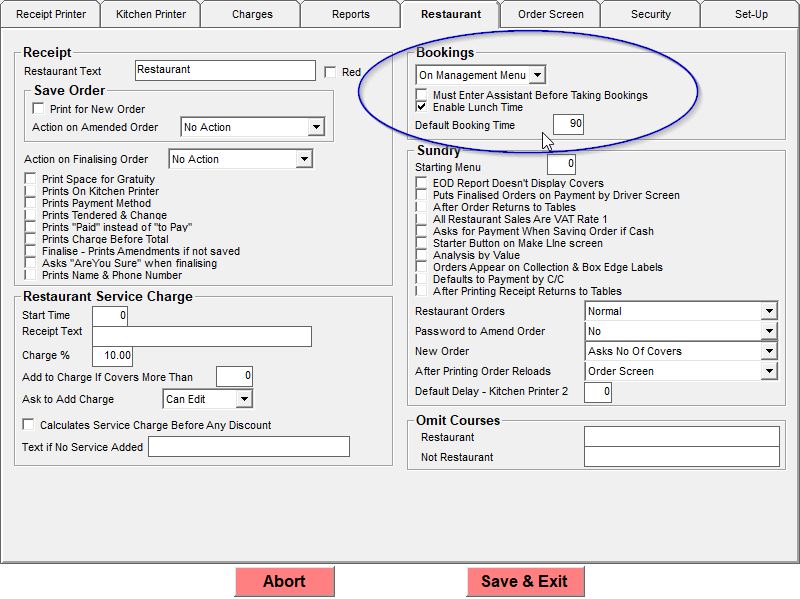
The Bookings Section is where you can set how the booking work if you have chosen it to appear.
- The first drop down allows you to say where or if the bookings button appears. It defaults to "None" but can be set to "On Main Menu" or "On Management Menu" and if set to either of these that is where the Bookings Button will appear.
- The "Must Enter Assistant Before Taking Bookings" option, if set, will ask for the assistant name first when placing a booking.
- The "Enable Lunch Time" option ,if chosen, when you choose a day to place the booking will have a "Show Lunch" button at the bottom right and it you press this It will show the earlier period of time for that day
- The "Default Booking Time lets you set how long as a default the booking would be. When Making a booking this can be altered.
The Sundry section of the options has options that don't belong in the other categories.
Adding Tables
First go into management

At the bottom right of the screen is a button labelled "Restaurant Tables"
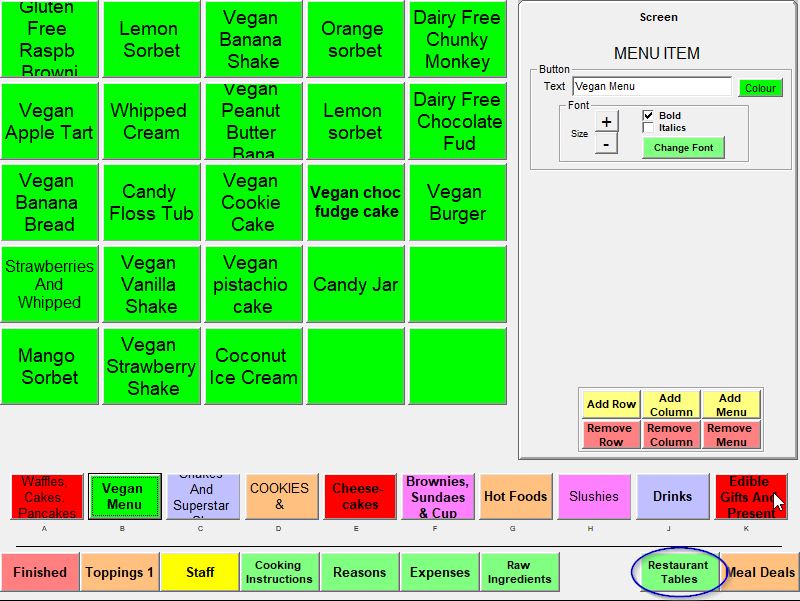
If you click on here you will be presented with the table layout.
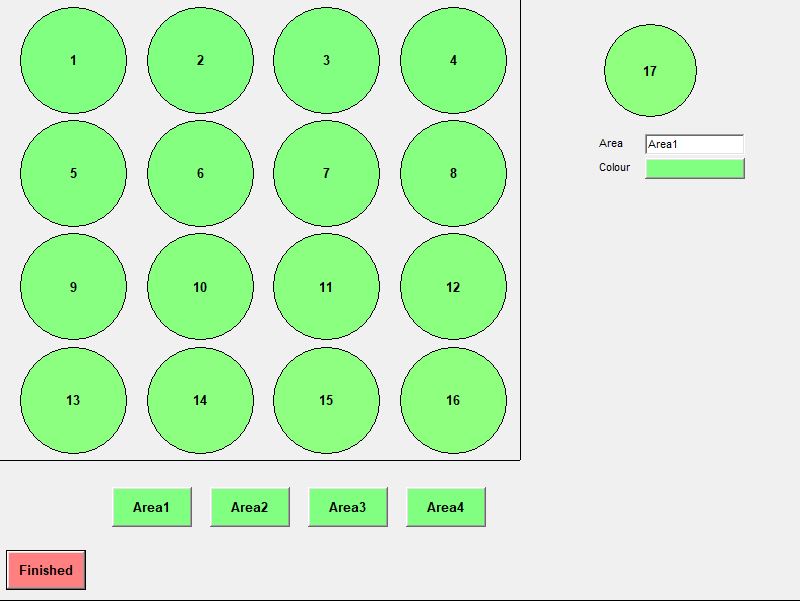
If you click on Table it will be highlighted and you can choose the name of the table, the colour, size and Shape.
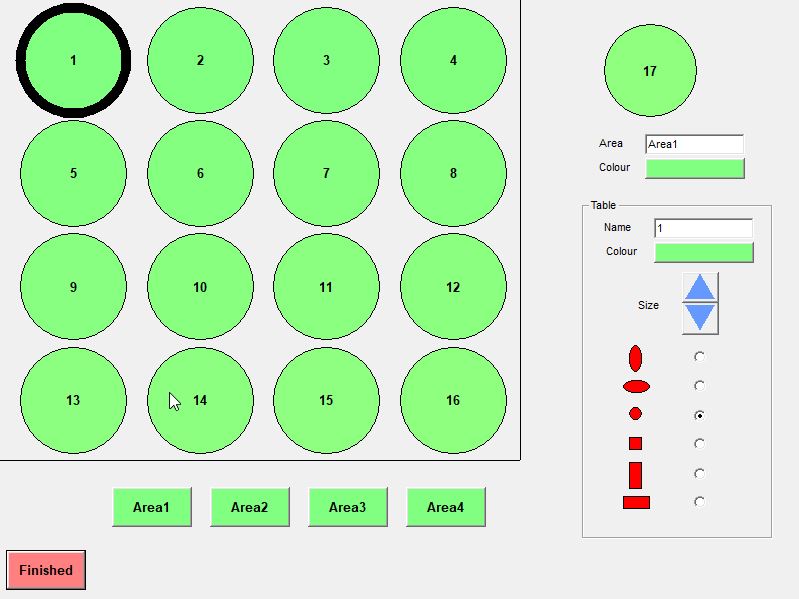
Clicking and holding on a table will let you drag it into position so you can make the layout look more recognisable to your staff. Any tables that are not needed can be dragged to the top right or it you want to add tables you can drag them onto the layout from here.
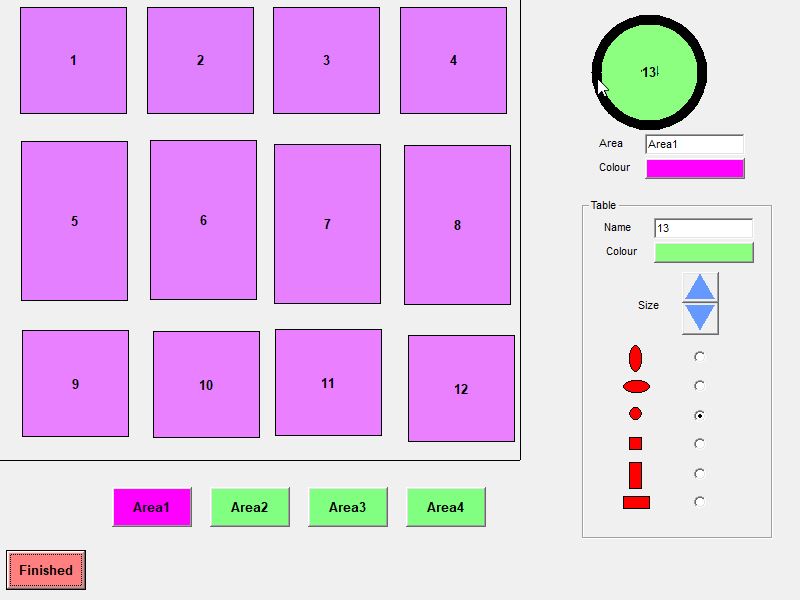
You can also have different areas for the restaurant (eg upstairs and downstairs). If the areas are left blank they won't appear once you go into the restaurant section.
Bookings
The way the bookings are set in the restaurant options.
The Bookings Section is where you can set how the booking work if you have chosen it to appear.
- The first drop down allows you to say where or if the bookings button appears. It defaults to "None" but can be set to "On Main Menu" or "On Management Menu" and if set to either of these that is where the Bookings Button will appear.
- The "Must Enter Assistant Before Taking Bookings" option, if set, will ask for the assistant name first when placing a booking.
- The "Enable Lunch Time" option ,if chosen, when you choose a day to place the booking will have a "Show Lunch" button at the bottom right and it you press this It will show the earlier period of time for that day
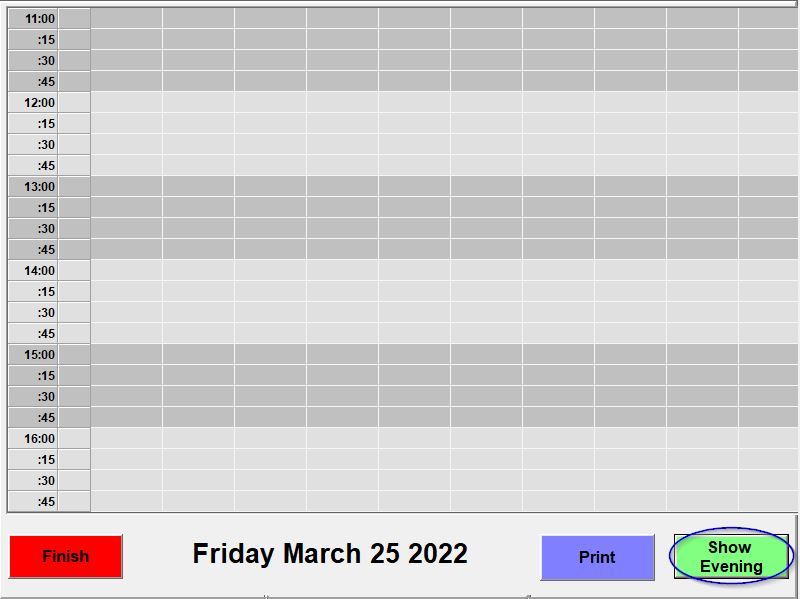
Once the bookings are set up the Bookings button appears where you set it to. Once you press on Booking you will see the days in the month.
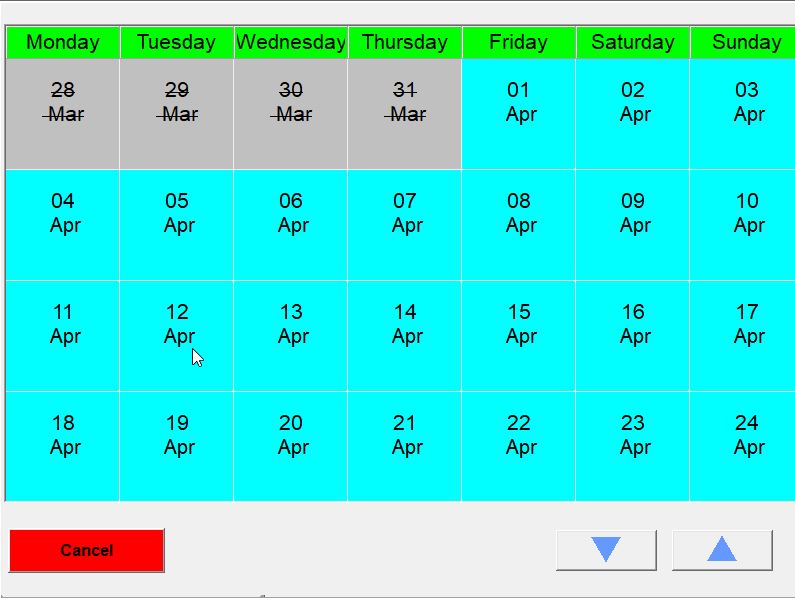
Choose a day by pressing on it on you will see a tables with time slots on the left. If you have lunch enabled you will also have a button at the bottom right say "Show Lunch" and it you press this the times on the left will change to cover lunchtime.
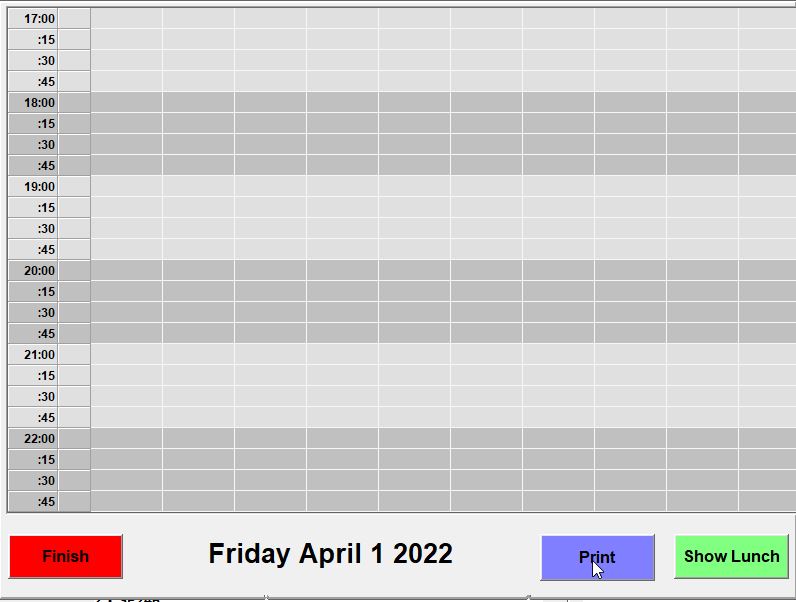
Once you have chosen a time slot a screen will appear to enter the booking details.
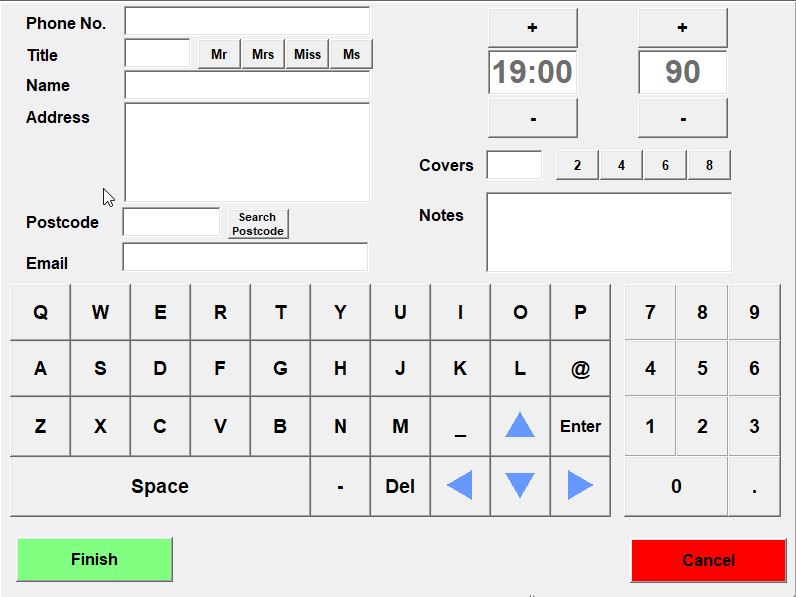
Here you can enter the name, address , phone number and email address. At the top right it allows you to adjust the time slot start time or slot time period, then the number of covers and finally any notes about the booking.
To see the bookings that have already been made for a day again press the booking button and press the day. You will now be shown the day and if there are any current bookings they will show here.
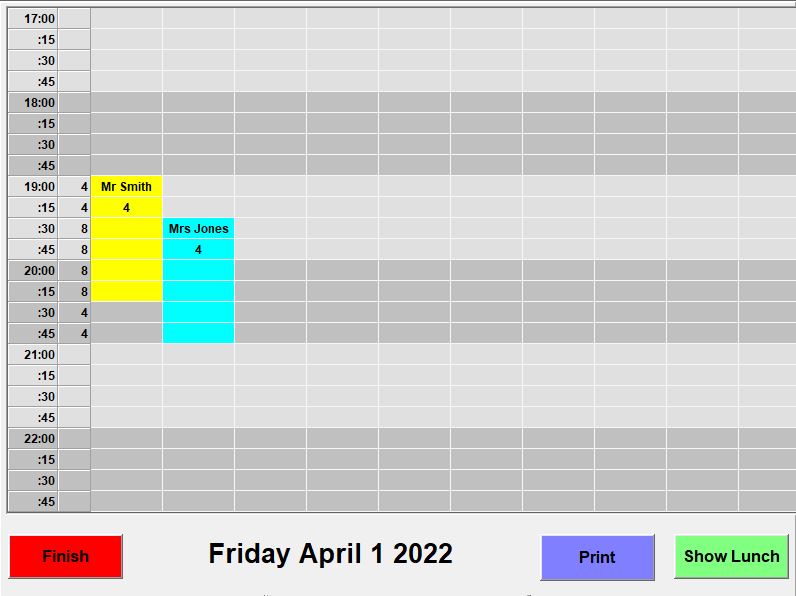
If you press on existing booking it will show you the detail of the booking. In the column after the time it shows a total number of covers for the bookings.
Taking an order in the Restaurant section
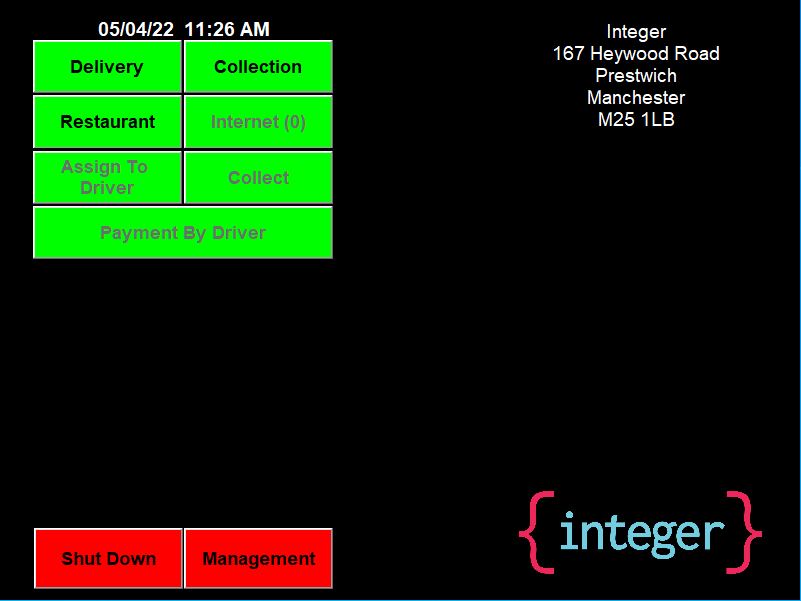
On the main screen click on Restaurant,
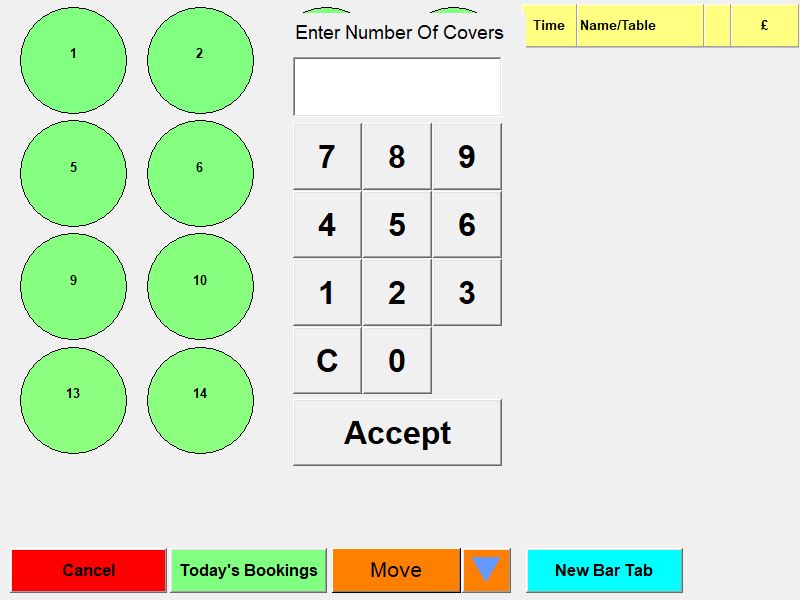
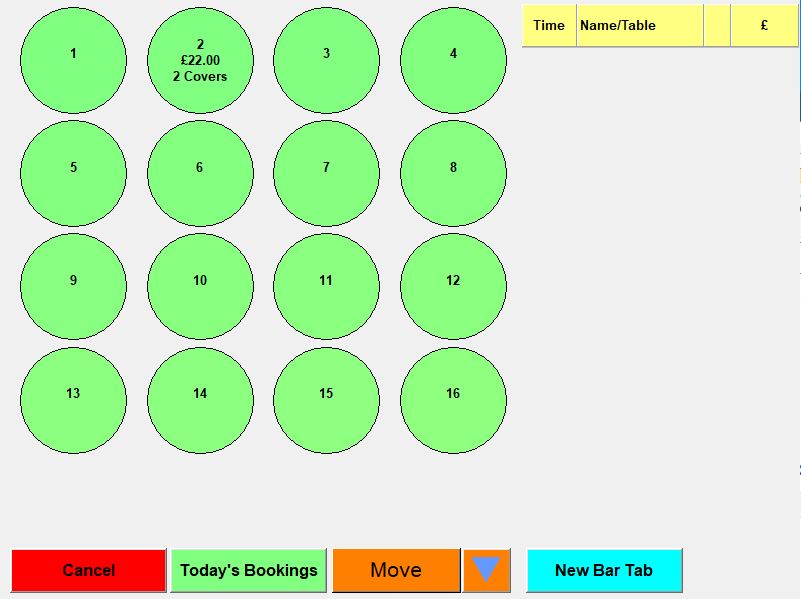
You will go to the table layout you have set up.

If you choose a table it will ask you to enter the number of covers,
Once you have done this you will be in the normal order entry screen but at the bottom there will be 2 choices either Save order or payment.
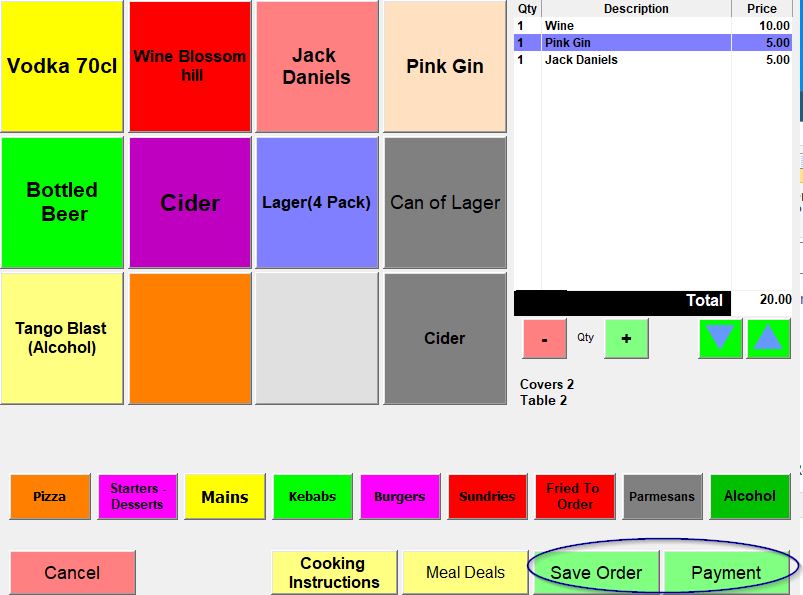
If you choose Payment the order will act as if it is being finalised straight away. If you choose Save Order you will go back to the main screen and the Restaurant button will now have a number in brackets after it to show the number of current orders.
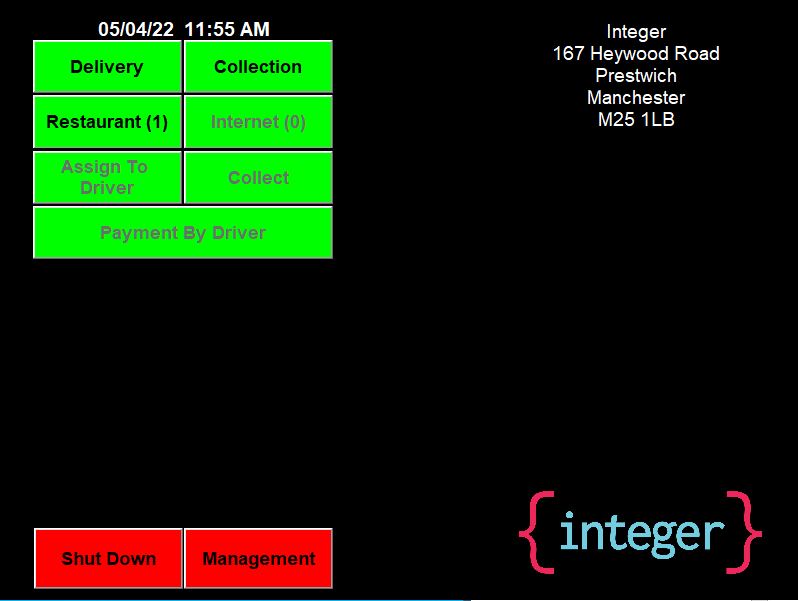
If you now click on Restaurant it will show you the tables again but this time tables with an order on them will show the value of the order and the number of covers.
If you click on a table with a current order instead of asking you the number of covers it will take you into the order so you can either edit it to add more items, save it to leave it how it was or finalise it to complete the order.
Also when you press Restaurant there is a bar section on the right. This allows you to start an order before a table has been allocated. If you click New Bar Tab it will ask you for a name and then the number of covers and then go into the order screen. If you save the order it will show in the Bar section with the customers name and the value.
To move an order from the bar or from one Table to another if you press on the move button at the bottom of the screen it will turn white and then press the bar order or table you want to move and that will then turn white and then click where it wants to be moved too.
If you get the message "In Use on another screen" either the table is being looked at on another screen or is locked. If it isn't on another screen to unlock it press the arrow next to Move and the button name will change to Release and if you then press this it will turn white and then press on the table that was locked earlier and it should be OK now.
Another feature of the arrow if to change the Move button to say merge. If you press the arrow next to move twice it will change the title of the button to Merge. If you press Merge it will turn white and if you then choose a table it will let you move it to a currently open table and merge the 2 orders together,