Your Menu
How to Make Changes to the in store Menu
- Adding Courses to My Menu
- Adding Items to My Menu
- Adding Choices To My Items
- How to change prices in Intouch
- How to set different prices for Delivery/Take-away/Restaurant
- Adding Toppings to the Menu
- Changing Receipt Description for Toppings
- Changing the Price for toppings
- Creating Staff, Cooking Instructions, Reasons, Expenses Buttons
- How to make Cooking Instructions highlighted
- How to make Collection/Delivery notes highlighted
- Adding Pizzas to any other course other than the first one
- Meal Deals
- Half Pizza charges
Adding Courses to My Menu
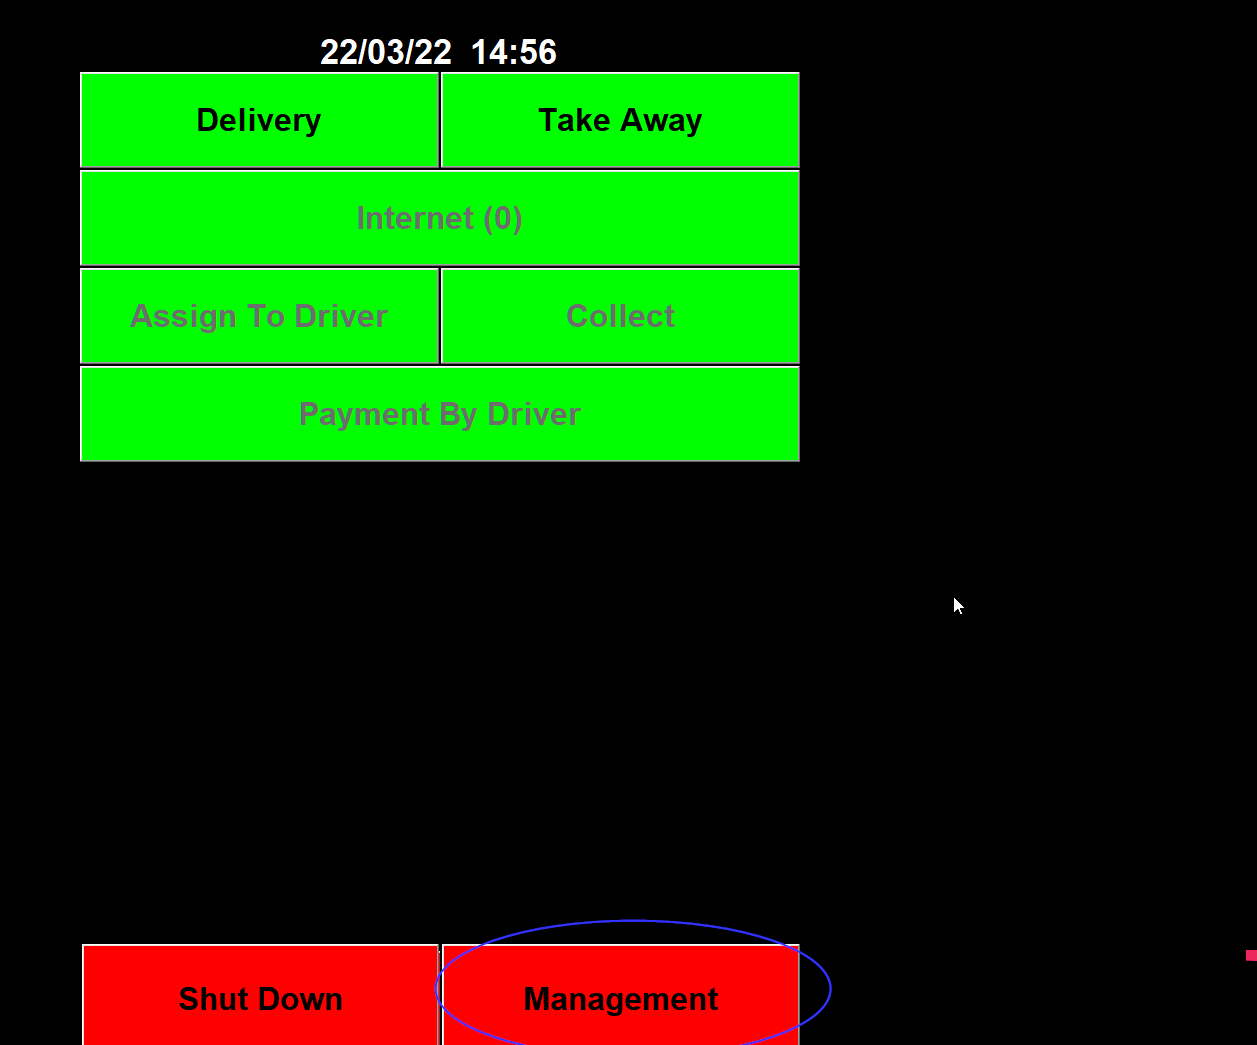
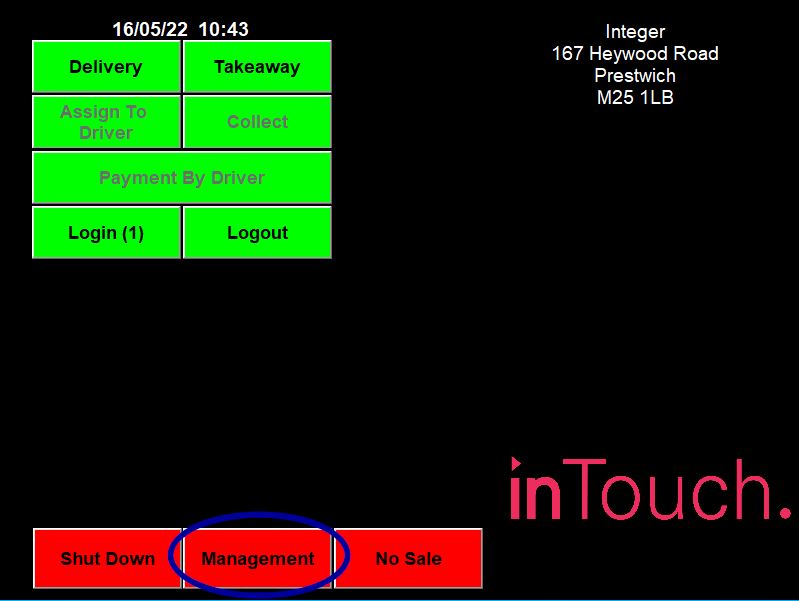
Click ‘Management’ at the bottom

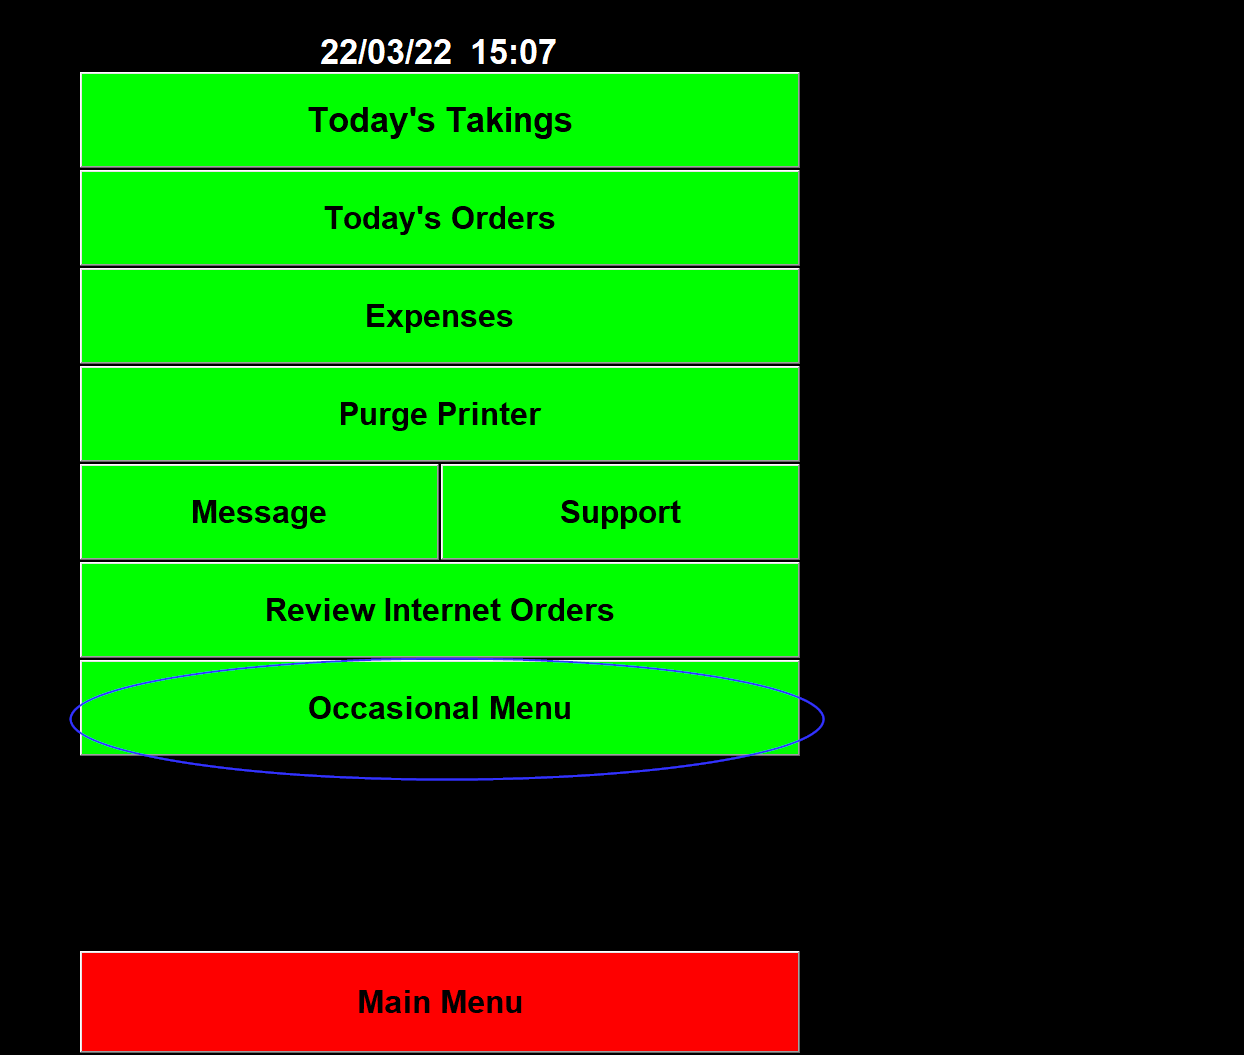
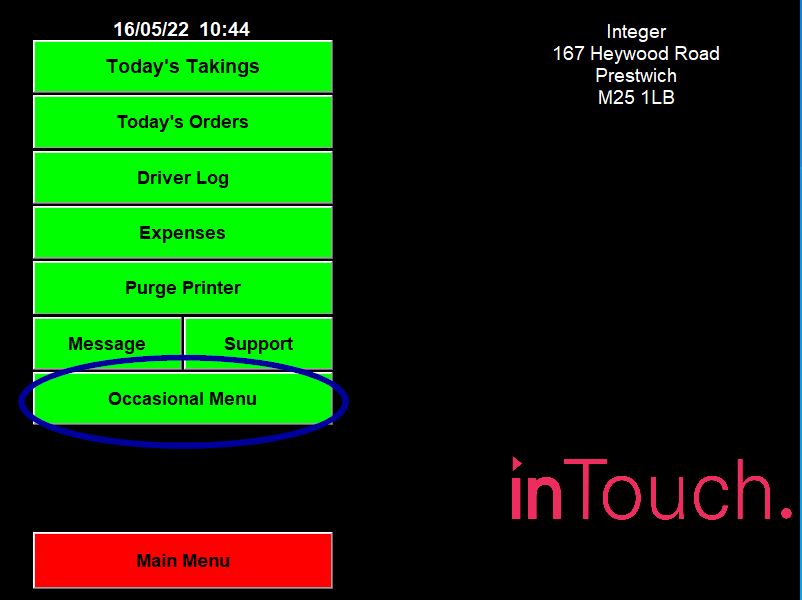
Bottom of the list click ‘Occasional Menu’


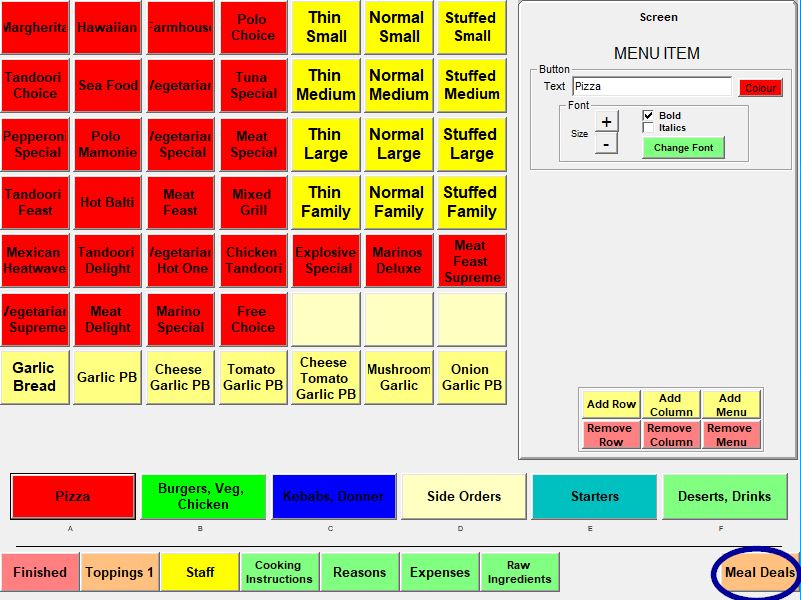
Click any of the courses for example ‘Side Orders’

Then on the right hand side click ‘Add Menu’

Now name the blank menu. ‘Burgers’ for example

This step Requires a Keyboard to add text to the Courses/Buttons.
Add the Items you wish to be in this course.
Adding Items to My Menu
Click ‘Management’ at the bottom
Bottom of the list click ‘Occasional Menu’

Click the Course you would like to Add items too
Select an empty button from the course.

Select Pizza Size to Add new Size (12", 16" etc) Pizza to add a new Pizza, or Stock Item for anything Else.
**Please Note: Pizza Size & Pizza Only Work in the First Courses.**
We will select Stock Item for this Example
Once you have Selected what you wish the new item to be, give it a Name (Test Item in this Case)

Click Details from the Top Right

And give your new Item a Price

Select Finish

Finish a Second Time

Then Exit.

Your New Item has been added to the Menu under the Course you have selected.

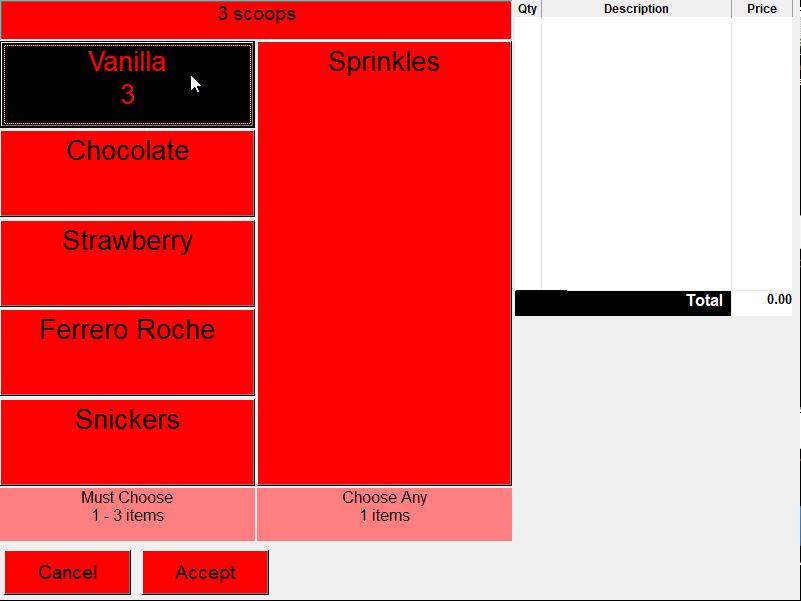
Adding Choices To My Items
For this example I will be adding a Beef Burger to my menu.
The burger will have the options of having:
- Cheese or No Cheese
- Salad or No Salad
and a choice of 1/4 Sauces:
- BBQ Sauce
- Spicy Sauce
- Garlic Mayo
- No Sauce
Lets get started!
Click 'Management'

Click 'Occasional Menu'


Click on a blank box and select 'Stock Item'

After naming your item, click 'details' at the top right. This is where we create our choices.
Option 1 will be "Cheese" or "No Cheese"
As these are additions to the item, they need to be proceeded by a '+'

Next, we do the same for Salad (I recommend changing the the colours per choice by clicking the coloured box):

Last choice is the sauce:

This next step is the most important step.
The column labelled 'Q2' tells the system of the order of choices, and how many choices can be selected.
1st Number - Choice
2nd Number - Minimum
3rd Number - Maximum

Look at the sauces for example, the number in 'Q2' is 311. This means this is the 3rd Choice, with a minimum selection of 1, and a maximum selection of 1.
On the right hand side, select 'Choices' to 'As Table'

Click "Finished" and Upload the data to your website when prompted on the main menu.


If you put a capital X after the number (e.g. 312X) it will let you choose multiple items and put a number underneath the. So normally if you press twice on the first press the choice is black and on the second the choice goes back to its normal colour. With hthe X at the end of the line it will stay black but change the number of that item underneath its description.
How to change prices in Intouch
Go to ‘Management’

Then ‘Occasional Menu’


Click on the item you want to change the price of

You will then see ‘Details’ top right

Once in details you will see ‘Price’

Click in the ‘Price’ box and enter the new price

Once you have changed the price(s) click ‘Finished’

And ‘Finished’ again

And 'Exit'

If you have Online Ordering with us it will ask you to ‘Upload Menu to Website’

If so click ‘Yes’ to upload

Check the item in inTouch has the correct price

Do the same for all the other price changes you may have.
Check the website regularly
How to set different prices for Delivery/Take-away/Restaurant
First got to "Management"

Then select "Occasional Menu"

Click "Options"

Click "Charges" tab along the top

On the right near the bottom you will find "Price 2 applies to"

From the drop down select "Delivery/Take-away/Restaurant

Now select "Save & Exit"


select any item and go to its "Details" tab

The item will now have a "Price 2" column

Click "Finished"
And now take orders as normal.
Adding Toppings to the Menu

To add a pizza topping, touch a blank button on the screen. If all the buttons are used, you must add a row or a column to create some blank buttons, as already described. When you touch a blank button, the message shown below will appear.

If you touch Yes, the Screen section below will reappear with two tabs at the top, “Screen” and “Details”.

If you touch No, the program will return to the Menu screen.
The Screen section allows you to set up the appearance of each button. Type in the description of the topping as you wish it to appear on the screen in the Button Text field. Touch Button Colour to display the colour palette if you want to choose an alternative colour to the default.
The “Font” section of the screen allows you to alter the appearance of the text that you have typed in the Button Text field. If you touch Change Font, the program will display the button text in a different font. Touch the button for a second time and inTouch will use another font. If you touch Change Font a third time, the text will go back to the original font.
Once you have selected a font for the button text, you can touch ▲ and ▼ to increase and decrease the size of the button text and use the Bold and Italics check boxes to add emphasis to the text on the screen.
If you touch an active button on the screen, then touch Move Button and then touch another blank button on the screen, the program will move the text displayed on the first button to the second (blank) one.
If you touch an active button on the screen and then touch Delete Button, the program clear the text from the selected button.
When you touch the “Details” tab, the boxes shown below will appear on the right of the screen.

The information that you enter here will be used by the program on the Stock Delivery screen on the Management Menu and in Stock Make-up and on the Stock Control section of the Occasional Menu.
In the Unit Name field, enter the basic unit in which a topping is measured, for example “Gram”. If the topping is delivered to you in packs of 1000 grams, enter “1000” in Units Per Pack. Type the cost price of the pack into the Price Per Pack field.
Enter an appropriate description in the Pack Name field, for example “Bag”. The description that you enter here will be used on the Stock Delivery screen where staff will enter the number of “Bags” that have been delivered.
Type the description of the topping as you want it to appear on the receipt in the Receipt Description field.
If you check the Free radio button, there will be no charge for this topping when it is added to a pizza. If you check the Free radio button, the program will only allow you to add this topping to a stock item if the Free Toppings box is checked on that stock item’s “Details” screen.
The three radio buttons, A, B and C, relate to the charge bands for toppings that have been created on the “Details” screens for both Pizza Sizes and Stock Items.
If you check A, the program will charge the amount entered in charge band A in “Topping Prices” for each size of pizza base. inTouch will also charge the amount entered in charge band A on stock items.
If you try to add a topping that has been created as Price Band B for example on this screen, the program will not allow you to add this topping to a pizza or to a stock item that does not have a price entered in their Topping Prices B field.
If you touch Toppings 1 at the bottom of the screen when the Toppings menu is on display, the text on the button will change to Toppings 2 and a second page for toppings will appear.
This screen enables you to create a different set of toppings. You might want to reserve the Toppings 1 page for extra toppings for pizzas and use the Toppings 2 page for toppings for other stock items. Remember that on the “Details” screens for both pizzas and stock items, you can enter “1” or “2” in the Toppings Page field to indicate which page of toppings should be used for that pizza or stock item.
If you touch Toppings 2 at the bottom of the screen when the Toppings menu is on display, the text on the button will change to Toppings 1 and the first page of toppings will reappear.
Changing Receipt Description for Toppings
Go to ‘Management’
Then ‘Occasional Menu’

Go to 'Toppings' at the bottom

Click on the topping you want to change the description of

Top right you want to click on 'Details'

You will see a box called 'Topping Details'

Click in the 'Receipt Description' box and type in the correct name

Once you have done that go through and check the other topping descriptions

All toppings will then appear on the receipts correctly
Changing the Price for toppings
If you go to management.


The toppings are priced depending on pizza size so click on a pizza size and then it details at the top right.
The old topping prices are already set there against A, B and C.

The topping price band is set on each topping. To set these go into Menus.

Then Toppings at the bottom of the screen.

Choose a topping and then click the details tab at the top right.

The price band is set by a dropdown box,
Creating Staff, Cooking Instructions, Reasons, Expenses Buttons
The operation of the four screens accessed from these buttons is identical. When you touch Cooking Instructions for example, a screen like the one shown below will appear.
Staff allows you to create buttons that are used by staff to log in and log out and to record which member of staff dealt with an order. Cooking Instructions allows you to create buttons that are used to quickly add cooking instructions to an order. The Reasons screen allows you to set up buttons that are used to enter a reason for a discount or short payment. The Expenses button allows you to create buttons that are used to record when petty cash has been paid out.
The Cooking Instructions and Reasons screens are slightly different in that the top left hand button is reserved and displays the text Other…. When these buttons appear on the Order screen, the program allows an operator to type in a “one off” instruction or reason in case none of the standard ones, that have been created here, apply.
The operation of the Cooking Instructions and Reasons buttons on the Order screen, and the Staff and Expenses buttons elsewhere in the program, are described in full in earlier sections of this guide.


If you touch Yes, the Screen section on the right hand side of the screen will reappear with two tabs at the top, “Screen”.

If you touch No, the program will return to the Menu screen.
The Screen section allows you to set up the appearance of each button. Type in the staff member’s name or the description of the Instruction, or Reason, or Expense, as you wish it to appear on the screen in the Button Text field. Touch Button Colour to display the colour palette if you want to choose an alternative colour to the default.
The “Font” section of the screen allows you to alter the appearance of the text that you have typed in the Button Text field. If you touch Change Font, the program will display the button text in a different font. Touch the button for a second time and inTouch will use another font. If you touch Change Font a third time, the text will go back to the original font.
Once you have selected a font for the button text, you can touch ▲ and ▼ to increase and decrease the size of the button text and use the Bold and Italics check boxes to add emphasis to the text on the screen.
If you touch an active button on the screen, then touch Move Button and then touch another blank button on the screen, the program will move the text displayed on the first button to the second (blank) one.
If you touch an active button on the screen and then touch Delete Button, the program clear the text from the selected button.
Whenever you have finished creating or amending buttons on one of these screens, touch this button to return to the Occasional Menu.
The cooking Instructions, Reasons and Expenses all only have the screen section but adding a new staff member has a details tab as well.

Here you can add more information about the staff member. It has room for a full name, address, phone number, mobile number and some extra notes. It will also allow you to enter the date started, date left and date of birth. There is a tick box for if they were issued a uniform. The "Type" dropdown gives you the choice of Driver, Server, Waiter or Chef. The hourly rate, if filled in, will give you the staffing cost. The location box can be filled in with a number.
How to make Cooking Instructions highlighted
On inTouch first go to ‘Management’

Then ‘Occasional Menu’

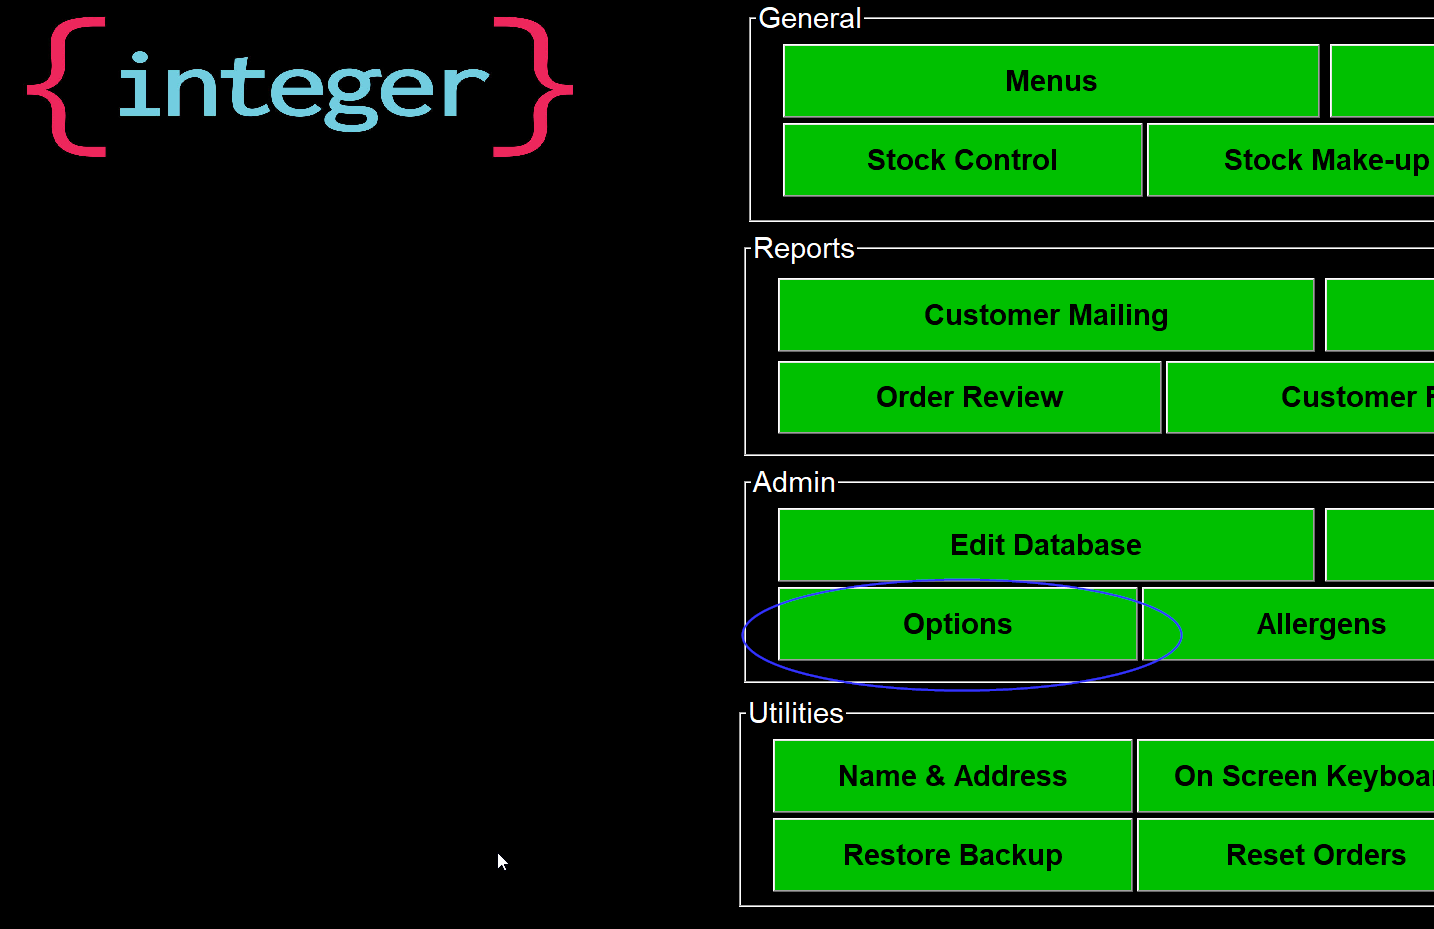
Click on 'Options'

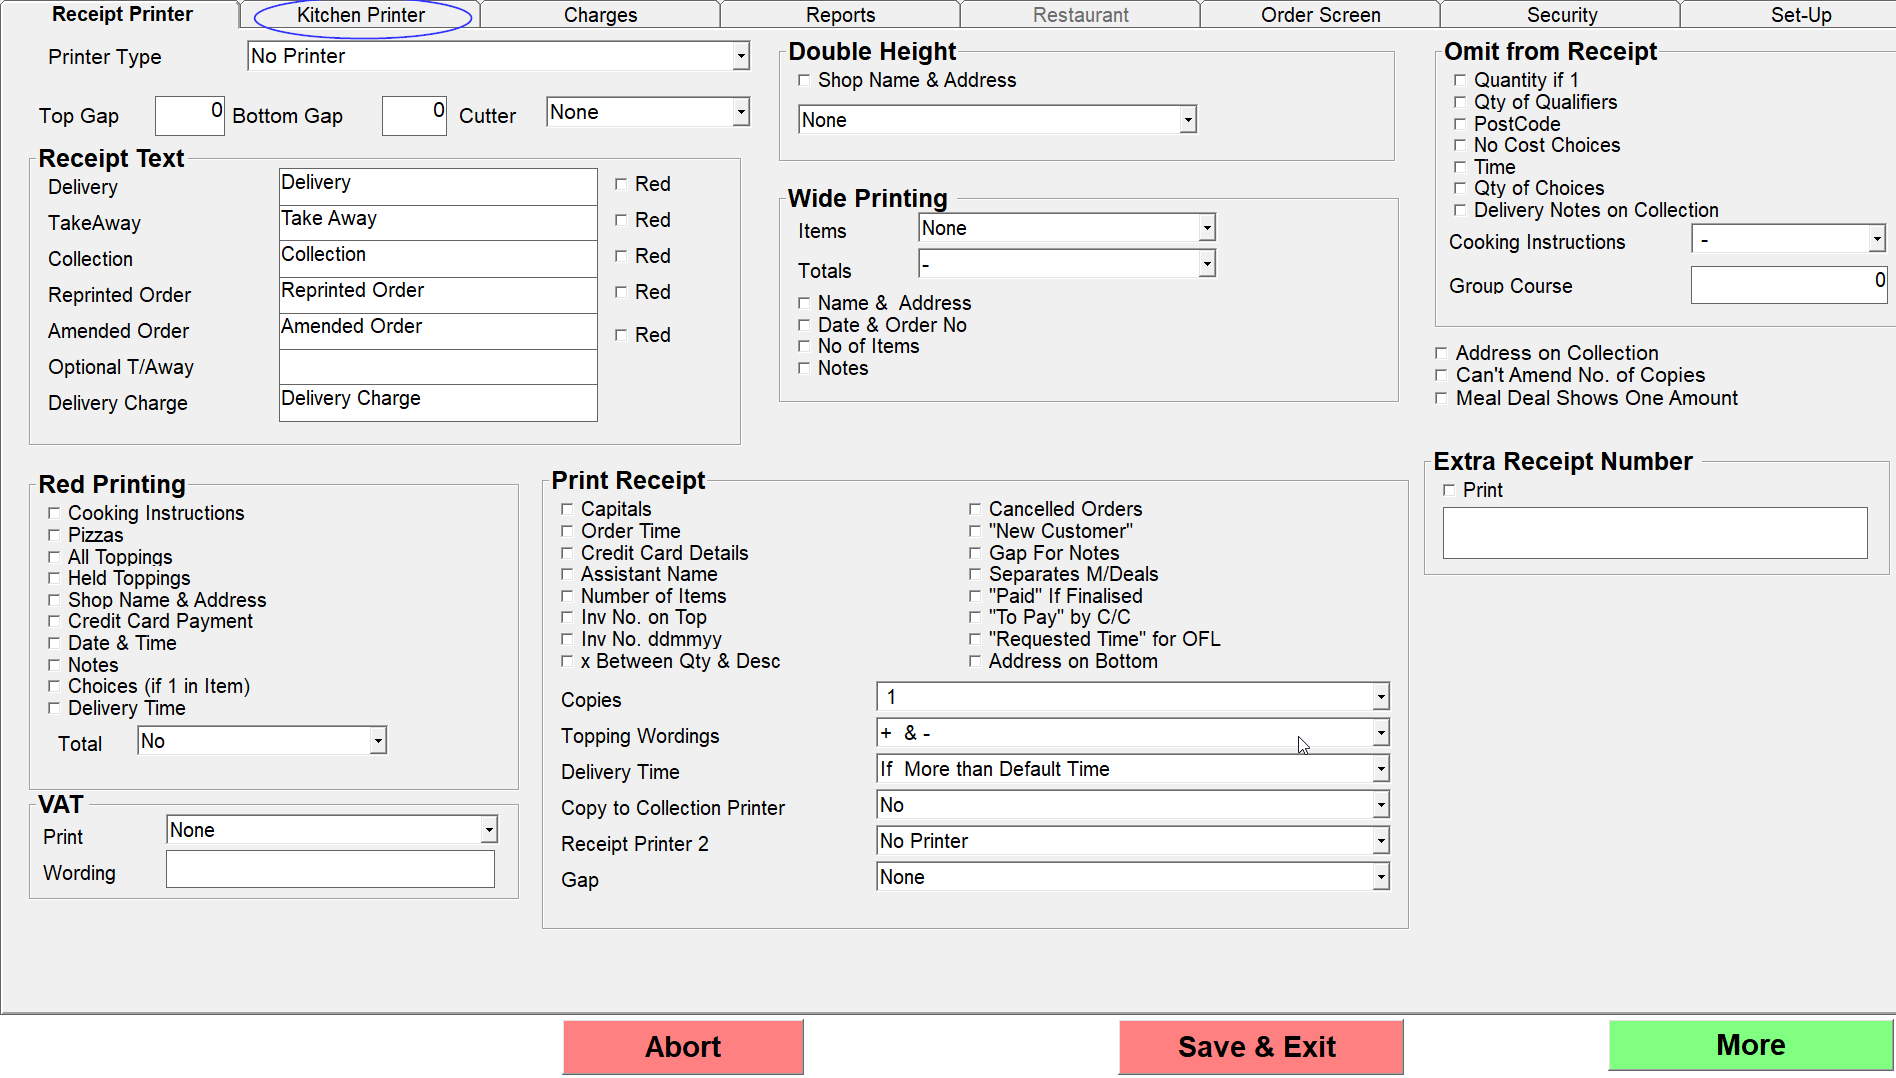
In the 'Receipt Printer' tab

Look for the box 'Red Printing'

Then tick the box 'Cooking Instructions'

Cooking instructions will now print reversed (Bold). See example of 'No Tomatoes'

How to make Collection/Delivery notes highlighted
On inTouch first go to ‘Management’
Then ‘Occasional Menu’
Click on 'Options'
In the 'Receipt Printer' tab
Look for the box 'Red Printing'
Then tick the box 'Notes'

Collection/Delivery notes will now print reversed (Bold). See example of 'This is a test order from Integer'

Adding Pizzas to any other course other than the first one
First click on 'Management'
Then click on 'Occasional Menu'
Then go to 'Options'
Once in options click on the 'Kitchen Printer' tab
Once in the kitchen printer tab, look at the far left for the pizzas set of options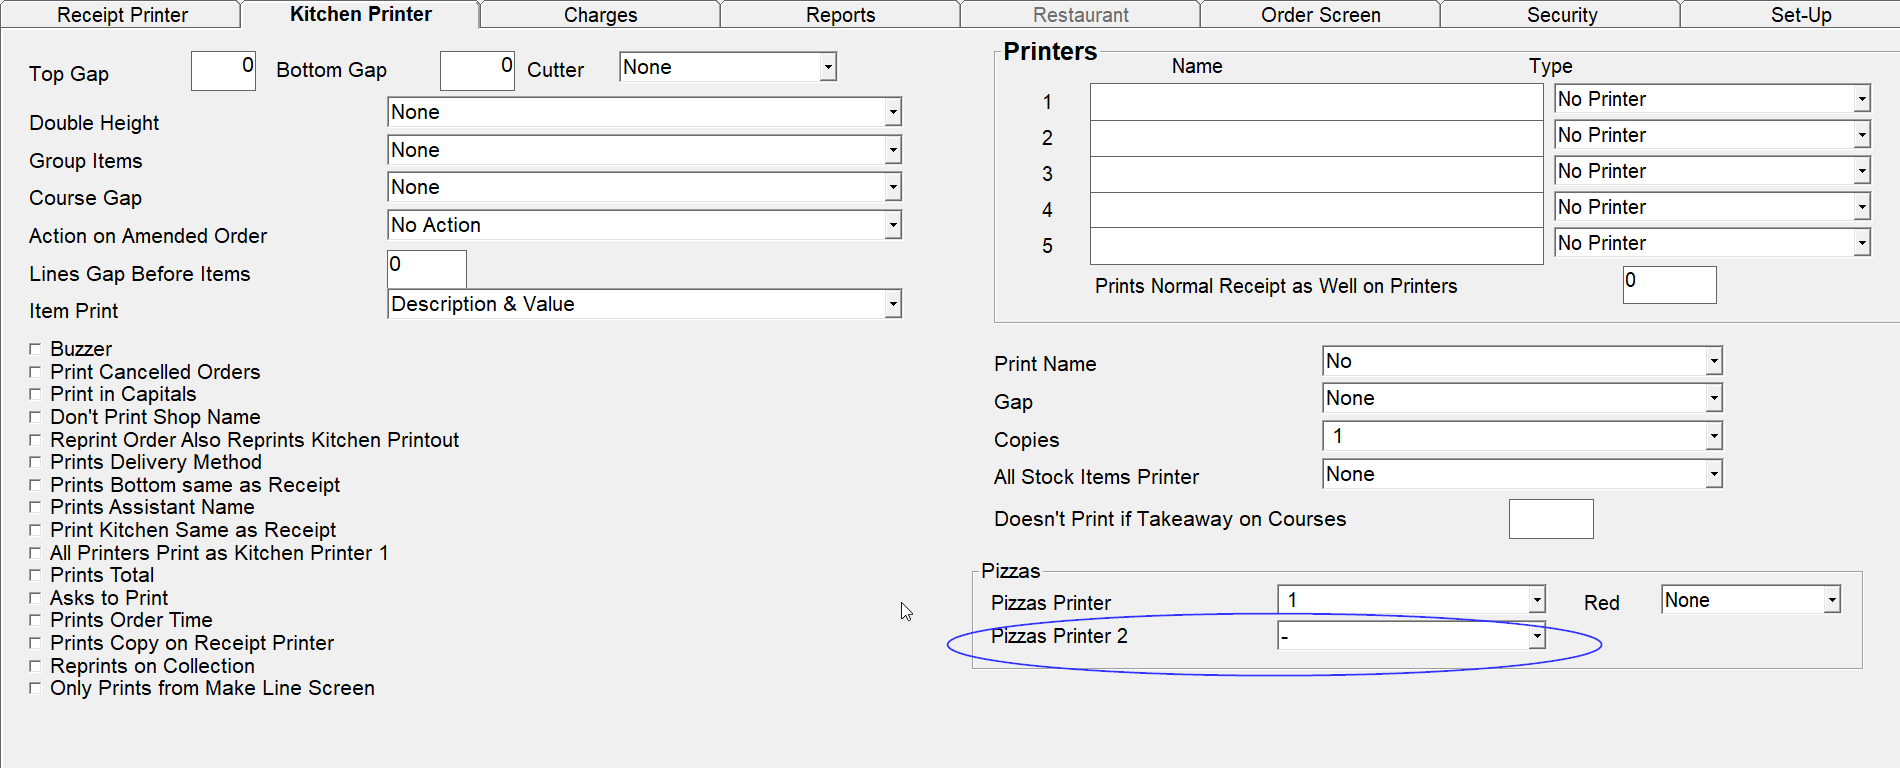
Then change the dropdown on Pizza Printer 2 and set it to none
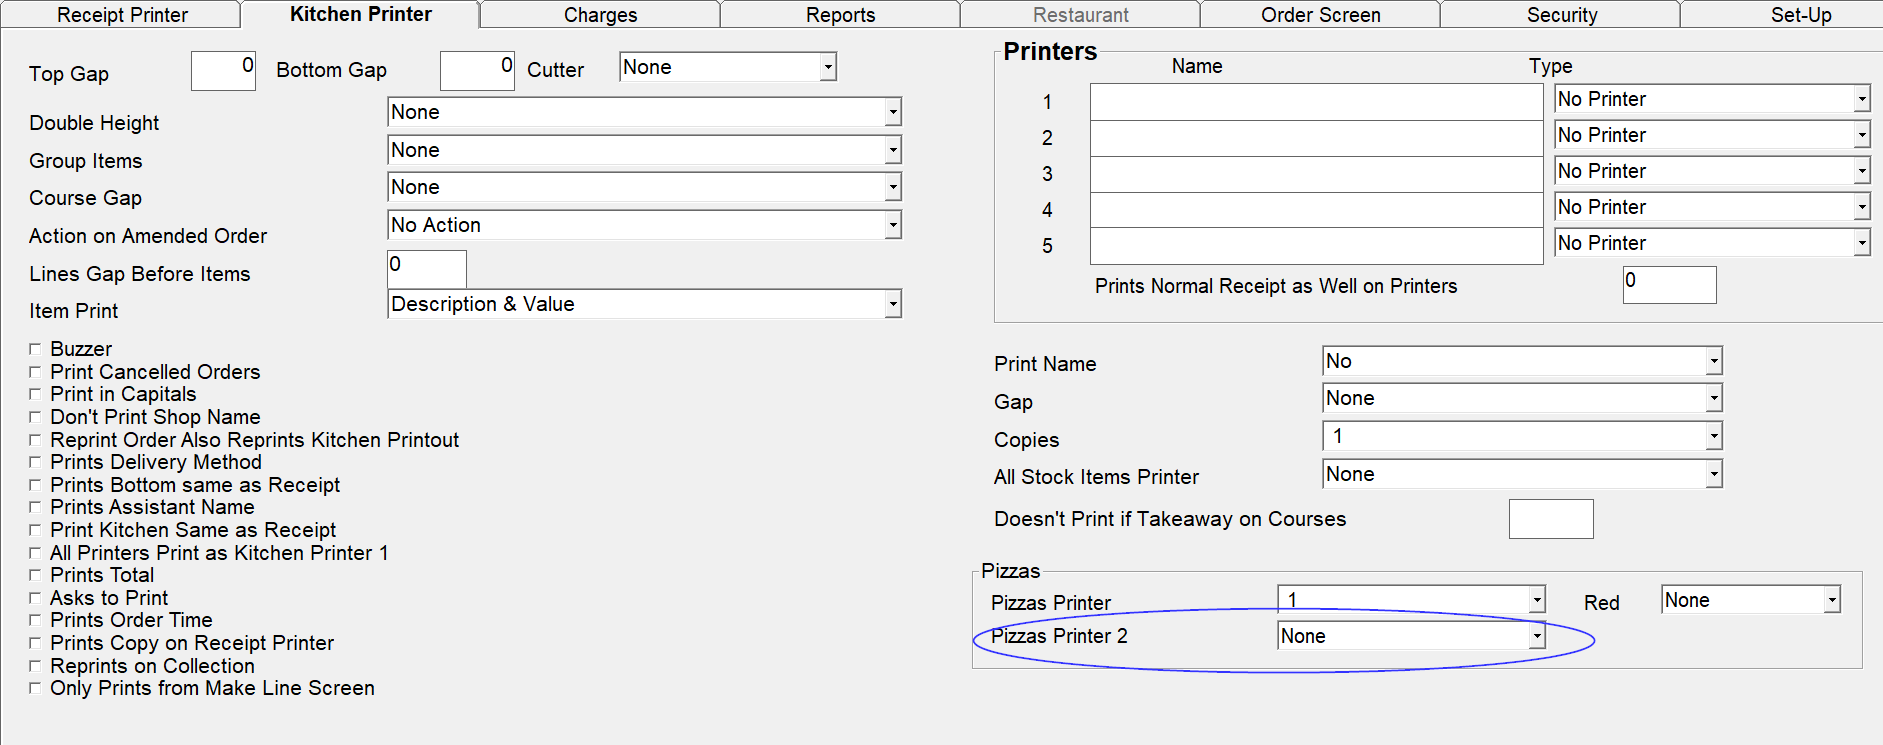
Once done click save and exit. Then when you go back into your menu and you will be able to have pizzas in any of the courses you wish.
Meal Deals
First go into "Management"
Then "Occasional Menu"

The click "Meal Deals" at the bottom right
To change an existing deal click on it and if you want to change the name change it in the button text box for other changes click the details tab at the top right. This will show you to the left the items included and in the bar on the right the other meal deal settings. At the top of this bar you can set the price.
The next setting is a drop down box that defaults to Normal this means all the items chosen on the different courses for whatever is set in the price box. It also shows "Special Offer Amount (2)" and "Special Order Percent (2)". The number in the brackets signifies the course that would be charged the discounted price or percentage. For example if you were doing a buy one get one free pizza deal course one you would choose all the pizzas and pay the normal price and course 2 again would have all the pizzas chosen and a price of 0 and "special offer amount (2)" chosen for the deal type.
Applies to is again a drop down that has the types of order the deal would be for, It defaults to All but on the drop down you can choose "Takeaway Only", "Delivery Only", "Restaurant Only", "Not Restaurant" and "Not Delivery".
The "Free Delivery" tick box can be ticked to take off the delivery charge, if you have one, for the deal.
The Days of the week tick boxes are ticked to show when the deal is active. For example if you have a deal that is only for weekdays you can tick just those days and leave the weekend days unticked.
The from and to boxes are to time limit when a deal is active. If both are left as 0 then the deal works all the time. To limit it put times in 24 hour clock with no separator. For example if a deal is just for lunch times set "From" to 1100 and "To" to 1400.
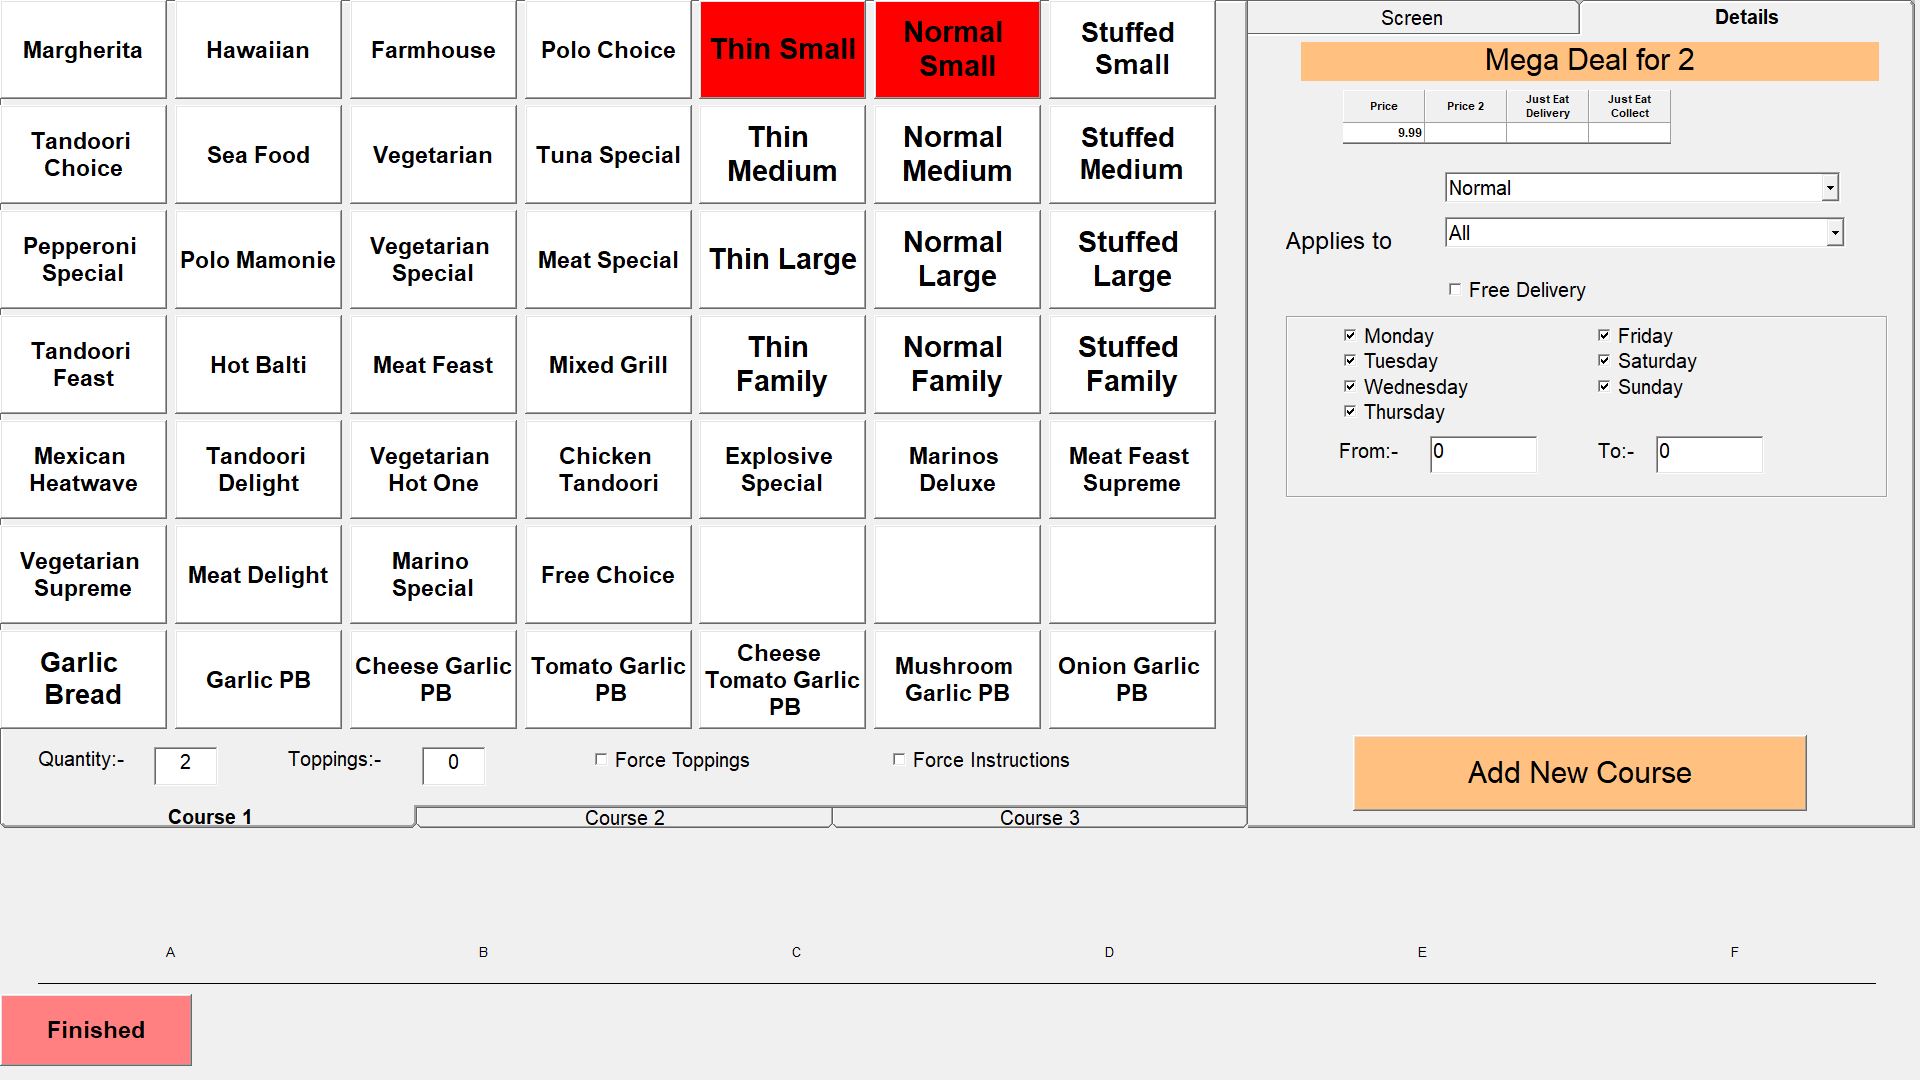
The items included in the deal are chosen by highlighting them. If you click on a new course you will be asked which section of the menu the item or items are on. If you choose a course all the items on that course will be displayed in white to choose an item to be in the deal press it and it will change to red. The quantity box is for the quantity of the items you have chosen. If the quantity is set to 8 then the course is connected to the course directly before it. This is used when the items in the deal aren't on the same course. The toppings are the number of toppings included in the deal with this course. To add more course click the "Add New Course" button at the bottom right.
When you have set up the deal click the "Finished" button at the bottom left.
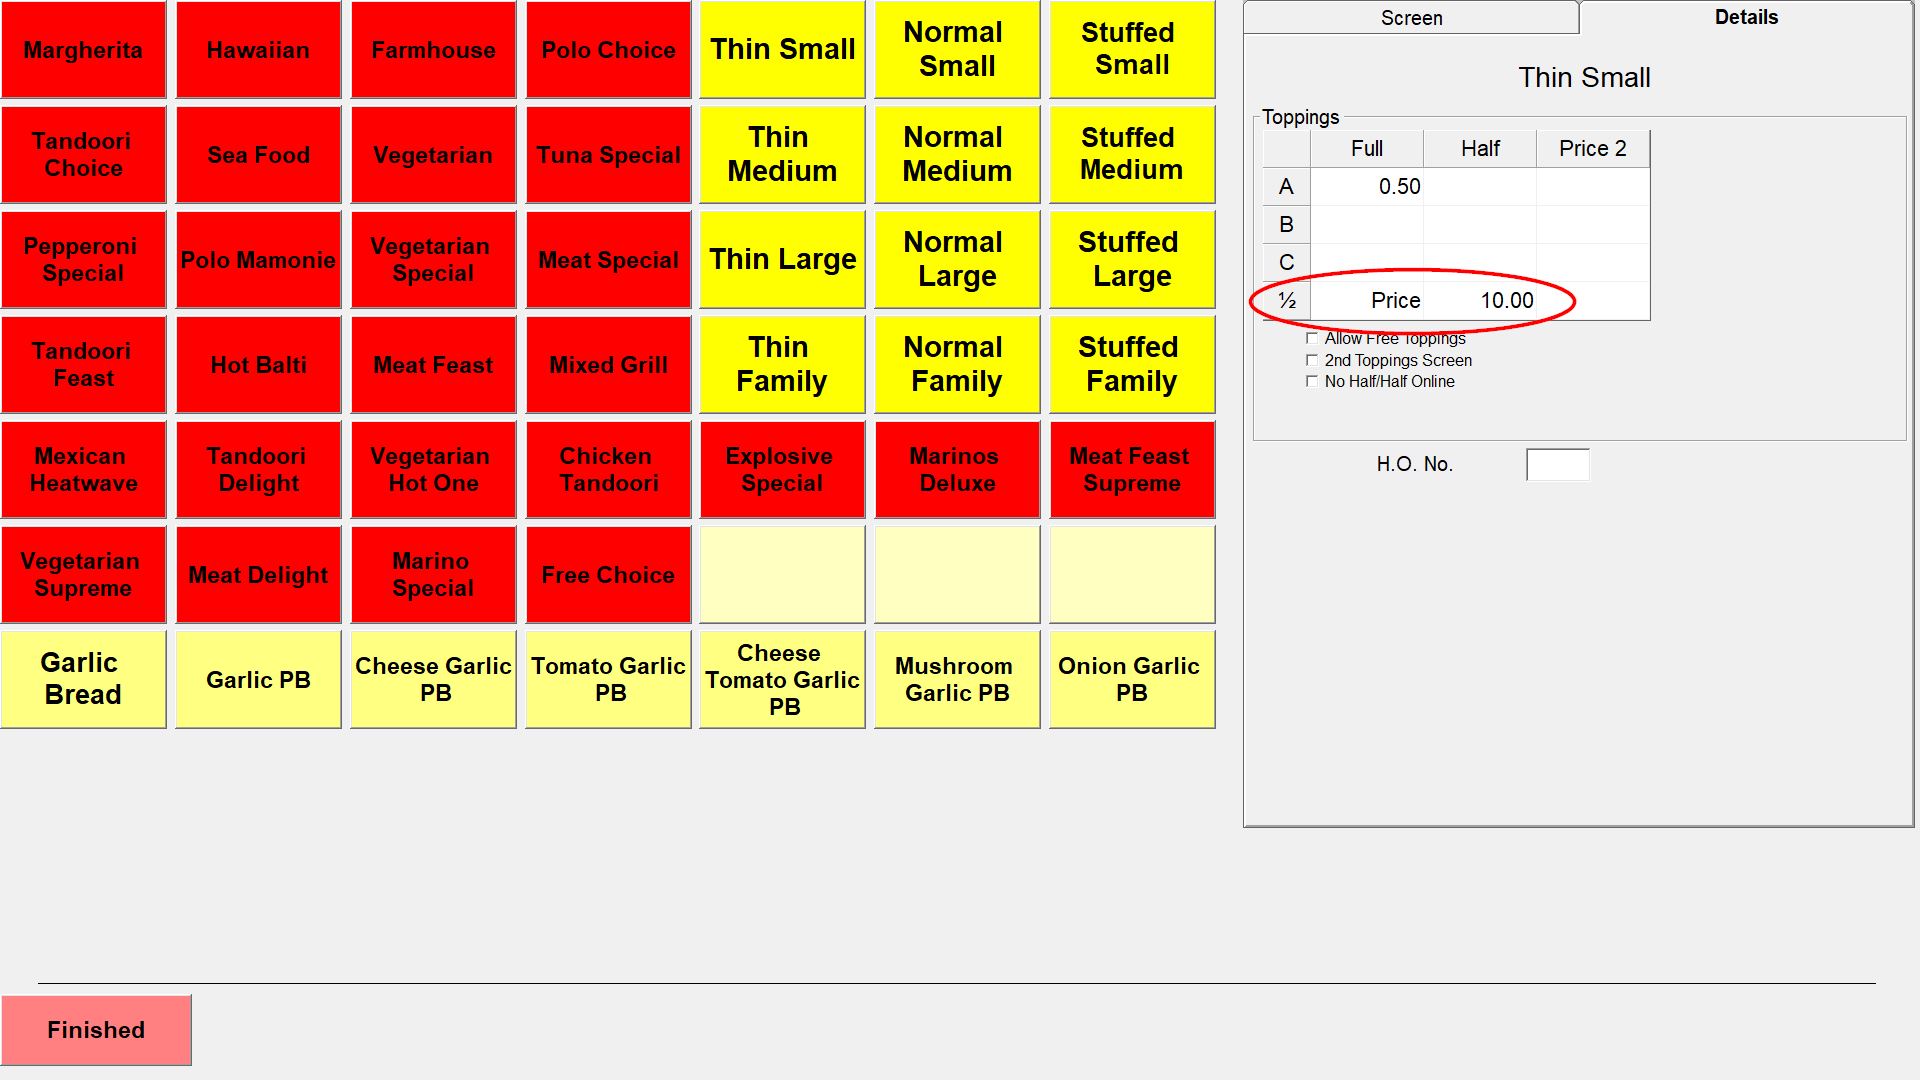
Half Pizza charges
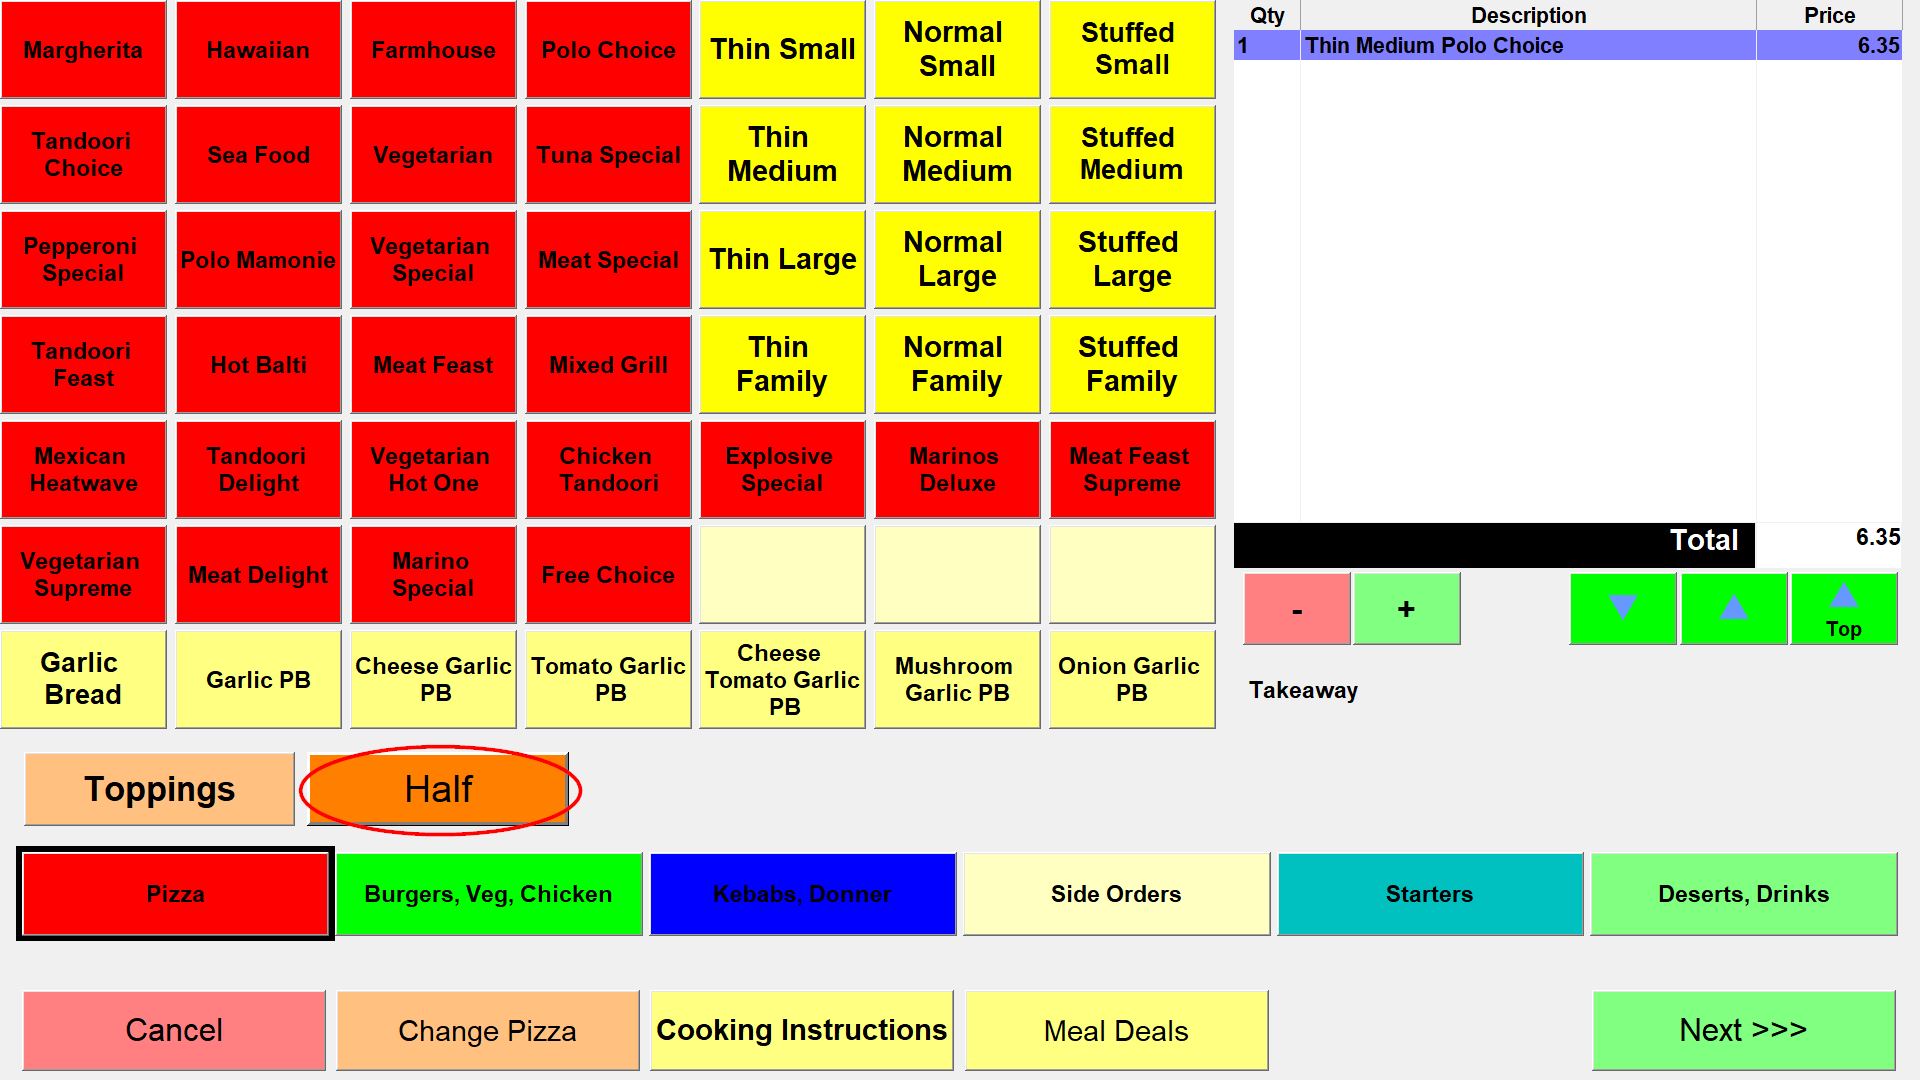
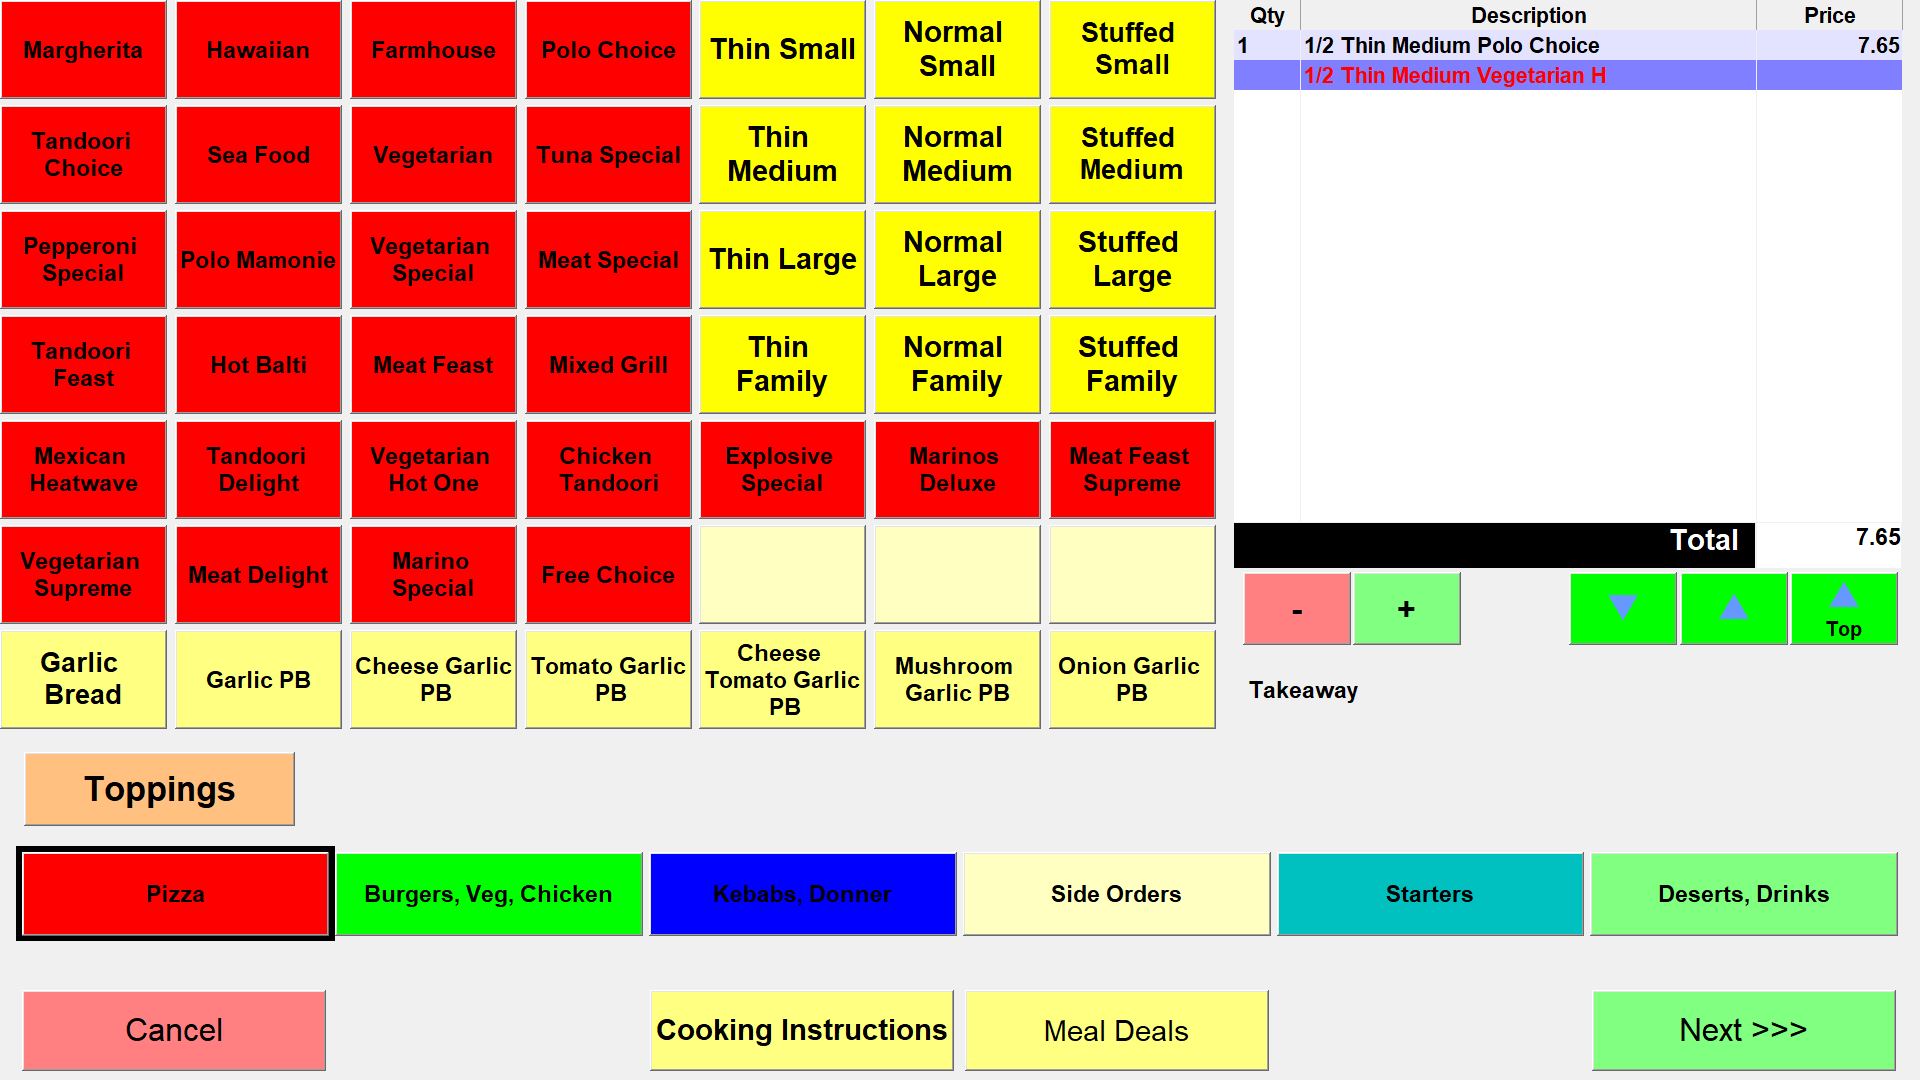
If you press a pizza and a size a half button appears and you can specify the 2nd half to be another of your set pizzas.
The 2nd half appears in red on the screen.
The program defaults to charge for the more expensive of the 2 halves. If you want to add an amount to the standard charge for half and half pizzas if you go into Management and then Occasional Menu and into Menus you will see all the items for your menu. If you click on a pizza size and then the details tab at the top right you will see a place to put in the extra charge for half and half at that size.
If you charge a flat fee for all half and half pizzas at a certain size there is an option to do this. If you go into Management then the Occasional Menu and then Options and press on the Order Screen tab there is a section at the top right called Pizza Fractions. In here there is an option called "Different Charge for Pizza Fractions" and if this is ticked the program changes the way half and half pizzas are priced.

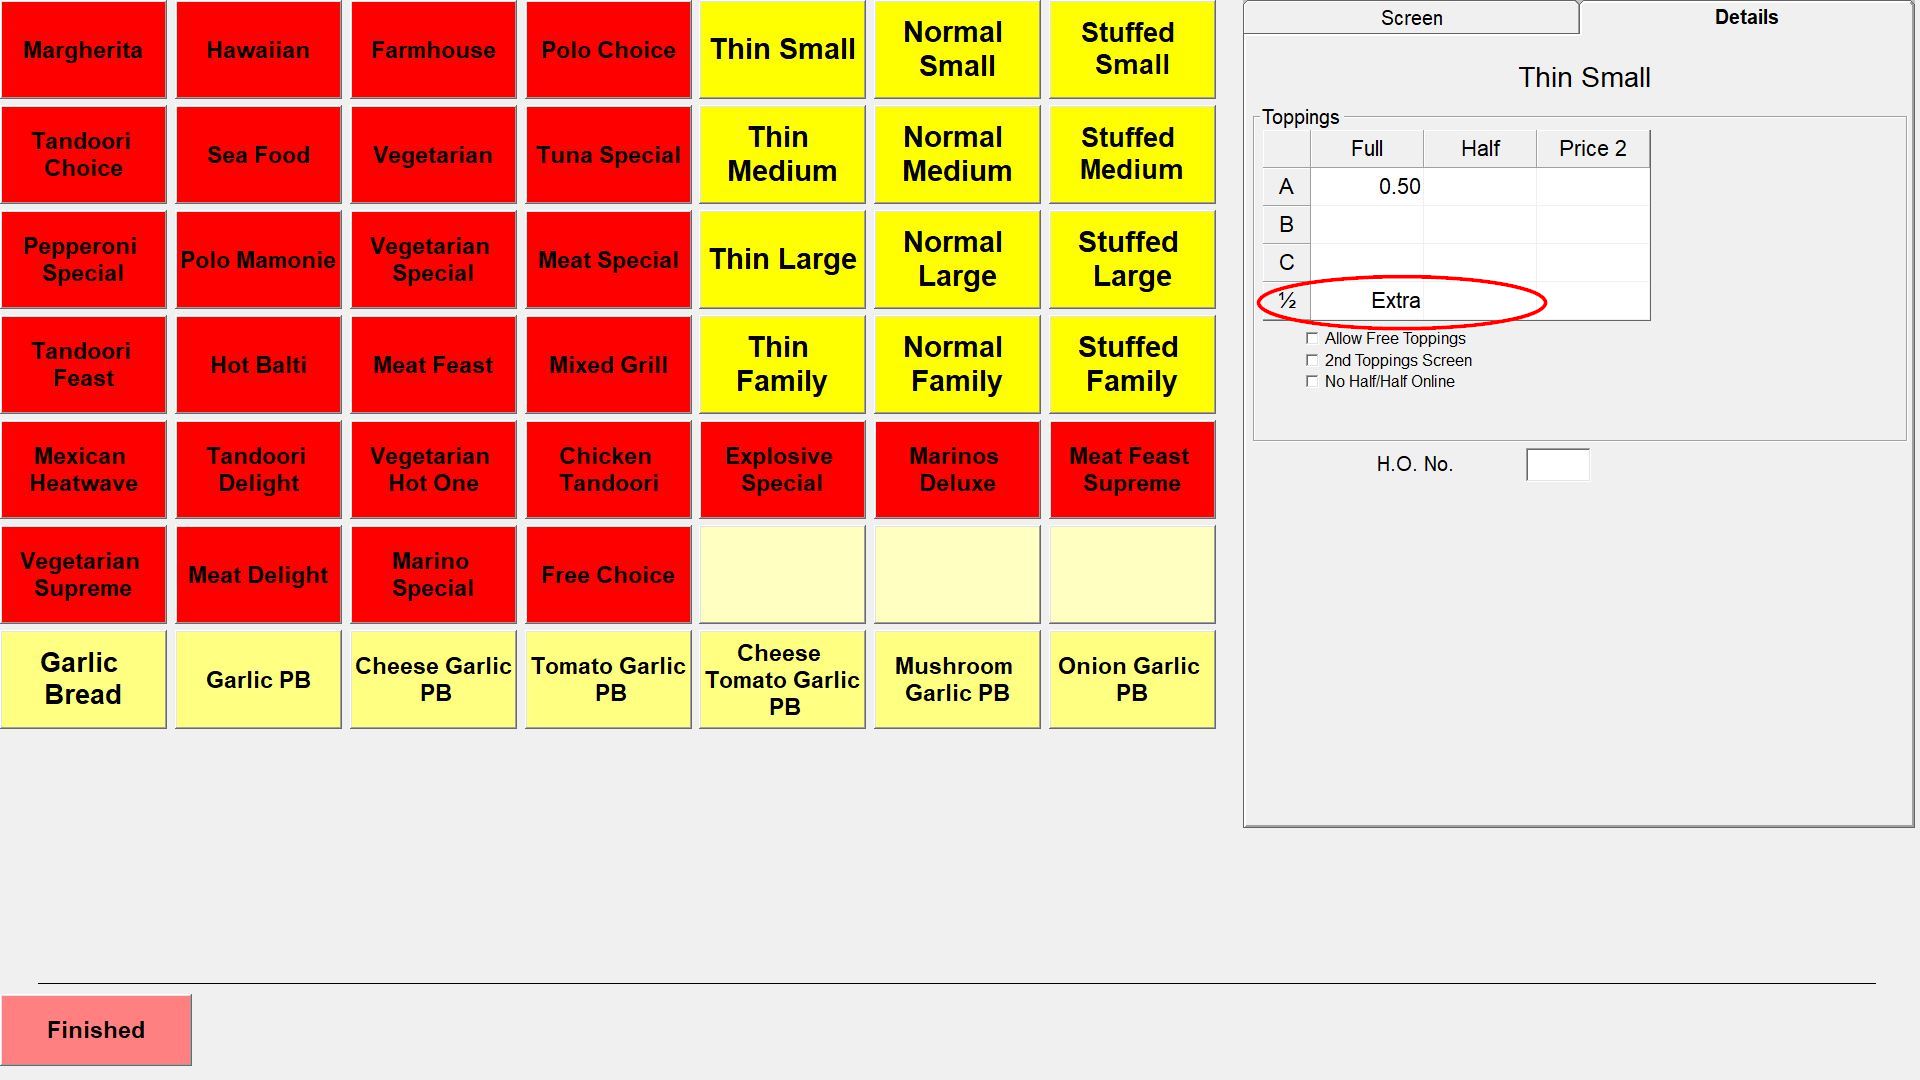
Now if you go into Management and then Occasional Menu and into Menus you will see all the items for your menu. If you click on a pizza size and then the details tab at the top right you will see a place to put in the charge for half and half at that size. With the option ticked the wording changes from Extra to Price and when you choose a half and half pizza the price at that size the price will be changed to what has been entered.