The Receipt Printer tab in Options
If you go into Management


Then Options

The first tab is all about the way the receipt prints out

The printer Type is a dropdown box that lets you choose the type of printer you have and affects the size of font, printing reversed or the cashdrawer if it is connected to the printer. Most printers can be set as "Epson Thermal".
The Top Gap if it is set as 99 won't pre print any information. If it is set for any other number it may be using less paper but is a matter of trail and error and balancing with the bottom gap to get the right setting for your printer.
The cutter option is a drop down the has a choice of None, Partial or Full. None doesn't cut, Partial Cuts but leaves a tiny bit of paper connecting so the paper stays connected if the printer is somewhere not attended the paper doesn't fall on the floor. Full cuts the paper completely.
The Receipt Text options are the text that prints so you know what order type it is. There is also a tick box here to choose whether to print something in red if you have a 2 colour printer or reverse if you have a thermal printer.
The red printing section lets you choose to print something in red if you have a 2 colour printer or reverse if you have a thermal printer.
The VAT section lets you chose how to print the VAT on the receipt.
The double height and Wide printing let you choose things to print either wider or double height. If you choose food items to print Wide as they take up more space on the receipt the description will be smaller.
The Print Receipt section is full of options that change the way the receipt is outputted.
The Omit from receipt section has options that will leave things off the receipt.
To go to the next page of options click the more button at the bottom right of the screen

And the second page of receipt printer options will be displayed

The top and bottom message sections lets you add a message to either the top or bottom of the receipt.
The If Above Section is for a message that goes on the receipt if more than an amount you set is spent.
The Collection section lets you choose when to print a collection receipt and what is says for Paid or to pay.
The Cash Drawer section lets you choose where the cash drawer is connected to ("Receipt" is the receipt printer, serial ports 1,2,3 & 4 are those serial ports, "Till" printer send it to a printer called till, "Kitchen" is the kitchen printer, till.exe is till.exe for that machine in the winci folder, c:\till.exe will look for till.exe in the root folder, Serial ports 5,6,7 & 8 are those serial ports and Posiflex sends the till drawer open command to the CR port of a Posiflex machine without the need for a till.exe). The message box allows you to put an optional message before the cash drawer is opened.
The group items section lets you choose if the receipt is printed as you entered items or reorganised.
The Takeaway Section lets you choose how or when the takeaway orders receipt is printed.
The Delivery Orders section lets you choose how or when the delivery orders receipt is printed.
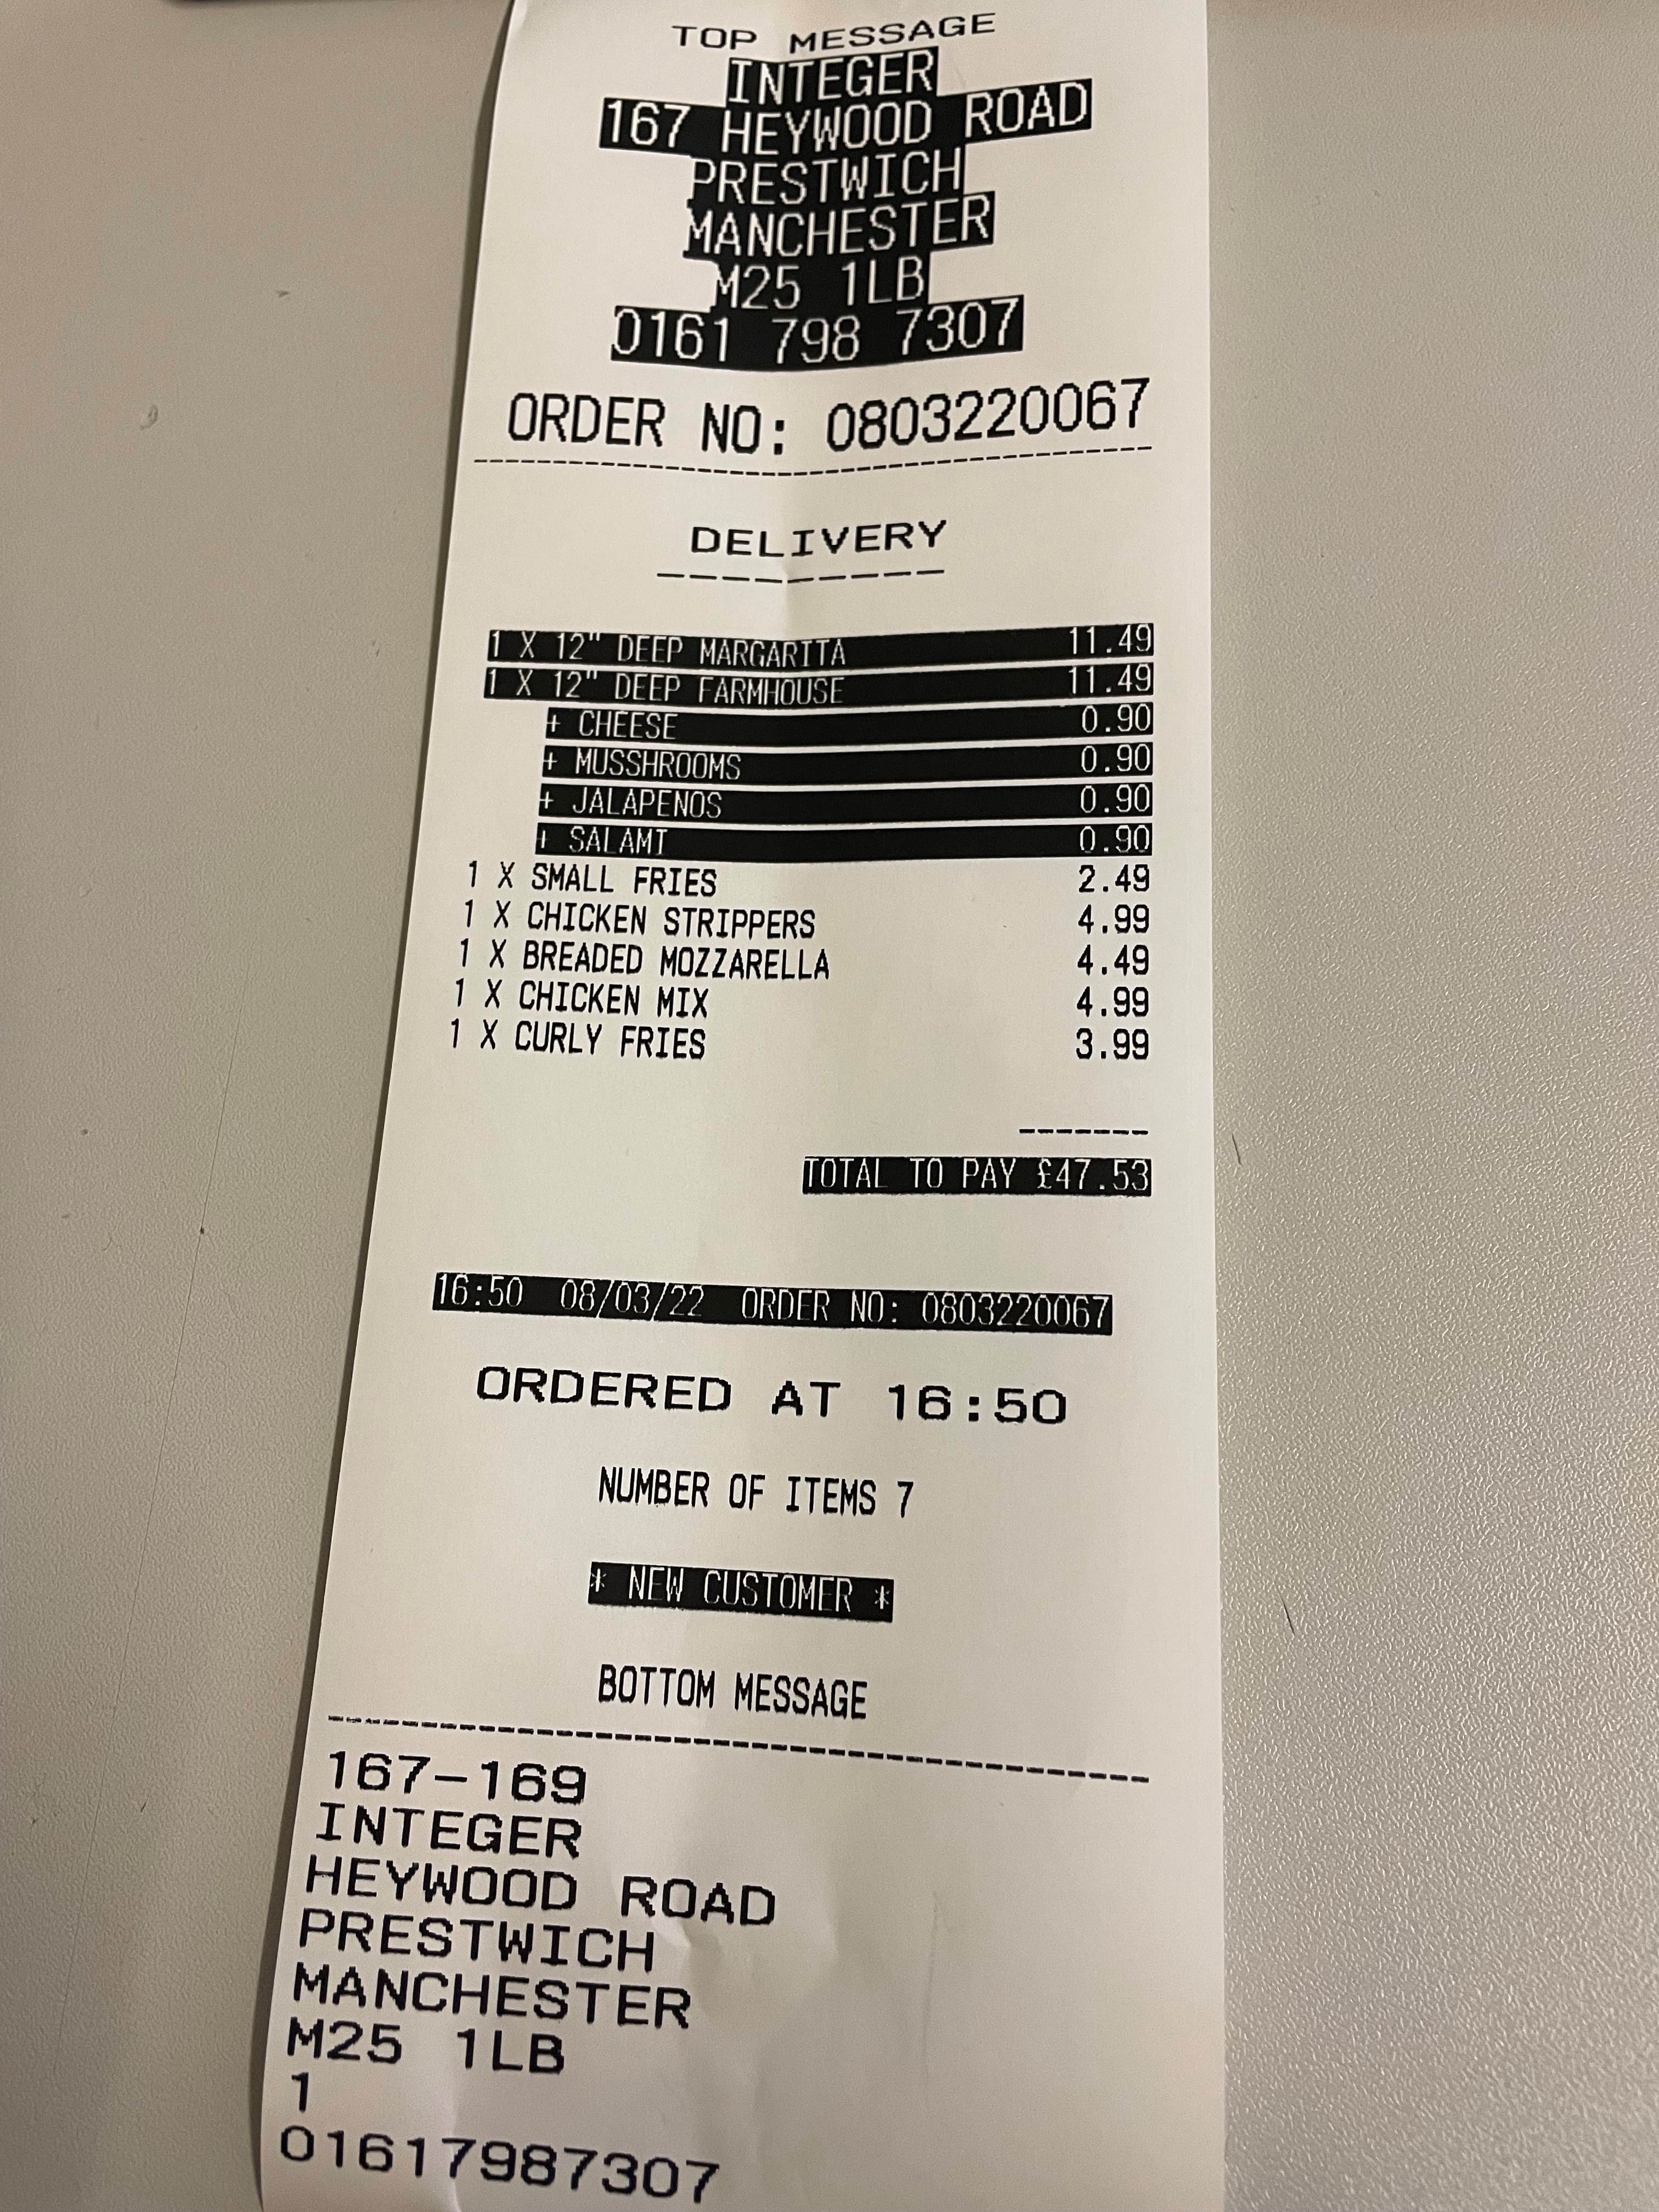
Below is an example of a receipt to show what some of the options do. It has Pizzas and topping in reverse, It has the total in reverse. It has the shop name in reverse. It has the date and time in reverse. It has the delivery time in reverse. It has The option to print everything in Capitals. It has the option to print the order time at the bottom. It has the option to print the number of items on an order, It has the option to print the order number on top. It has the option to make the order number contain the date and time. It has the option to print "New Customer" if they are. It has the option to print the customers details at the botom of the receipt. It also has the top and bottom message on the receipt.